Form Decode: Specify the Accepted Page
What is Accepted page

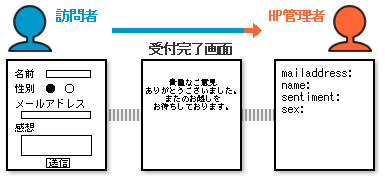
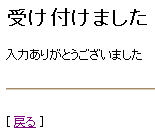
Accepted page refers to a page which is shown to confirm the acceptance of Form Decode data being sent.

Normally, a simple page as shown above is used as an Accepted page, but you can show any page by specifying a file for the page.
Change the Accepted page
Specify a file
The file specified with the VALUE attribute can be shown as Accepted page by specifying _accept_html in the NAME attribute in the <INPUT> tag. Files specified with the VALUE attribute could specify an HTML file (with extensions html or htm) or an image file (gif, jpg, etc.)
If Accepted page file is placed in a different folder with Form Decode HTML file, the VALUE attribute has to be written as a relative path.
Please note that _accept_html cannot be specified for SSL server. Make sure to specify with _accept_url.
Specify a URL
<input type="hidden" NAME="_accept_url" VALUE="any URL">
By specifying _accept_url for the NAME attribute in <INPUT>, the URL specified with the VALUE attribute will be shown as the Accepted page.
It may not be shown depending on the browser (uses HTTP’s Location:).
Example of how to write and use (FreeAddress)
HTML file (Form Decode)
<form ACTION="https://cgi.www.ne.jp/cgi-bin/formdecode.cgi" METHOD="POST">
<input type="hidden" NAME="_accept_html" VALUE="accept.html">
Name <input type="text" NAME="name"><br>
Gender <input type="radio" NAME="gender" VALUE="male">Male <input type="radio"
NAME="gender">Female<br>
What is your favorite color?
<SELECT NAME="color">
<option selected>Please choose.</option>
<option VALUE="red">Red</option>
<option VALUE="blue">Blue</option>
<option VALUE="yellow">Yellow</option>
</SELECT><br>
Where do you want to go?<br>
<input type="checkbox" NAME="usa" VALUE="on">United States<br>
<input type="checkbox" NAME="china" VALUE="on">China<br>
<input type="checkbox" NAME="france" VALUE="on">France<br>
<input type="checkbox" NAME="germany" VALUE="on">Germany<br>
Comment<br><textarea NAME="comment" ROWS="4" COLS="30"></textarea><br>
<input type="submit" VALUE="Send"><input type="reset" VALUE="Reset">
</form>
</BODY>
An HTML file with the <INPUT> tag which changes the Accepted page. Here, it specifies an HTML file for the Accepted page. Please note that the <INPUT> tag should always be written between <form> and </form>.
HTML file accepted.html (Accepted page)
<p>Looking forward for your next visit.</p>
<input type="button" VALUE="Back" onClick="window.history.back ();">
</BODY>
An HTML file of separately-created Accepted page.
Form Decode
This is how Form Decode is shown in a browser. To check how it works, send as a test.
Accepted page accept.html
Thank you for your comment.
Looking forward for your next visit.
Accepted page specified with the <INPUT> tag will be shown.