Spam Filtering Service
This page explains how to set the Spam Filtering Service.
See the following page for service details.
Spam Filtering Service
Settings for Spam Filtering Service
In the Web Mail settings page, the following could be set for each mailbox.
- Easy spam block settings
- List of filters and blocked addresses
- Spam Quarantine Notification
- Spam folder
- *The UI of Web Mail is only provided in Japanese.
- *See the following settings guide for how to set your Web Mail.
Easy spam block settings
- Changing the filtering level of easy spam block settings
You can set the filtering level of easy spam block.
Changing the filtering level of easy spam block settings
-
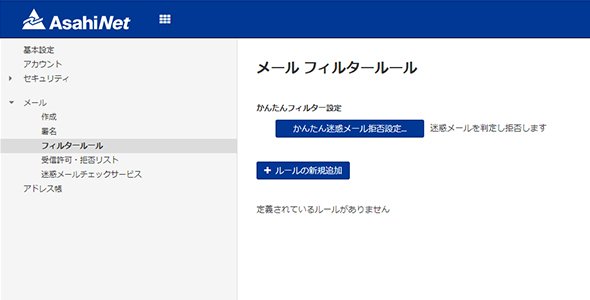
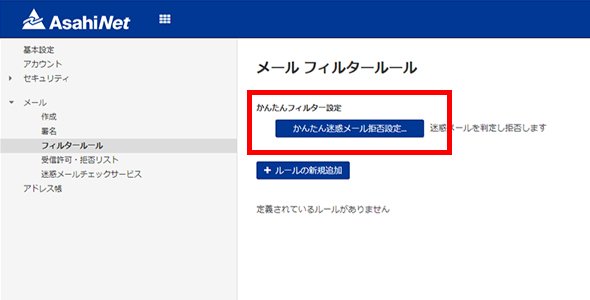
STEP1
Go to Web Mail settings page, and click メール (= Mail) > フィルタールール (= Filter rules) > [かんたん迷惑メール拒否設定 (Easy spam block settings)].
-
STEP2
Choose the filter level and click [設定 (Set)].
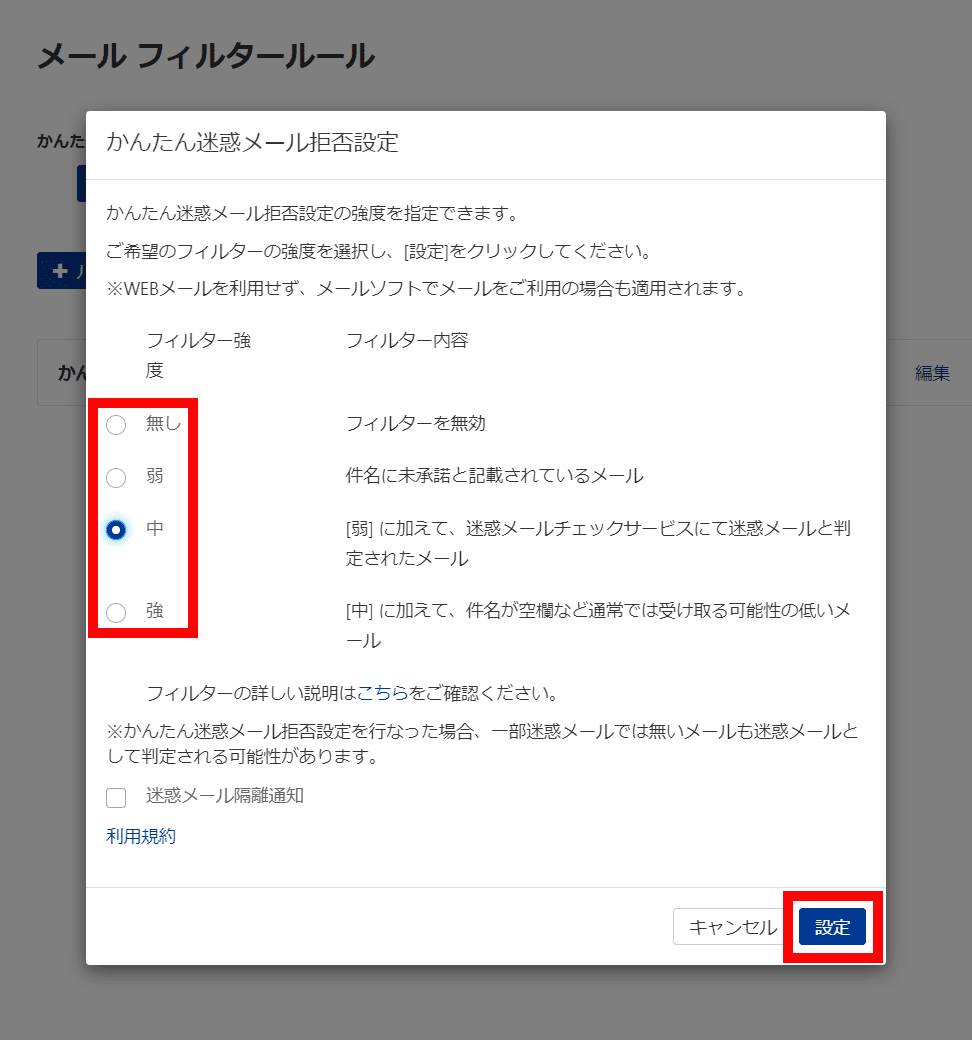
The default is set to [無し (None)]. Please change your settings depending on your situation.
If you set to other than [無し (None)] for the filtering strength of Easy spam block settings, the subject of emails determined as spam will be tagged with “MEIWAKU”.
- *Addresses added to 受信許可リスト (= Filters list) may also be determined as spam. In such cases, they will also be tagged with “MEIWAKU”.
Filters and blocked address settings
- Add filters/blocked addresses (domains)
You can set each address or domain to be filtered/blocked. - Edit filters/blocked addresses (domains)
- Delete filters/blocked addresses (domains)
You can delete the already-set filters/blocked addresses (domains).
Add filters/blocked addresses (domains)
Make settings in inbox or spam mail folder
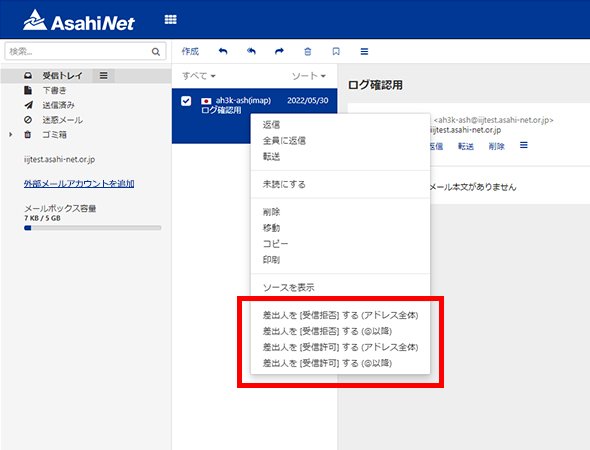
- 1.Go to 受信トレイ (= inbox) or 迷惑メール (= spam) folder, and choose the mail which you want to be fltered or blocked.
- 2.Click to choose the setting of your choice.
- 差出人を[受信拒否]する(アドレス全体)=Block sender (the whole address)
- 差出人を[受信拒否]する。(@以降)=Block sender (@domain)
- 差出人を[受信許可]する(アドレス全体)=Allow sender (the whole address)
- 差出人を[受信許可]する(@以降)=Allow sender (@domain)
- 3.A page to add a list of filters/blocked addresses (domains) will be shown. Click [追加 (Add)].
Make settings in Web Mail settings page
Make settings in Web Mail settings page
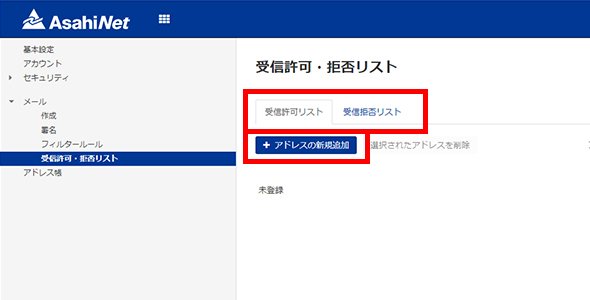
- 1.Go to Web Mail settings page, and click メール (= Mail) > 受信許可・受信拒否リスト (= Filters and blocked address settings) > 受信許可リスト (Filters), or choose a tab, 受信許可リスト (= Filters) or 受信拒否リスト (= Blocked list).
- 2.Click [+アドレスの新規追加 (Add new address)] to add an email address or a domain.
- For email addresses or domains which are not determined as spam by easy spam block, we recommend you to to user filters or blocked address (domain) settings.
-
Example: In case of abc@example.com
- *Please note that wildcard string (such as “*” or “?”) is not applicable.
Specify abc@example.com Only abc@example.com will be filtered/blocked. Specify @example.com The domain, @example.com will be filtered/blocked.
Edit filters/blocked address (domain) settings
Click [編集 (Edit)] of the mail address or domain you want to edit.

Delete filters/blocked address (domain) settings
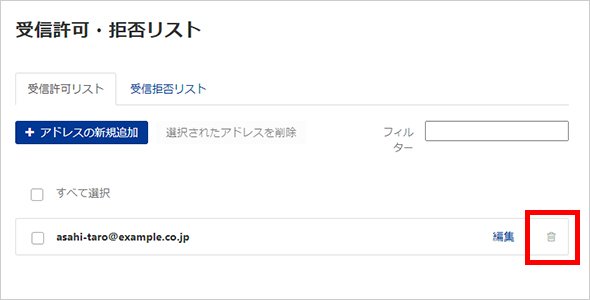
Delete individually
Click the trash can icon shown next to the email address (domain) you want to delete.
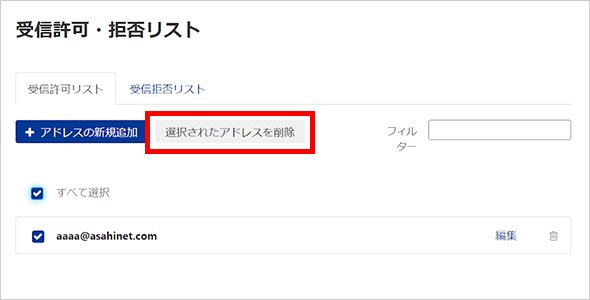
Delete all at once
- 1.Choose all the the email addresses (domains) you want to delete, or choose [すべて選択 (Choose all)].
- 2.Click [選択されたアドレスを削除 (Delete the chosen address)].
The number of filters/blocked addresses you can add are as follows:
- Filtered addresses (accepted addresses): 250
- Blocked addresses: 250
Spam Quarantine Notification
You can choose to be notified when email determined as spam is saved in your spam folder.
- *Notifications will be sent to the mailbox of an Asahi Net ID linked with the email address which the spam is sent.
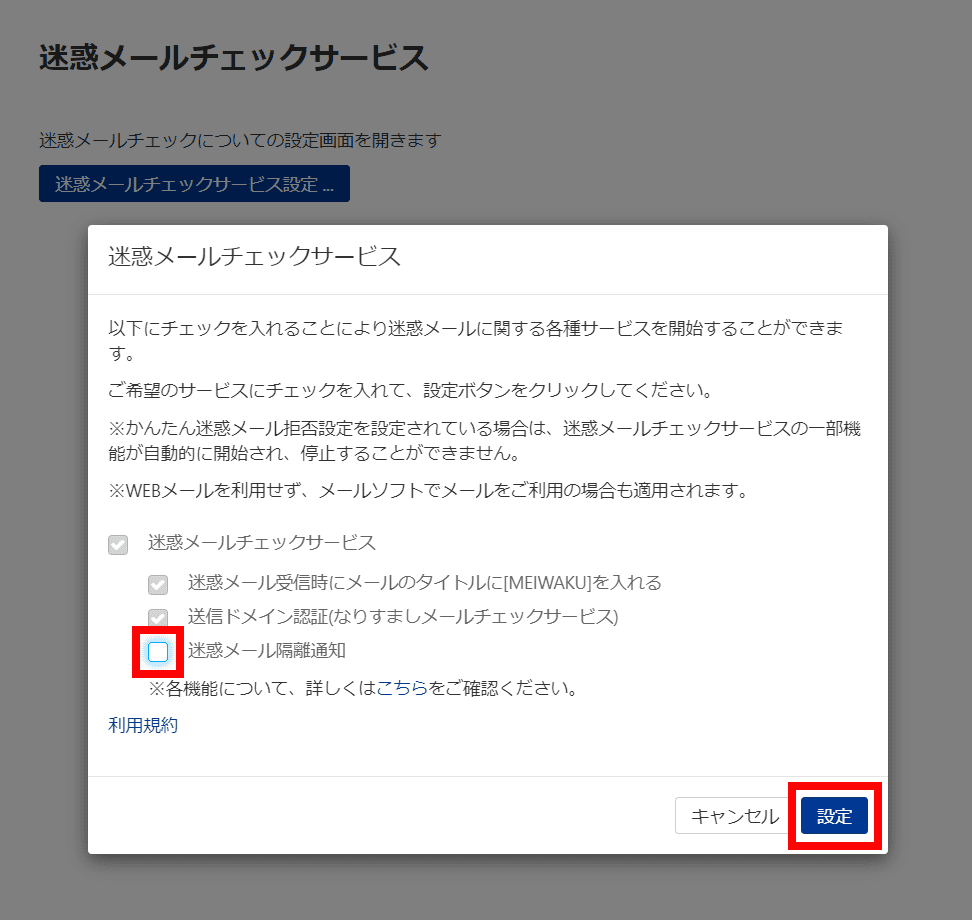
Setting up Spam Quarantine Notification
- 1.Go to Web Mail settings page, click メール (= Email), and then click 迷惑メールチェックサービス (= Spam Filtering Service).
- 2.Put a check mark next to 迷惑メール隔離通知 (= Spam Quarantine Notification).
You will be notified when there is a check mark, and not when there is no check mark.
Spam folder
- How to check your spam folder
You can check email determined as spam depending on the filtering level of easy spam block settings. - Transferring email from the spam folder Emails in the spam folder can be transferred.
How to check your spam folder
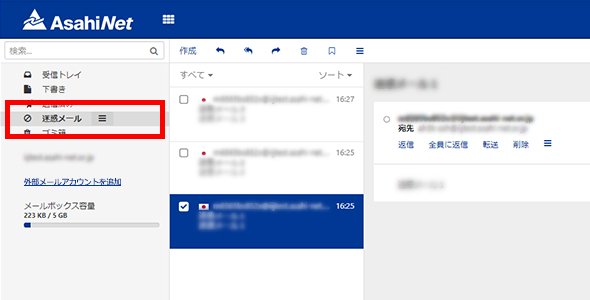
- 1.Go to the Home of Web Mail, and click 迷惑メール (= Spam) folder.
- 2.Click the email you want to check.
- Email in the spam folder will be automatically deleted after seven days.
- If necessary email is sorted as spam, we recommend you to change your filters and blocked address settings.
Transferring email from the spam folder
When emails which are not spam are sorted into the 迷惑メール (=Spam) folder, please move them to another folder such as your 受信箱 (= Inbox).
Details on how to transfer could be found on the following page.
Setup Guide: How to Use the Web Mail > Transferring email to another folder
- Email transferred from the spam folder will not be automatically deleted.