Web Mail
This page explains how to use the Web Mail.
See the following page for service details.
Web Mail
Precautions
- Disable the proxy server settings of your browser.
- If you are using a network not provided by Asahi Net (e.g., your company’s or school’s LAN, network by provided by other company, etc.), such network has to support Secure Sockets Layer (SSL) (Port 443). For details, please consult the network administrator of the network you are using.
- If a massive amount of email is kept in your inbox, you might have to wait for a long time until the page is shown, or it may time out.
If it times out, try to log in after waiting for a while. - It is recommended to delete unnecessary email on a regular basis.
How to use the Home of Web Mail
This page explains the various functions available in the Home of Web Mail after logging in.
- 1Account
- Edit personal data
- Log out
- 2Settings
- 3Email
- 4How to use the address book
Log in
-
STEP1
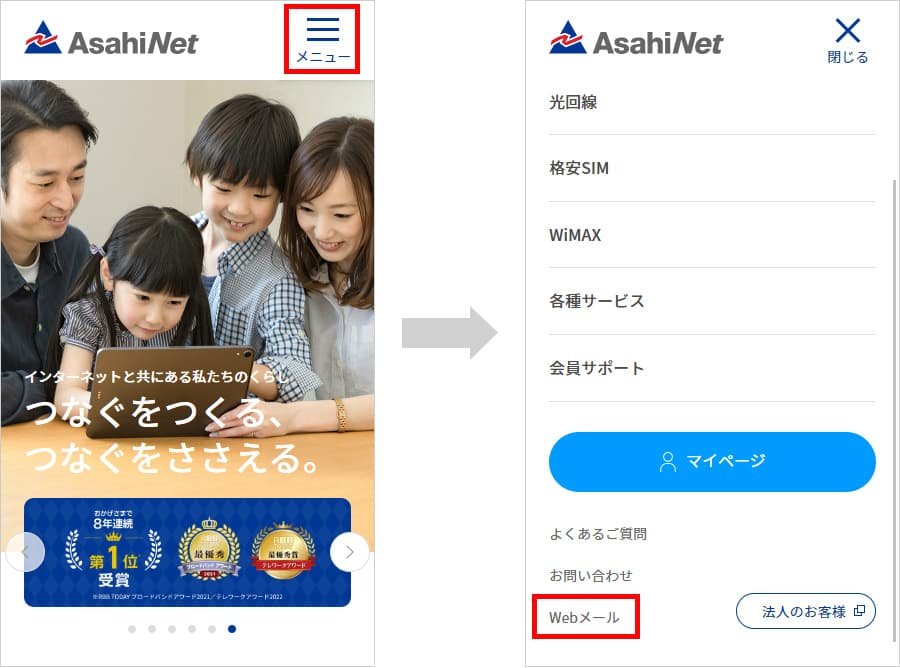
Go to Web Mail.
For PCs
Click Web Mail in the top right-hand side of Asahi Net website.

For smartphones
Tap the menu in the top right hand-side of Asahi Net website, and tap Web Mail.
-
STEP2
- 1.A login page/screen for Web Mail will be shown.
- 2.Enter your user ID and password, and then click (or tap) [ログイン (Log in)].
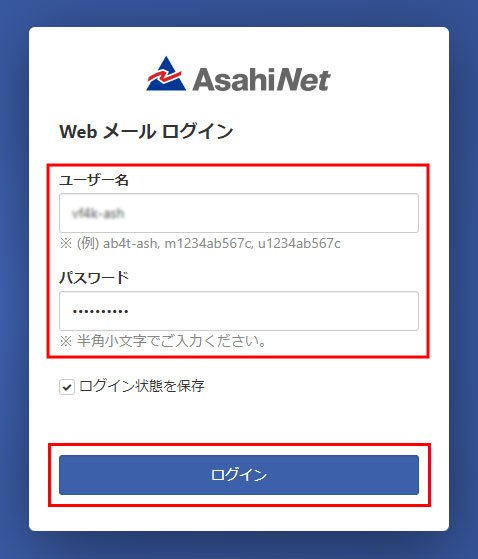
- Use your Asahi Net ID for ユーザー名 (= user name).
(E.g., ab4t-ash; m1234ab567c; u1234ab567c) - Use a password which corresponds to your Asahi Net ID.
Log out
- 1.Click the account icon in the top right-hand side of Web Mail page.
- 2.Click ログアウト (= log out).
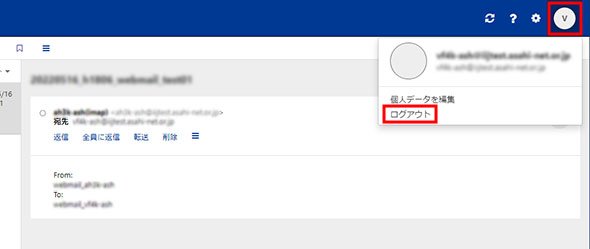
- Make sure to log out of the service after your use.
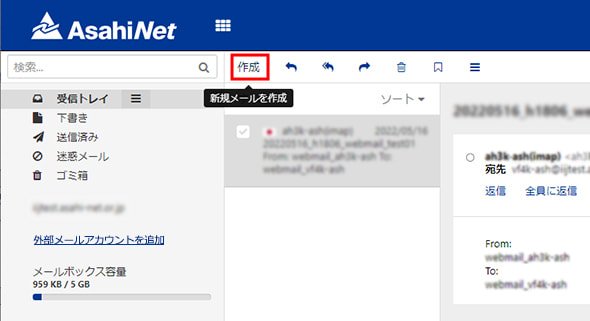
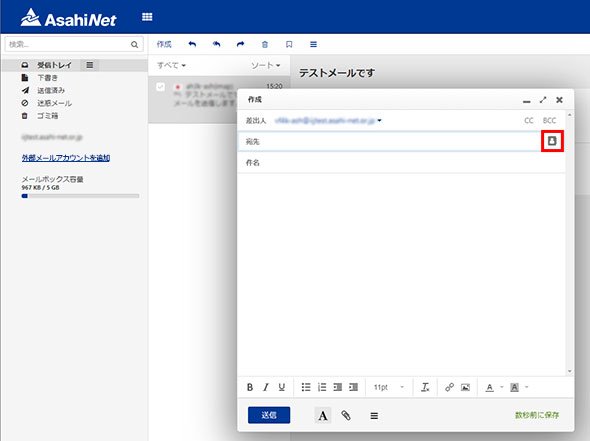
Send email
-
STEP1
Go to Web Mail and click 作成 (=create a new mail).
-
STEP2
Enter the 宛先 (= address), the 件名 (= subject), and the main text, and then click [送信 (Send)].
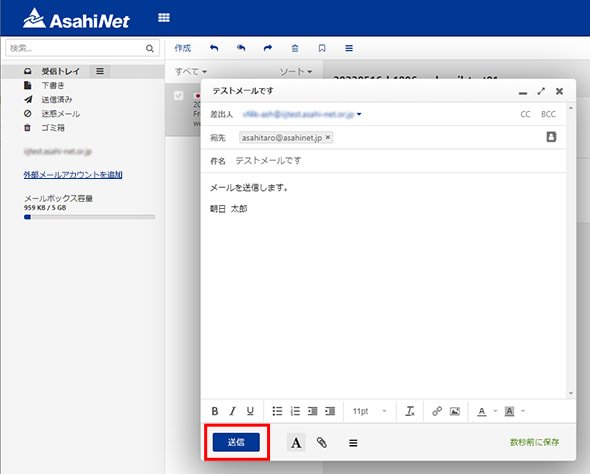
- Incomplete email will be auto-stored in 下書きフォルダ (= Drafts).
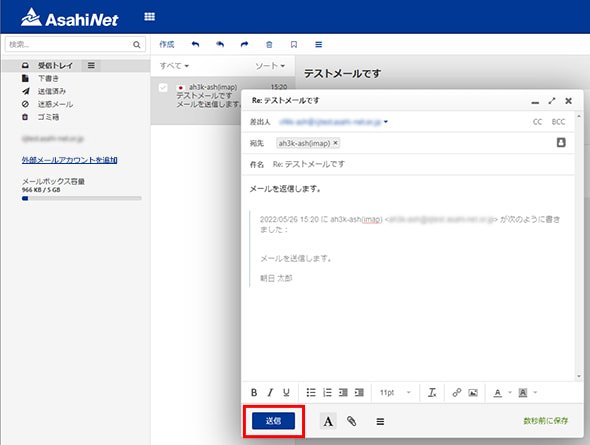
Reply to or forward an email
-
STEP1
- 1.Go to 受信トレイ (= inbox) and choose the email which you want to reply to or forward.
- 2.Click one of the following: 返信 (= reply); 全員に返信 (= reply to all); or 転送 (= forward).
-
STEP2
Enter the 宛先 (= address), the 件名 (= subject), and the main text, and then click [送信 (Send)].
Delete email
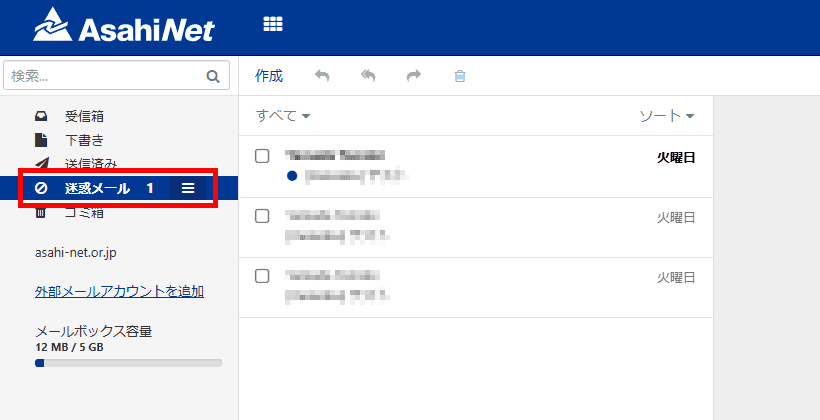
- Delete received email
- Empty out the trash
You can delete email in ゴミ箱 (=trash) folder completely.
Delete received email
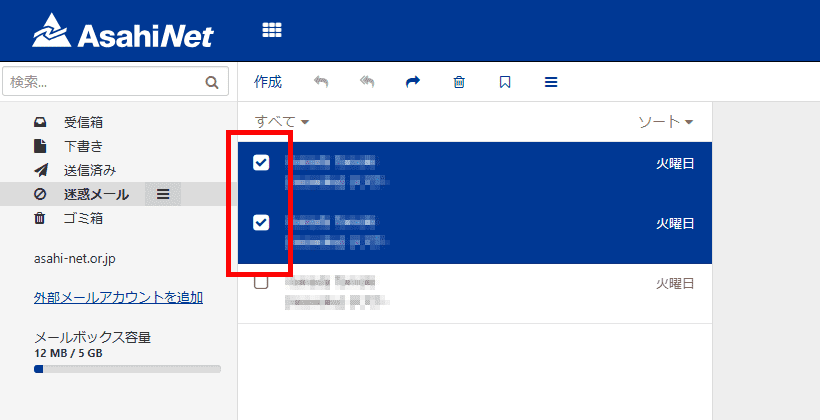
- 1.Go to 受信トレイ (= inbox) and choose one or more email which you want to delete.
- 2.Click the trash can icon to delete.
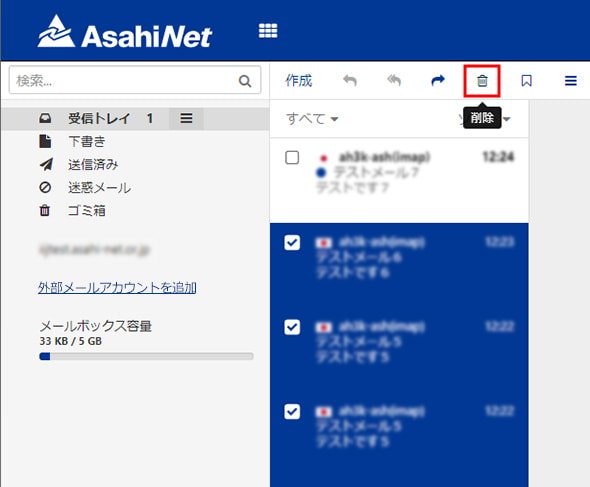
- Email in inbox will be deleted automatically after 180 days.
- Deleted email will be transferred to trash folder.
Empty out the trash
- 1.Click the trash can icon on the right-hand side of the ゴミ箱 (= trash) folder, and click ゴミ箱を空にする (= empty out trash).
- 2.A confirmation page will be shown. Click [確定 (=Confirm)].
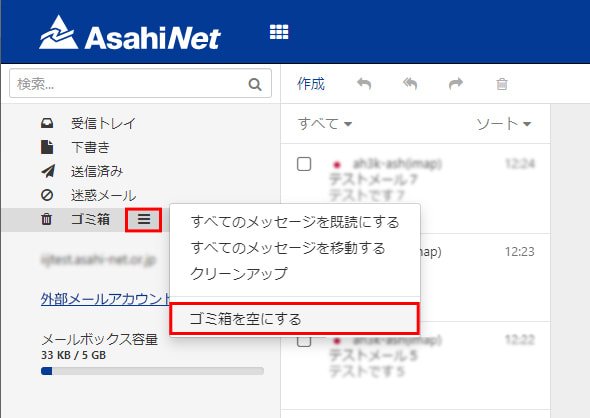
- Email in trash will be deleted automatically after 30 days.
- Email which you deleted completely can not be recovered.
Transferring Email to Another Folder
For PC
-
STEP1
Click the folder which contains the email you wish to transfer from the list of folders shown on the left side of Web Mail.
-
STEP2
A checkbox will be shown on the left side of each email. Put a check mark to choose the email you wish to transfer.
-
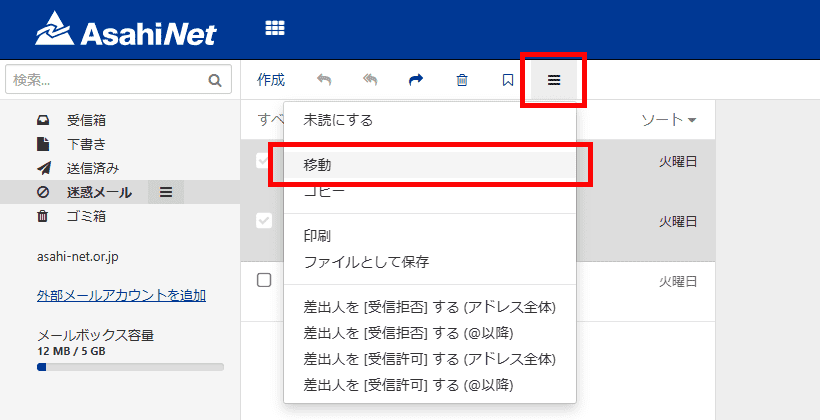
STEP3
Click the three-line icon (その他のアクション [= Other actions]) on the upper part of Web Mail and choose 移動 (= Transfer).
-
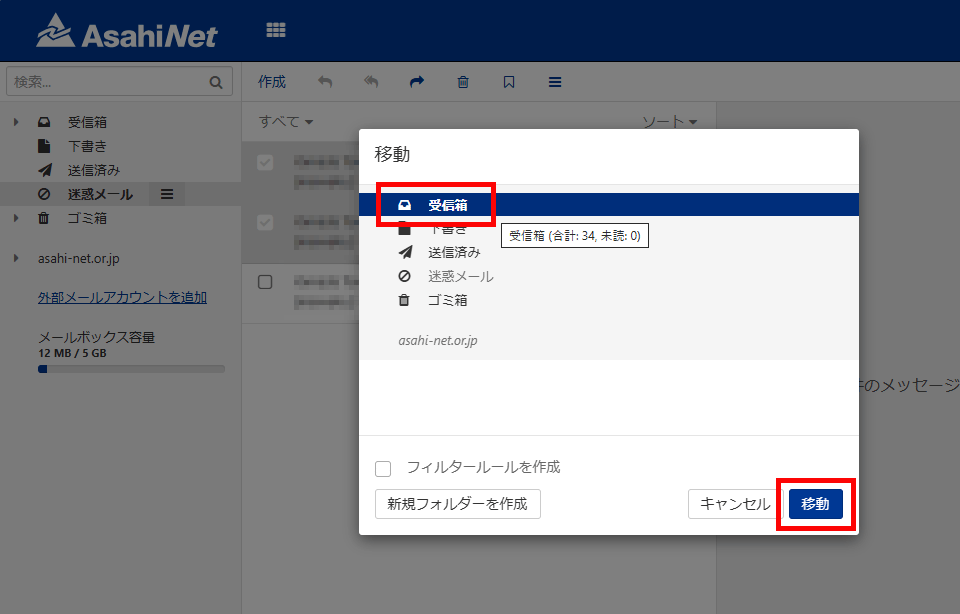
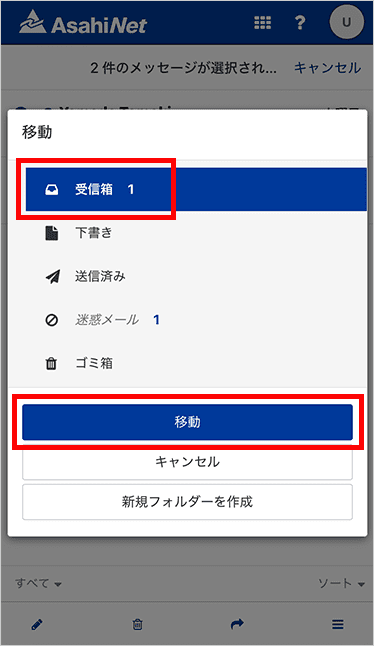
STEP4
Choose the folder you wish to transfer the email to and click the 移動 (= Transfer) button.
-
STEP5
Click the mail folder which you chose in STEP 4 from the list of folders shown on the left and check if the email is transferred.
For Smartphone
-
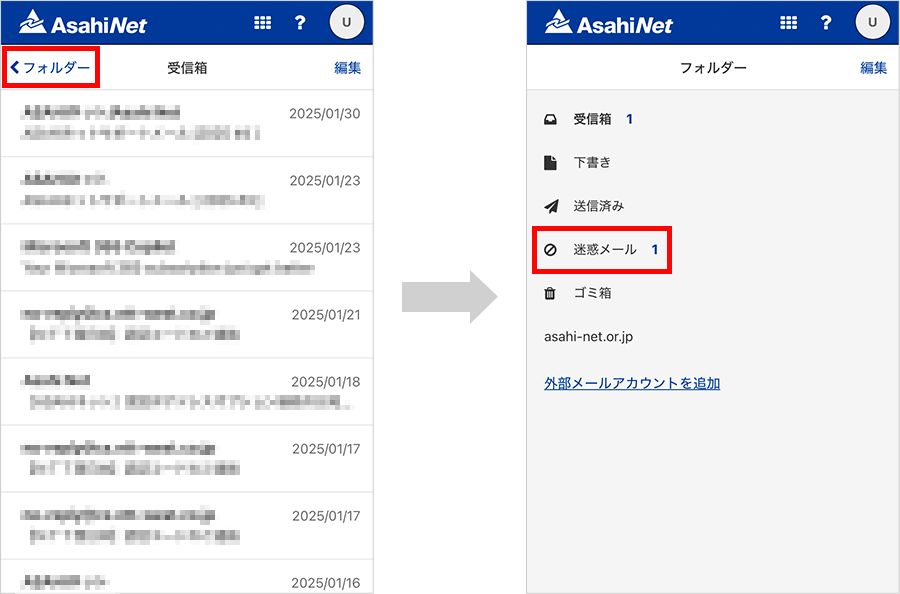
STEP1
Tap <フォルダー (= Folders) on the upper left to show the list of folders and choose the folder you wish to transfer the email to.
-
STEP2
Tap 編集 (= Edit) on the upper right. A checkbox will be shown on the left side of each email. Put a check mark to choose the email you wish to transfer.

-
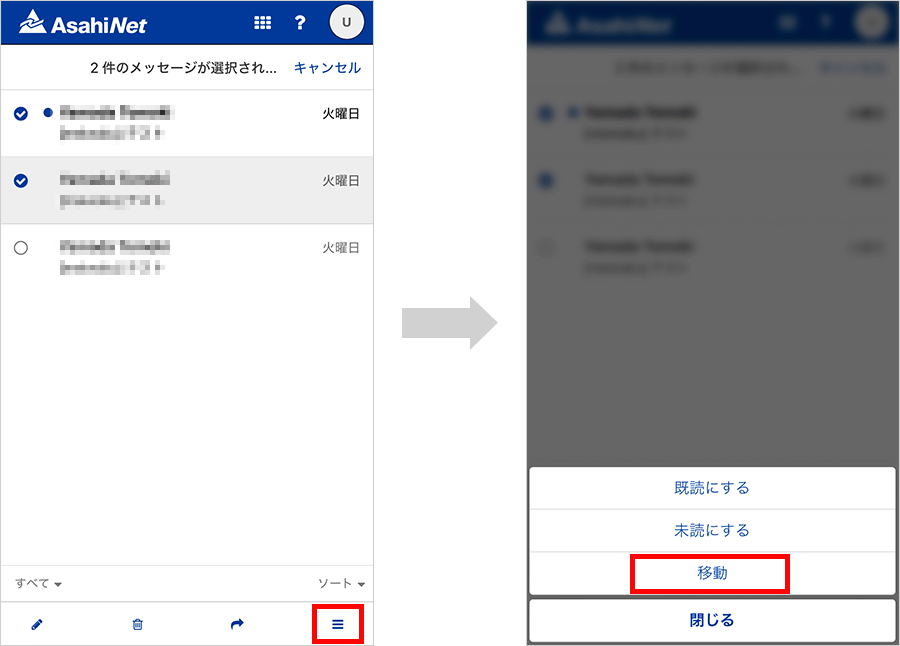
STEP3
Tap the three-line icon on the bottom right of the page and choose 移動 (= Transfer).
-
STEP4
Choose the mail folder you wish to transfer the email to and tap the 移動 (= Transfer) button.
-
STEP5
Tap Cancel on the upper right, open the folder which you chose in STEP 4, and check if the email is transferred.
Add an address
- Add from the address book
- Add from received email
Add from the address book
-
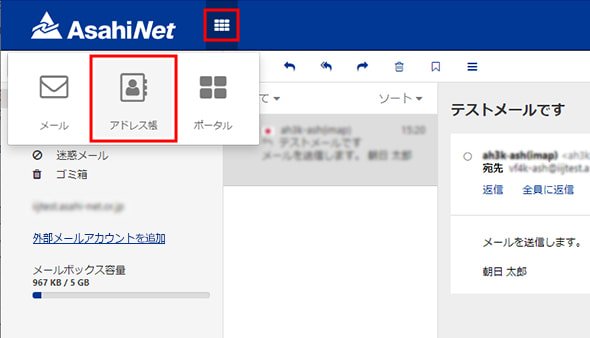
STEP1
Go to アドレス帳 (= address book).
-
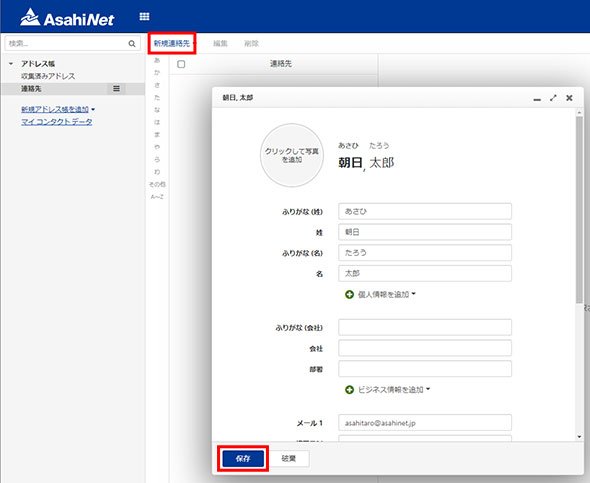
STEP2
- 1.Click 新規連絡先 (= new address) and choose 新規連絡先 (= new address).
- 2.A form will pop out. Fill in the necessary information and click [保存 (Save)].
Add from received email
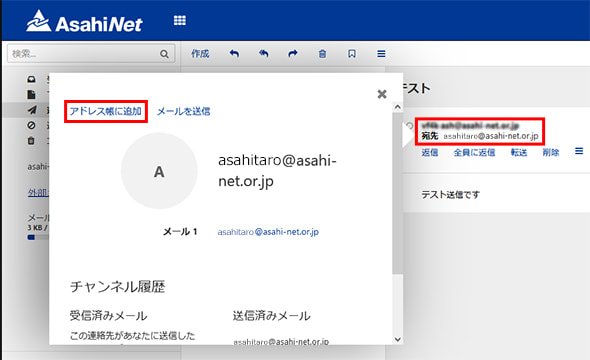
- 1.Open up an email and click either 差出人 (= sender)] or 宛先 (= address).
- 2.A form for adding an address will pop out. Click [アドレス帳に追加 (add to address book)].
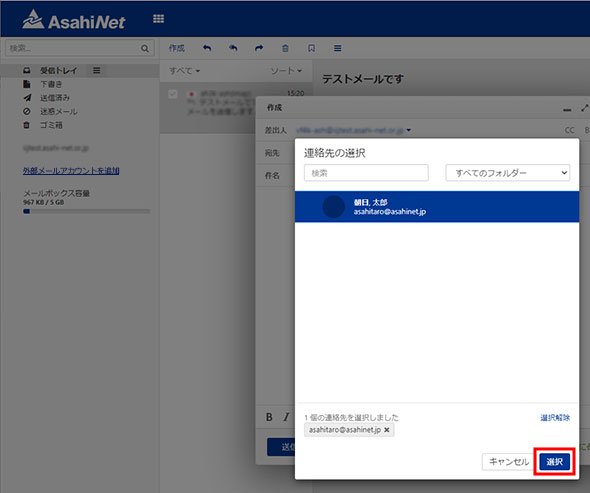
Specify an email address
- When creating a new email message, you can specify email address(es) added to the address book as the recipient.
-
STEP1
Start a new email message, and click the address book icon in the right-hand side of the 宛先 (= address) field.
-
STEP2
Choose the email address you want to specify and click [選択 (Choose)].