Asahi Net LTE (ANSIM) Settings and Connection Guide
Before Making Settings
This is a guide for setting up the connection settings or connection methods for those using the Asahi Net LTE (ANSIM) service.
Your Asahi Net user ID and password are not required to connect.
Following the guides below, based on your Plan type, please set your communication device accordingly.
For those using the Voice SIM service
For those currently switching carriers from a previous mobile carrier to Asahi Net LTE (ANSIM) and have used an MNP reservation number (MNP: mobile number portability), after receiving the SIM card, you are required to take an extra step to begin using the service.
Please log in to the Asahi Net Account Maintenance page for Asahi Net LTE (ANSIM), and then press the “Start” button.
Asahi Net LTE (ANSIM) Contract Confirmation and Procedures Page
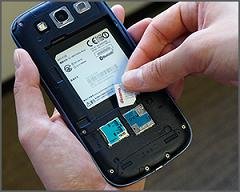
Inserting the SIM card into your communication device
First, insert your Asahi Net LTE (ANSIM) SIM card into your communication device, turn on the power, and then confirm that it is recognized.
The process for setting up your LTE-compatible device
Depending on your contract Plan, please configure the network settings as shown below.
For those using the SIM card in LTE (Xi)-compatible devices
| Communication Speed | Low Speed | High Speed |
|---|---|---|
| SIM Card | Data SIM | Data SIM/Voice SIM |
| Item Name*1 | 128 K Plan | 3 Giga Plan 7 Giga Plan 20 Giga Plan 50 Giga Plan 110 MB/Day Plan |
| APN | lte.mobac.net | lte.mobac.net |
| User Name |
d@x.asahinet.jp If using the Fixed IP Address Option: |
d@w.asahinet.jp If using the Fixed IP Address Option: |
| Password | 0000 | 0000 |
| Authentication Type | PAP or CHAP | PAP or CHAP |
- *1Item name may differ depending on the device you are using.
Device Settings
How to change settings for blocking malicious SMS messages
This section shows how to change settings for the anti-phishing feature which automatically blocks SMS messages containing malicious URLs and phone numbers.
This feature is applied automatically* and therefore it does not require any individual settings.
For details on settings for blocking malicious SMS, please refer to NTT docomo's webpage.
NTT docomo: Settings for Blocking Malicious SMS (only in Japanese)
- *Please note that if you are currently blocking all SMS messages or receiving SMS messages from only specified numbers, the feature will not be applied automatically. In order to use, settings have to be changed after the feature has been provided.
iOS
-
STEP1
Change the APN in Settings.
The APN has to be changed in order to access the settings change page.
To change settings, download the following profile. -
STEP2
Access the settings page.
Access the settings page provided by NTT docomo.
-
STEP3
Enter your passcode and change settings.
When you access the settings page, a page with a message “ネットワーク暗証番号を入力する (Enter your network passcode)” will show up, so enter “0033”.*
Change your settings in accordance to the content which shows up.- *Be sure to enter the correct passcode since it will be locked after 3 wrong attempts.
-
STEP4
Enter the original APN in Settings.
After changing settings, change the APN to the original information.
The profile for connections settings could be downloaded from the following page.
Android
-
STEP1
Change the APN in Settings.
The APN has to be changed in order to access the settings change page. Show the connection settings of Asahi Net LTE (ANSIM) and change only the APN to the following information.
APN settei.dcm-wcs.ne.jp -
STEP2
Access the settings page.
Access the following settings page provided by NTT docomo.
-
STEP3
Enter your passcode and change settings.
When you access the settings page, a page with a message “ネットワーク暗証番号を入力する (Enter your network passcode)” will show up, so enter “0033”.*
Change your settings in accordance to the content which shows up.- *Be sure to enter the correct passcode since it will be locked after 3 wrong attempts.
-
STEP4
Enter the original APN in Settings.
After changing settings, change the APN to the original information.