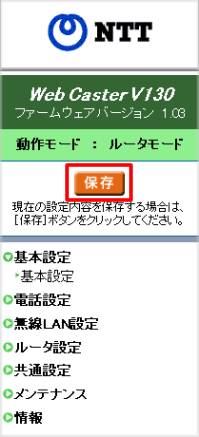
Internet Connection Settings for Web Caster V130
Internet Connection Setup
Before setting up
This page gives you information on how to set up the internet connection on Web Caster V130.。
See the following page for how to check your information after taking STEP 1 and STEP 3.
First-time setup
-
STEP1
Open a browser window
After wiring the Web Caster and your computer, open a browser window, enter the address “http://192.168.100.1” in the address bar, and press Enter.

-
STEP2
管理者パスワードの初期設定 (= Initial setup of administrator password)
When you access the page for the first time, it will be shown as follows. Set a password of your choice.
Please note that this password is different from the Asahi Net password. We strongly recommend taking a note of it.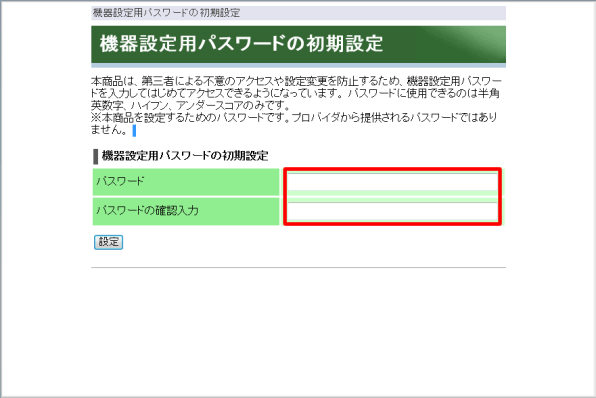
-
STEP3
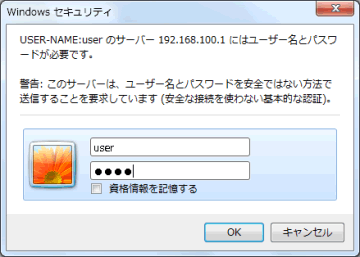
Login
A login window for setting up will be shown. Enter “user” for user name and the password you set in STEP 2, and then click OK.
-
STEP4
設定ウィザード (= Setup wizard)
Set up as follows and click the 設定 (= Set) button.
動作モード
Operating modeルータモード
Router modeインターネット接続先設定
Internet connection settings設定する (= Set) 接続先名
Connection nameAny name (e.g., asahi-net) 接続先ユーザー名
Connection user nameAsahi Net ID@atson.net
(E.g., ab4t-ash@atson.net)接続パスワード
Connection passwordAsahi Net password which corresponds to the ID 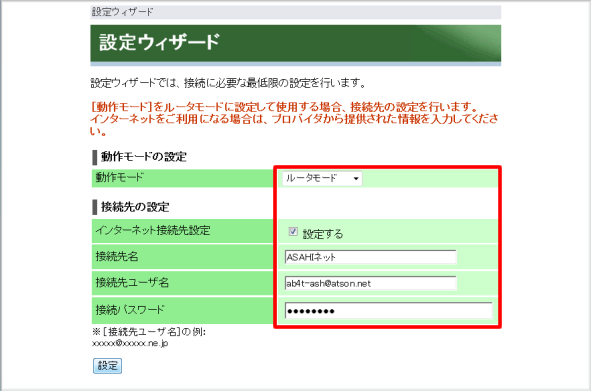
Check settings
Check settings
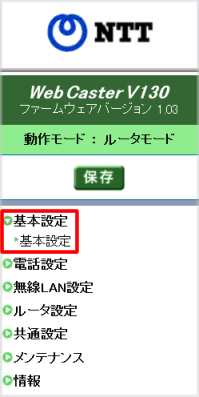
Select 基本設定 (= Basic settings) from the pull-down menu 基本設定 (= Basic settings) in the left of the page.
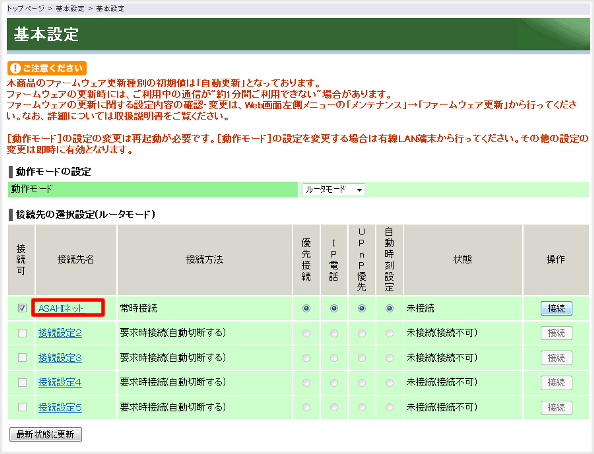
Click the 接続先名 (= connection name) which you want to check the settings (e.g., Asahi Net).
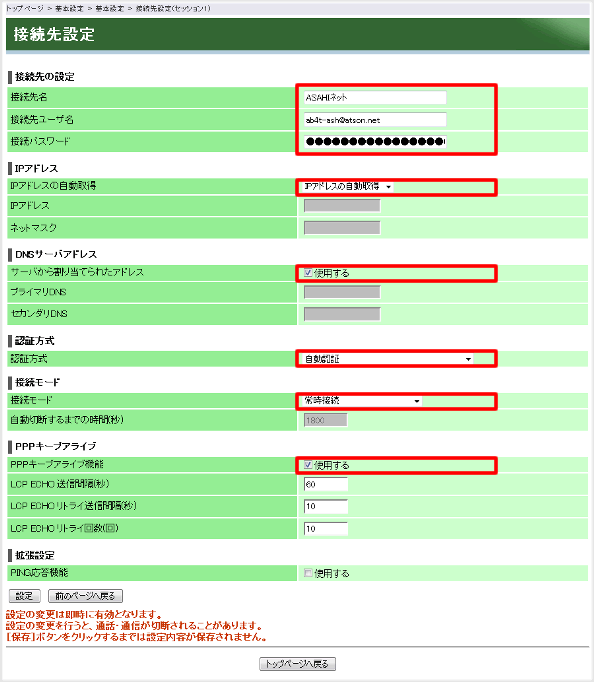
接続先設定 (= Connection settings)
Set up as follows and click the 設定 (= Set) button.
| 接続先名 Connection name |
Any name (e.g., asahi-net) |
|---|---|
| ログインユーザー名 Login user name |
Asahi Net ID@atson.net (E.g., ab4t-ash@atson.net) |
| 接続パスワード Connection password |
Password which corresponds to the above Asahi Net ID (lowercase letters, numbers and symbols) |
| 認証方式 Authentication |
自動認証 Automatic |
| 接続モード Connection mode |
常時接続 Always connected |
| PPPキープアライブ機能 PPP keep alive function |
使用する Place a check mark next to 使用する (= Use) |
Click the 保存 (= Save) button to complete the setup.
