Internet Connection Settings for ADSL Modem-MNV
Internet connection setup
Before setting up
This page gives you information on how to set up the internet connection on ADSL Modem-MNV.
Frist-time setup
-
STEP1
Open a browser window
Open a browser window.
Enter the address “http://192.168.1.1” in the address bar and press Enter.
-
STEP2
管理者パスワードの初期設定 (= Initial setup of administrator password)
Enter the password for accessing the modem setup page twice
(the second time is for confirmation) and click 設定 (= Set).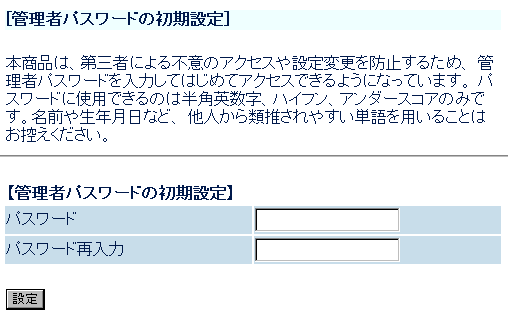
-
STEP3
設定ウィザード (= Setup wizard)
Set up as follows and click the 設定 (= Set) button.
接続先名
Connection nameAny name ユーザー名
User nameAsahi Net ID@atson.net
(E.g., ab4t-ash@atson.net)パスワード
PasswordAsahi Net password which corresponds to the ID 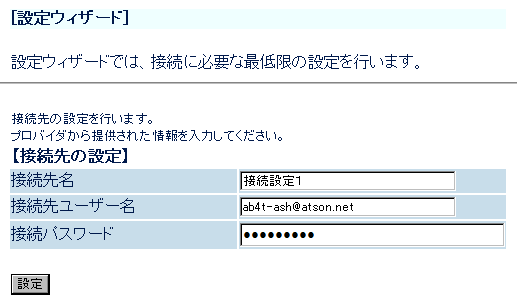
-
STEP4
設定ウィザード(設定中) (= Setup wizard (during the setup))
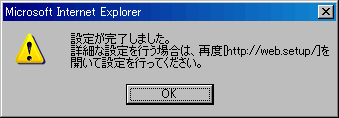
During the setup, wait until reboot is complete.

Click OK when the setup complete dialog window is shown.
Check settings
-
STEP1
Check settings
Open a browser window.
Enter the address “http://192.168.1.1” in the address bar and press Enter.
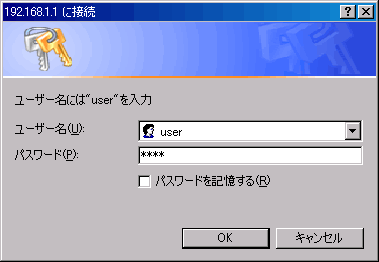
Enter the information to log into the modem (an account for setting up the modem; user name: user; password: password which you set) in the dialog window shown and click OK.
-
STEP2
Check settings 2
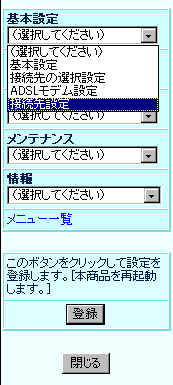
Select 接続先設定 (= Connection settings) from the pull-down menu 基本設定 (= Basic settings) in the left of the page.
-
STEP3
Check settings 3
Check if the following settings are being applied. (If you make any changes, click 設定 (= Set). In order to reflect the registered information, you are required to click the 登録ボタン (= Register button) in the pull-down menu in the left of the page and reboot the device.)
接続先名
Connection nameAny name 接続先ユーザー名
Connection user nameAsahi Net ID@atson.net
(E.g., ab4t-ash@atson.net)接続パスワード
Connection passwordAsahi Net password which corresponds to the ID IPアドレスの自動取得
Auto retrieval of IP addressPlace a check mark next to 使用する (= Use) サーバーから割り当てられたアドレス
Address assigned from the serverPlace a check mark next to 使用する (= Use) 認証方式
AuthenticationChoose 暗号化されてないパスワード(PAP) (= Unencrypted password (PAP)). 自動切断
Auto disconnectOptional (default setting is recommended) PPPキープアライブ機能
PPP keep alive functionOptional (default setting is recommended) 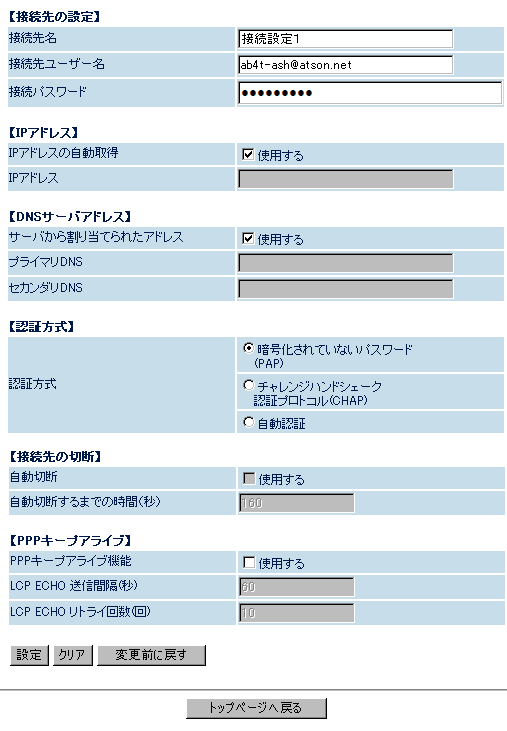
-
STEP4
Check settings 4
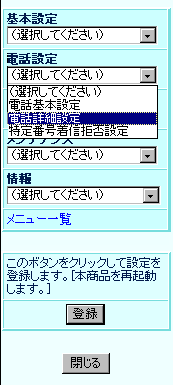
Select 電話詳細設定 (= Advanced phone settings) from the pull-down menu 電話設定 (= Phone settings) in the left of the page.
-
STEP5
Check settings 5
Check if the following settings are being applied. (If you make any changes, click 設定 (= Set). In order to reflect the registered information, you are required to click the 登録ボタン (= Register button) in the pull-down menu in the left of the page and reboot the device.)
ナンバーディスプレイ
Caller ID DisplayIf you are using a Caller ID Display supported phone device, あり (= Yes)
If you are using a phone device not supporting caller ID display, なし (= None)着信音
RingtoneOptional (default value is recommended) 電話回線ダイヤルモード
Phone line dial modeOptional (default value is recommended) 市外局番
Area codeEnter the area code of your subscribed regular phone line (landline) エコーキャンセラ
Echo CancellerPlace a check mark next to 使用する (= Use) 非通知着信
Unknown callerOptional (default value is recommended) 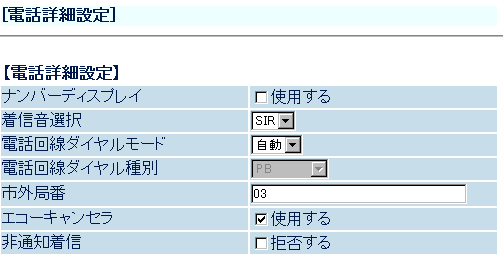
-
STEP6
Check connection status
Select
現在の状態 (= Current status) from the pull-down menu of 情報 (= Information) in the left of the page.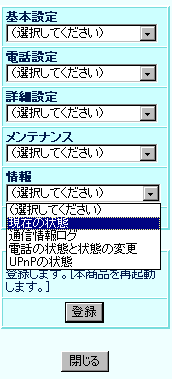
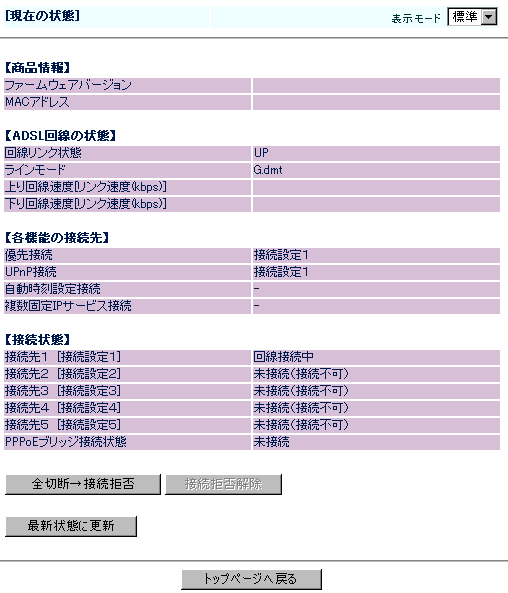
If UP is shown for 回線リンク状態 (= Line link status), the connection is correctly established and synched.
And finally, if the lamp status is as follows, the internet connection setup is complete.
After connecting to the internet, set up the phone function.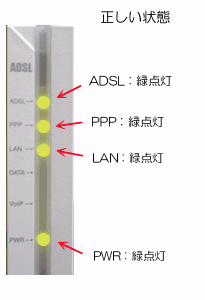
Correct status
ADSL Green light is on PPP Green light is on LAN Green light is on PWR Green light is on