Internet Connection Settings for Web Caster X400V
Internet connection setup
Before setting up
This page gives you information on how to set up the internet connection on Web Caster X400V.
First-time setup
-
STEP1
Open a browser window
Open a browser window.
Enter the address “http://192.168.1.1” in the address bar and press Enter.
-
STEP2
管理者パスワードの初期設定 (= Initial setup of administrator password)
Enter the password for accessing the modem setup page twice (the second time is for confirmation).
For FLET’S/Square connection settings, click the applicable area.
Click the 確認 (= Confirm) button, and then the 送信 (= Send) button.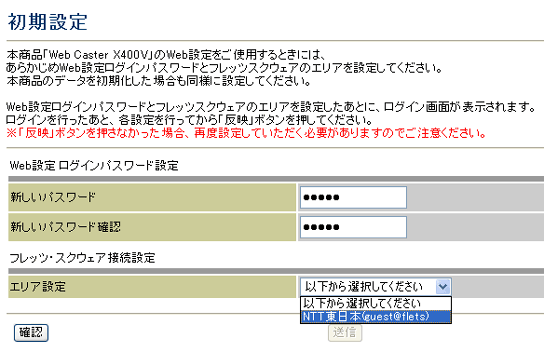
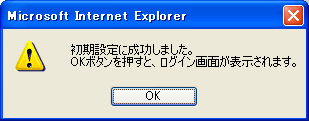
Click OK when the setup complete dialog window is shown.
-
STEP3
Login
Enter the information to log into the modem in the dialog window shown and click OK.
ユーザー名
User nameadmin パスワード
PasswordPassword which you set up 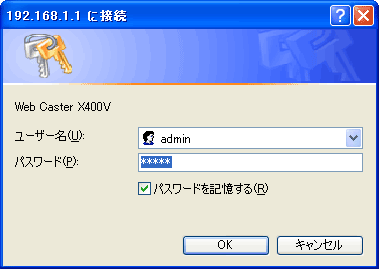
-
STEP4
かんたん設定 (= Easy setup)
After the setting up as follows, click the 確認 (= Confirm) button, and then the 送信 (= Send) button.
セキュリティ設定 (= Security settings)
オンライン登録
Online registrationOptional e-mailアドレス
Email addressYour preferred email address 通知する情報
Information you wish to be notifiedOn your preferences インターネットサービスプロバイダ設定 (= ISP settings)
接続ユーザー名
Connection user nameAsahi Net ID@atson.net
(E.g., ab4t-ash@atson.net)接続パスワード
接続パスワード確認
Connection password (and for confirming password)Asahi Net password which corresponds to the ID 利用中電話サービス (= Subscribed phone service)
ナンバーディスプレイ
Caller ID DisplayIf you are using a Caller ID Display supported phone device, あり (= Yes)
If you are using a phone device not supporting caller ID display, なし (= None)キャッチホン
Call waitingIf you are subscribed to a call waiting service, select あり (= Yes)
If you are not subscribed to a call waiting service, select なし (= None)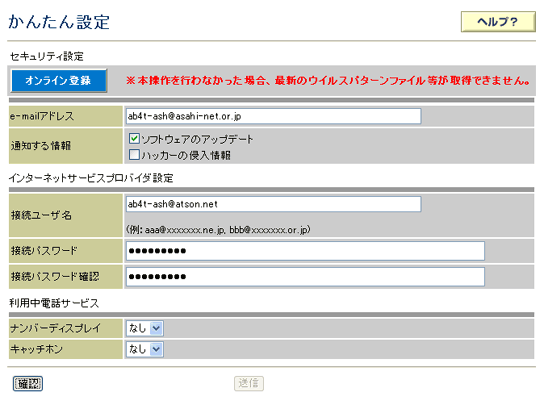
-
STEP5
Reflect the settings
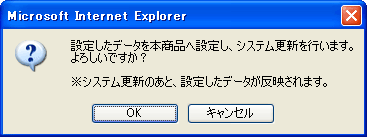
Click 反映 (= Reflect) shown in the left menu.

Web Caster X400V will reboot by clicking the OK (= Reflect) button in the dialog window. Setup will complete when the reboot is done.
-
*Web Caster X400V will not reboot if you click 反映 (= Reflect) when you are calling.
Click 戻る (= Back) in the shown page.
-
*Web Caster X400V will not reboot if you click 反映 (= Reflect) when you are calling.
Check settings
Check PPPoE settings
Select PPPoE (= PPPoE settings) under ルータ設定 (= Router settings) in the left menu of the page.
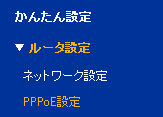
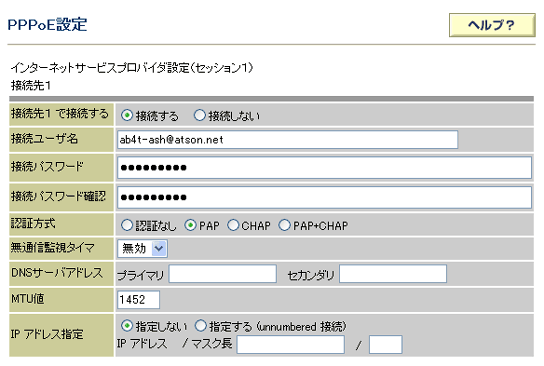
Check the following.
After the setting up as follows, click the 確認 (= Confirm) button, and then the 送信 (= Send) button.
| 接続先 1で接続する Connect with Connection 1 |
Choose 接続する (= Connect) |
|---|---|
| 接続ユーザー名 Connection user name |
Asahi Net ID@atson.net (E.g., ab4t-ash@atson.net) |
| 接続パスワード 接続パスワード確認 Connection password (and for confirming password) |
Asahi Net password which corresponds to the ID |
| 認証方式 Authentication |
Choose PAP |
| 無通信監視タイマ Inactivity monitoring time |
Choose 無効 (= Disable) |
| DNSサーバアドレス DNS server address |
No need to set up |
| MTU値 MTU value |
Optional (leave it as default (1452)) |
| IPアドレス指定 IP address specification |
Choose 指定しない (= Do not specify) |
Reflect the settings
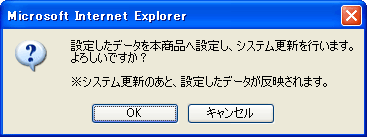
Click 反映 (= Reflect) shown in the left menu.

Web Caster X400V will reboot by clicking the OK button in the dialog window.
Setup will complete when the reboot is done.
Check connection
Check on the settings page
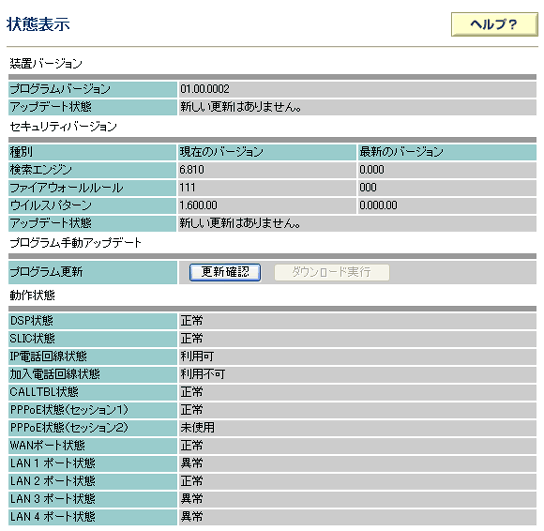
In the left menu, click 状態表示 (= Shows status).

If 正常 (= Normal) is showing under PPPoE状態 (= PPPoE state), the line is connected.
Check the lamp status
If the lamp status is as follows, the internet connection setup is complete.
After connecting to the internet, set up the phone function.
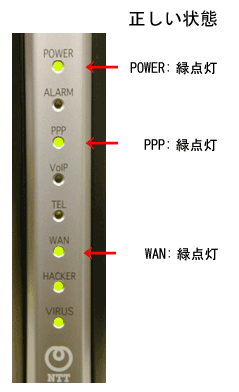
Correct status
| POWER | Green light is on |
|---|---|
| PPP | Green light is on |
| WAN | Green light is on |