Internet Connection Settings for ADSL Modem-NV/NVII/NVIII
Internet connection setup
Before setting up
This page gives you information on how to set up the internet connection (WAN) on ADSL Modem-NV/NVII/NVIII.
The information is based on ADSL Modem-NVIII (firmware version: 1.03), Windows XP and Internet Explorer 6 (for Windows).
The same settings apply to Macintosh computers and other OSs.
The pages of ADSL Modem-NVIII are used here, but ADSL Modem-NV/NVII has the same pages.
First-time setup
-
STEP1
Open a browser window
Open a browser window.
Enter the address “http://192.168.1.1” in the address bar and press Enter.
-
STEP2
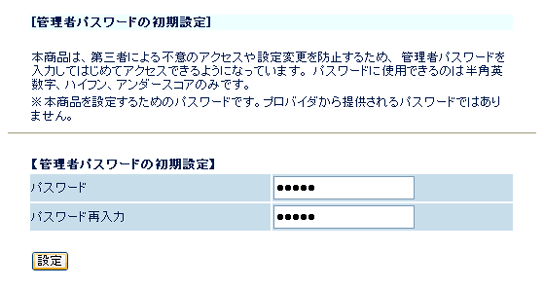
管理者パスワードの初期設定 (= Initial setup of administrator password)
Enter the password for accessing the modem setup page twice (the second time is for confirmation) and click 設定 (= Set).
-
STEP3
設定ウィザード (= Setup wizard)
Set up as follows and click the 設定 (= Set) button.
利用タイプ
Usage typeADSLモデム内蔵ルータ
ADSL modem built-in router接続先名
Connection nameAny name (e.g., asahi-net) ユーザー名
User nameAsahi Net ID@atson.net
(E.g., ab4t-ash@atson.net)パスワード
PasswordAsahi Net password which corresponds to the ID フレッツ・スクウェア接続
FLET'S/Square connectionDepends on your preference 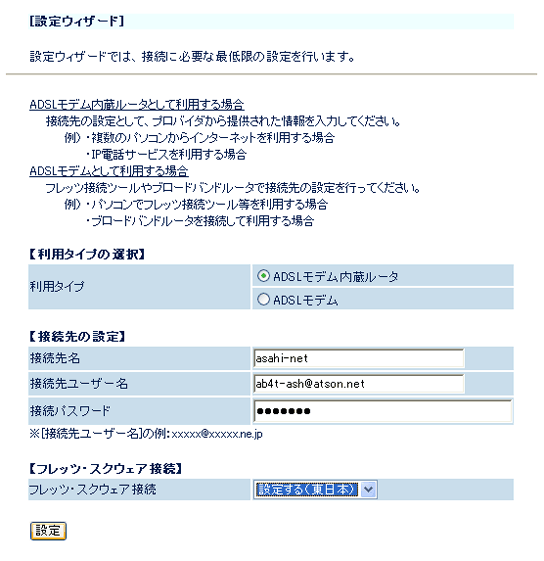
-
STEP4
設定ウィザード(設定中) (= Setup wizard (during the setup))
During the setup, wait until reboot is complete.

Click OK when the setup complete dialog window is shown.
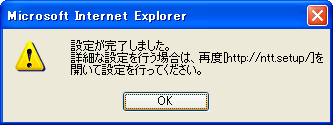
Click はい (= Yes) and close the dialog window.

Check connection settings
-
STEP1
Log into settings page
Open a browser window.
Enter the address “http://192.168.1.1” in the address bar and press Enter.
Enter the information to log into the modem in the dialog window shown and click OK.
ユーザー名
User nameuser (factory default) パスワード
PasswordAdministrator password which you set up 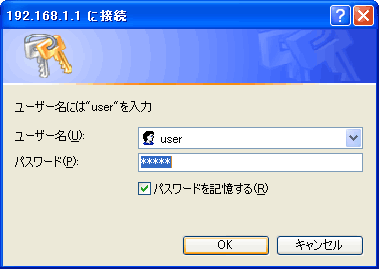
-
STEP2
基本設定 (= Basic settings) > 接続先設定 (= Connection settings)
Select 接続先設定 (= Connection settings) from the pull-down menu 基本設定 (= Basic settings) in the left of the page.

Check that the following settings are being applied. (If you make any changes, click 設定 (= Set). In order to reflect the registered information, you are required to click the 登録ボタン (= Register button) in the pull-down menu in the left of the page and reboot the device.)
接続先名
Connection nameAny name (e.g., asahi-net) 接続ユーザー名
Connection user nameAsahi Net ID@atson.net (e.g., ab4t-ash@atson.net) 接続パスワード
Connection passwordAsahi Net password which corresponds to the ID IPアドレスの自動取得
Automatic retrieval of IP addressPlace a check mark next to 使用する (= Use) サーバから割り当てられたアドレス
Address assigned from the serverPlace a check mark next to 使用する (= Use) 認証方式
Authentication暗号化されてないパスワード(PAP)
Unencrypted password (PAP)接続モード
Connection mode常時接続
Always connectedその他の項目
OtherDepends on your preference 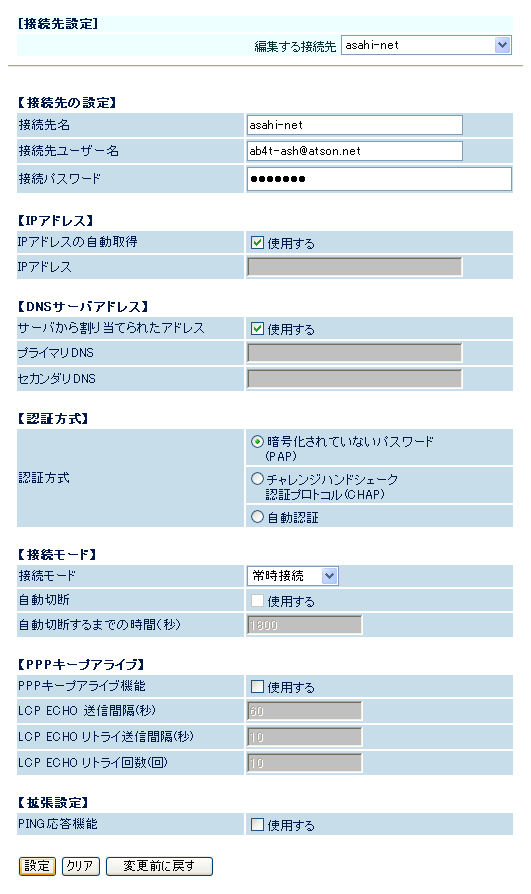
Check connection
-
STEP1
現在の状態 (= Current status)
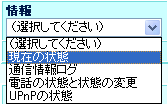
Select 現在の状態 (= Current status) from the pull-down menu of 情報 (= Information) in the left of the page.
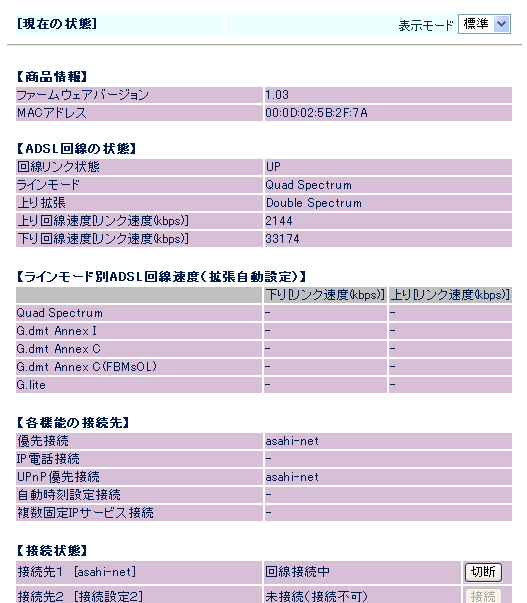
If 回線接続中 (= Line connected) is shown for 接続先 (= Connection), connection of the ADSL line is correctly established.
-
STEP2
Lamp status
The internet connection of ADSL line is correctly established if the lamp status is shown as below.
After connecting to the internet, set up the phone function.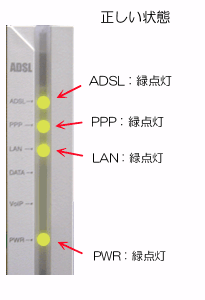
E.g., ADSL modem-NVCorrect status
ADSL Green light is on PPP Green light is on LAN Green light is on PWR Green light is on 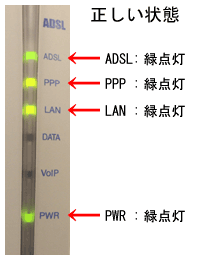
E.g., ADSL modem-NVII/NVIIICorrect status
ADSL Green light is on PPP Green light is on LAN Green light is on PWR Green light is on