Confirm Settings for Outlook 2016
(version 1810 or later)
- This page explains the steps to check your settings for Windows Microsoft Outlook 2016 (version 1810 or later).
- The items referred to with brackets (= [ ]) in this guide are unique data to
each customer.
In actual settings, please replace them with your own information. - The [ASAHI Net User ID] used in this guide as an example is [ab4t-ash].
- Settings for IMAP function could be found in the following page.
Mailer Setup: Before Setting Up
Checking your account
-
STEP1
Start the software
To start Outlook 2016, click the Outlook icon
 in the Start
menu or the icon
in the Start
menu or the icon on the
desktop.
on the
desktop. -
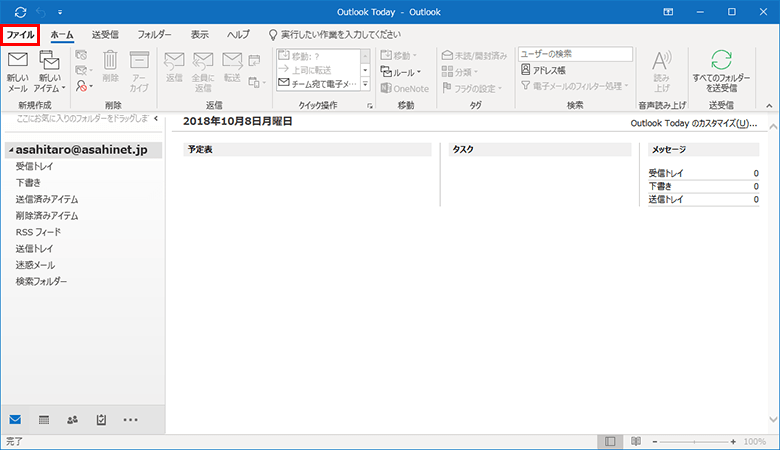
STEP2
Main window
When Outlook is launched, click ファイル (= File) in the top left.
-
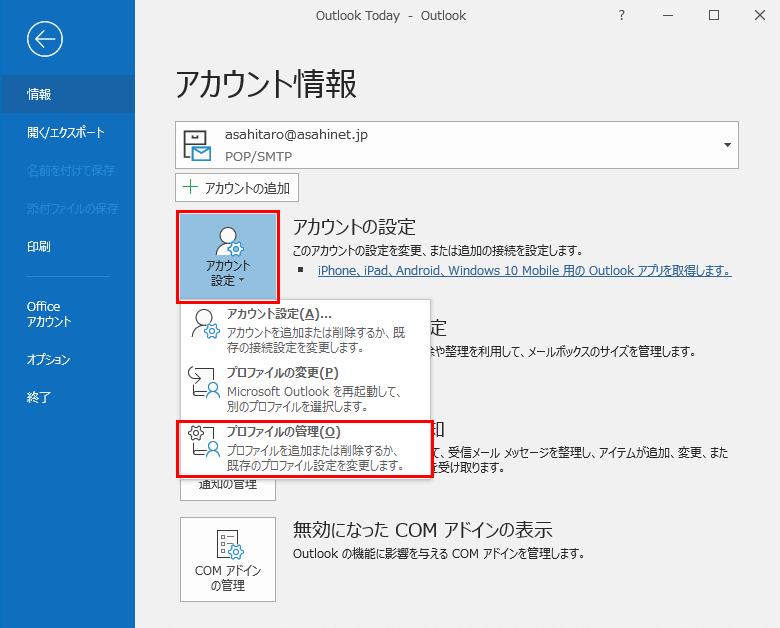
STEP3
アカウント情報 (= Account information)
From アカウント設定 (= Account Settings), click プロファイルの管理 (= Manage Profiles).
-
STEP4
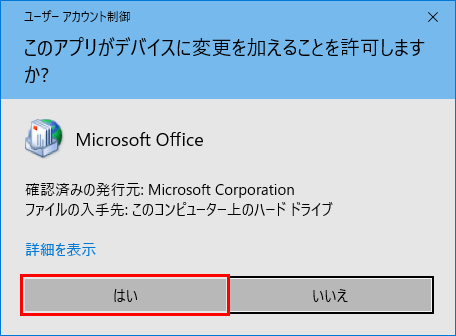
ユーザーアカウント制御 (= User Account Control)
If a control window appears, click はい (= Yes).
-
STEP5
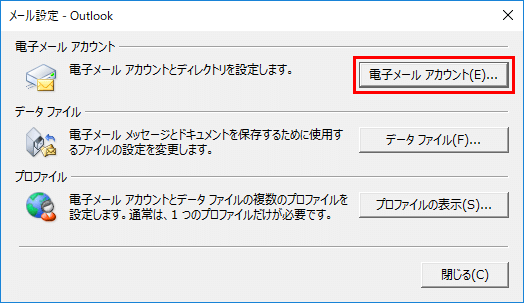
メール設定 (= Mail Setup)
Click 電子メールアカウント (= Email Accounts…)
-
STEP6
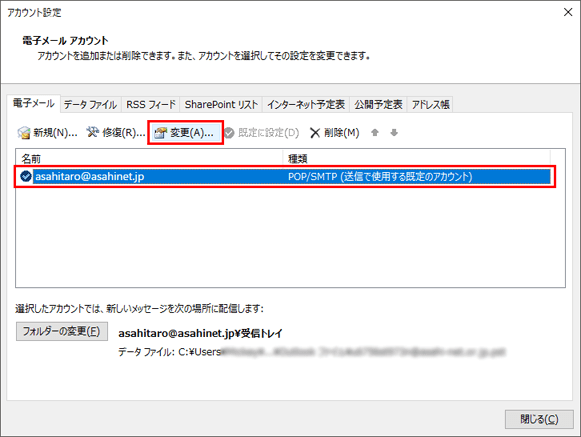
Select an account
Select the account you wish to check and click 変更 (= Change).
-
STEP7
POPとIMAPのアカウント設定 (= POP and IMAP Account Settings)
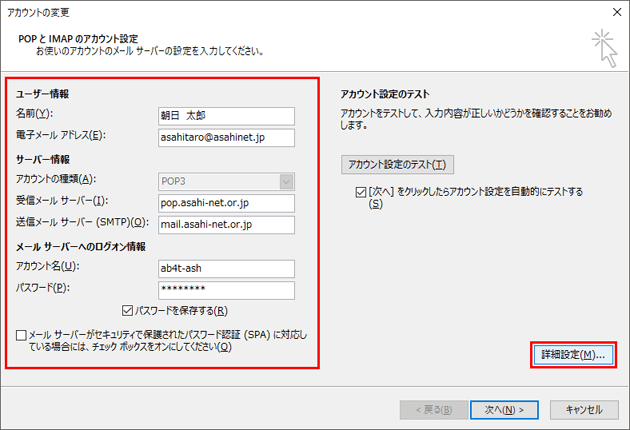
名前
NameYour name (any name)
E.g., Taro Asahi電子メールアドレス
Email address[Your email address]
E.g., asahitaro@asahinet.jpアカウントの種類
Account typePOP3 受信メールサーバー(POP3)
Incoming mail server (POP3)pop.asahi-net.or.jp 送信メールサーバー(SMTP)
Outgoing mail server (SMTP)mail.asahi-net.or.jp mails.asahi-net.or.jp - * If you are subscribed to Email Virus Check.
アカウント名
Account name[Asahi Net ID]
E.g., ab4t-ashパスワード
Password[Password corresponds to the Asahi Net ID] - *Enter all in lowercase characters.
パスワードを保存する
Remember password(Optional) メールサーバーがセキュリティで保護された~~
Require logon using Secure Password Authentication (SPA)Do not place a check mark Set up by referring to the above and click 詳細設定 (= More Settings…)
- *Settings for IMAP function could be found in the following page.
Mailer Setup: Before Setting Up
-
STEP8
送信サーバー (= Outgoing Server) tab
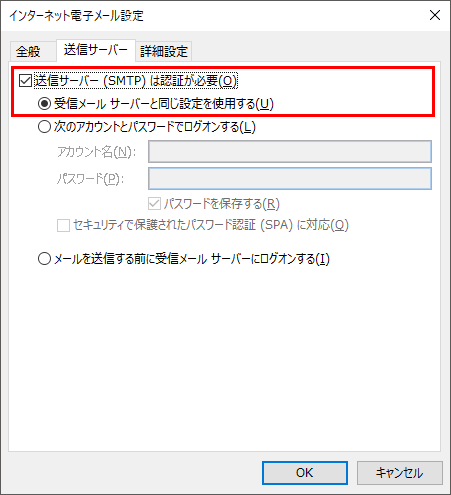
Set each items in 全般 (= General) tab as you like.
Switch to 送信サーバー (= Outgoing Server) tab.送信サーバー(SMTP)は認証が必要
My outgoing server (SMTP) requires authenticationPlace a check mark - * SMTP authentication
受信メールサーバーと同じ設定を使用する
Use the same settings as my incoming mail serverPlace a check mark Set up by referring to the above and click 詳細設定 (= More Settings …)
-
STEP9
詳細設定 (= More Settings…) tab

Server Port Numbers
受信サーバー
Incoming server995 このサーバーでは暗号化された接続(SSL/TLS)が必要
This server requires an encrypted connection (SSL/TLS)Place a check mark - * POP over SSL/TLS
送信サーバー
Outgoing server465 使用する暗号化接続の種類
Use the following type of encryption connectionSelect SSL/TLS - * SMTP over SSL/TLS
配信 (= Delivery)
Leave a copy of messages on the server (Optional) Set up by referring to the above.
After you are done setting up, click OK. -
STEP10
POPとIMAPのアカウント設定 (= POP and IMAP Account Settings)
When the window returns to the account settings window, click
次へ (= Next) .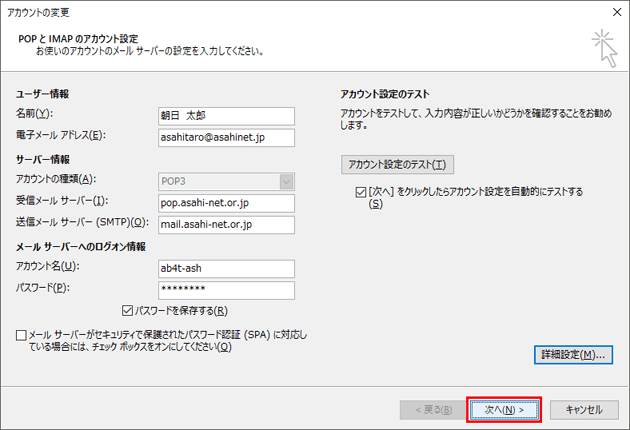
-
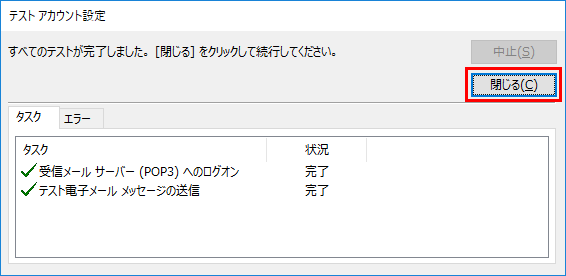
STEP11
テスト アカウント設定 (= Test Account Settings)
Account test will start. When all tests are completed, click 閉じる (= Close).
-
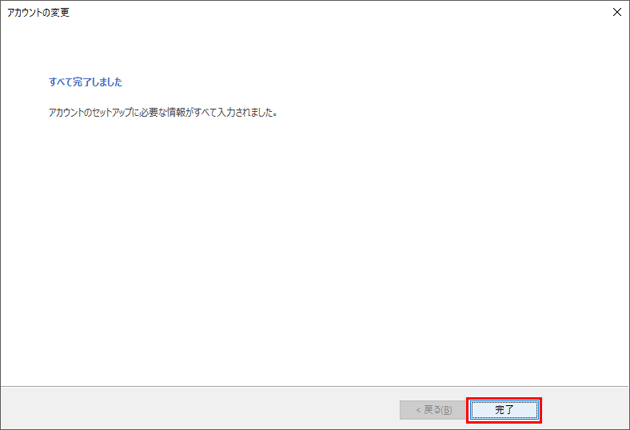
STEP12
Complete
Click 完了 (= Done).