Standard Mail App (macOS Ventura or Later Version) New Settings
- This page explains the steps to set up a new account for Mail 16.0 (macOS Sonoma version14.1.2).
- The items referred to with brackets (= [ ]) in this guide are unique data to each customer. In actual settings, please replace them with your own information.
- The [ASAHI Net User ID] used in this guide as an example is [ab4t-ash].
- Settings for IMAP function could be found in the following page.
Adding a New Account
-
STEP1
Launching the Software
Launch the メール (= Mail) application.
-
STEP2
メールアカウントのプロバイダを選択 (= Choose a Mail account provider)
The メールアカウントのプロバイダを選択 (= Choose a Mail account provider...) window will be shown.
Choose その他のメールアカウント (= Other Mail Account...) and click 続ける (= Continue).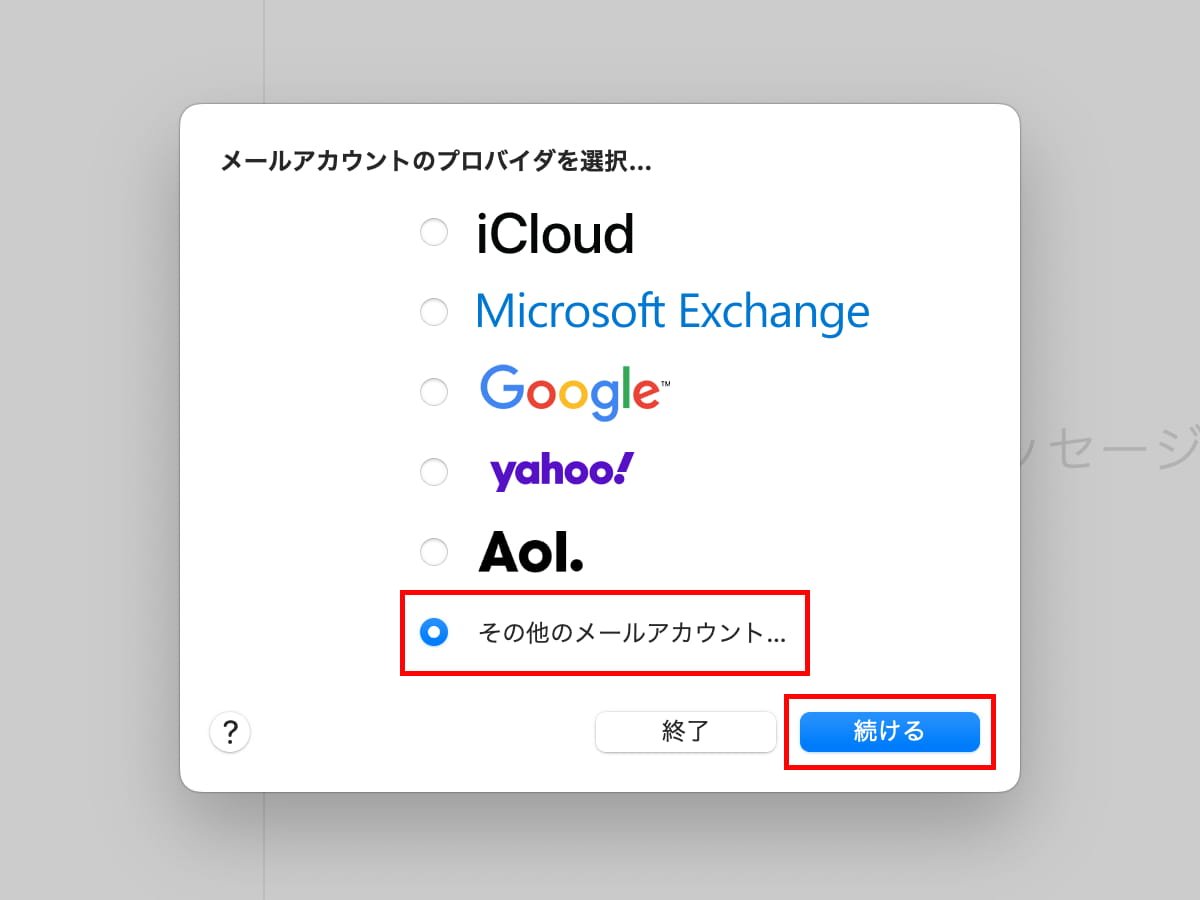
- If the メールアカウントのプロバイダを選択 (= Choose a Mail account provider...) window does not show up
-
From the menu, click メール (= Mail) and then click アカウント追加 (= Add account).
The メールアカウントのプロバイダを選択 (= Choose a Mail account provider...) window will be shown. 
-
STEP3
メールアカウントを追加 (= Add Mail Account)
Refer to the following to set up, and click サインイン (= Sign in).
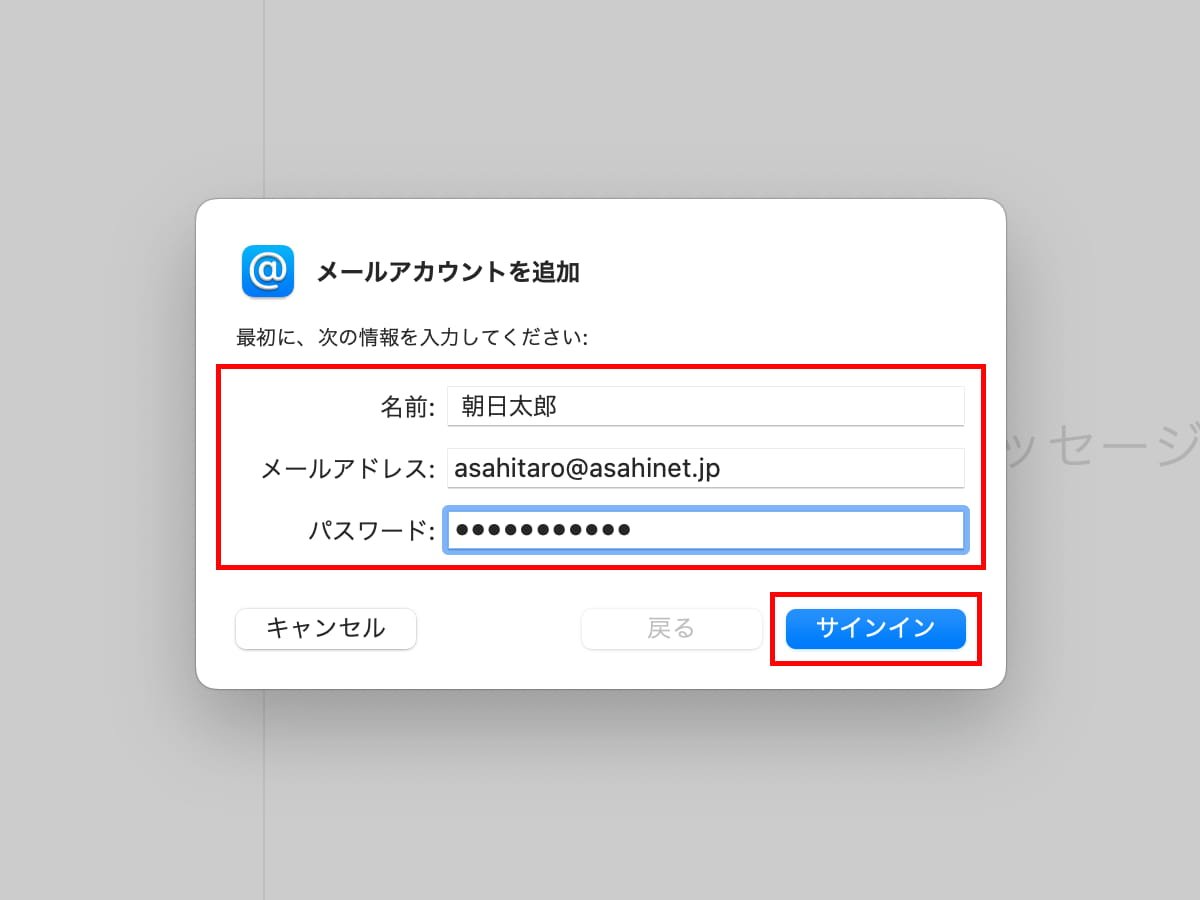
名前
NameYour name (arbitrary)
E.g., Asahi, Taroメールアドレス
Email address[Your email address]
E.g., asahitaro@asahinet.jpパスワード
Password[Password corresponds to the Asahi Net ID] -
* Enter all in lowercase characters.
-
-
STEP4
Entering Mail Server Information
If アカウント名またはパスワードを確認できません。 (= Unable to verify account name or password.) appears, manually fill in the sections as shown below, and then click サインイン (= Sign in).
Inbox will appear if there is no error. Continue on to complete your settings.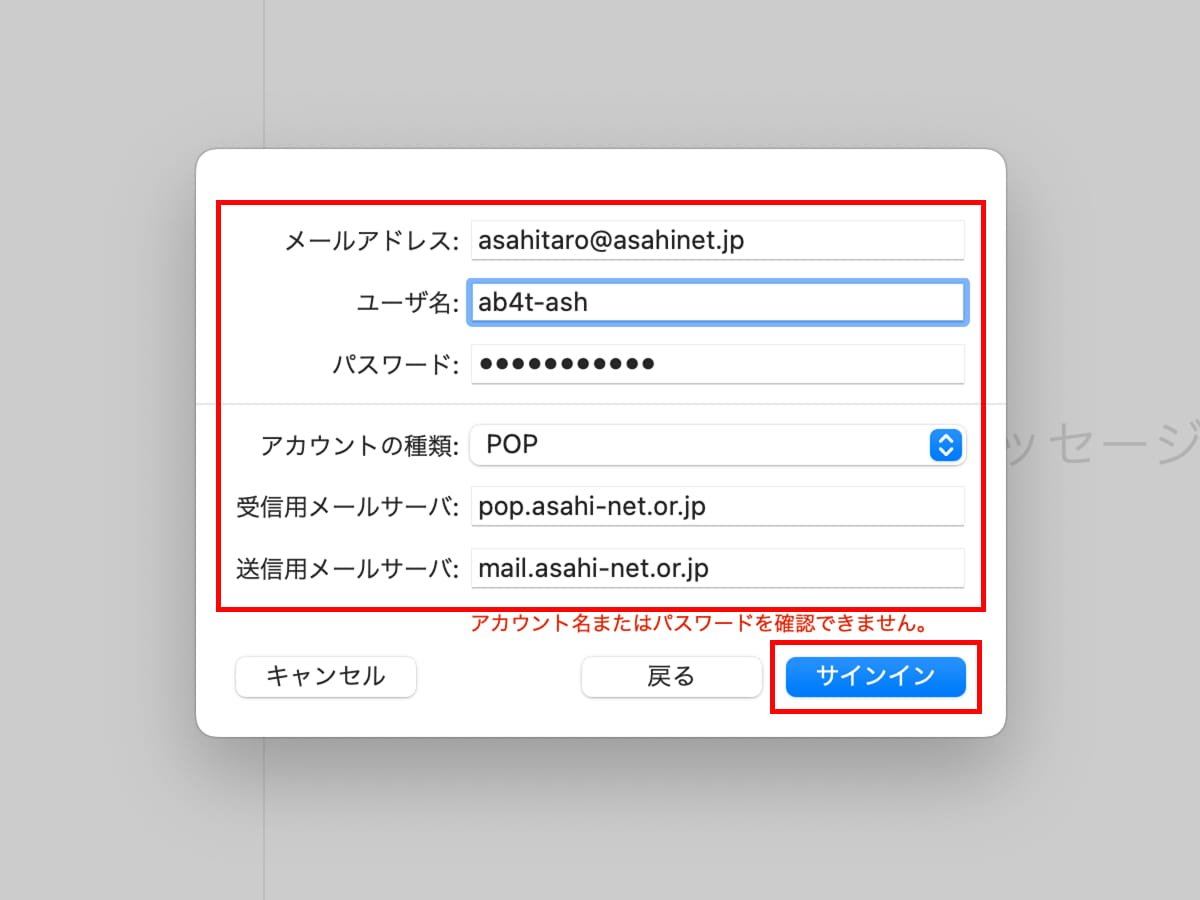
メールアドレス
Email Address[your email address]
e.g., asahitaro@asahinet.jpユーザ名
User Name[your Asahi Net User ID]
e.g., ab4t-ashパスワード
Password[Asahi Net password assigned to your Asahi Net User ID] - *Enter in lowercase (small) characters.
アカウントの種類
Account TypePOP 受信用メールサーバ
Incoming Mail Serverpop.asahi-net.or.jp 送信用メールサーバ
Outgoing Mail Servermail.asahi-net.or.jp
mails.asahi-net.or.jp (*)- *If using the Email Virus Check
-
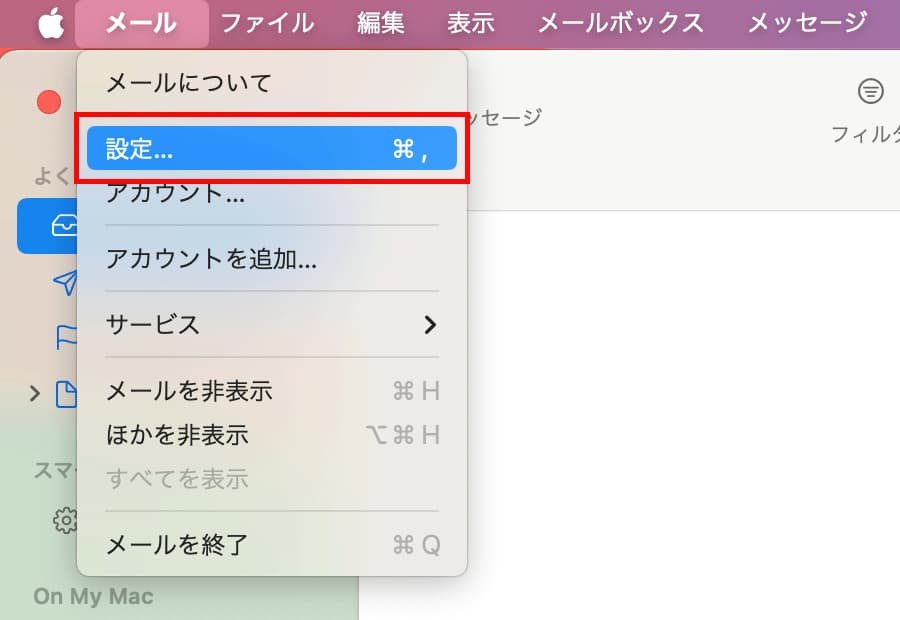
STEP5
設定 (= Settings)
From the menu, click 設定 (= Settings).
-
STEP6
アカウント情報 (= Account information)
Click アカウント (= Accounts), and choose the account which you wish to set up.
Switch to アカウント情報 (= Account information) tab, put a check mark next to メッセージ受信後にメッセージのコピーをサーバから削除 (= Remove copy from server after retrieving a message), and set your preference using the pull-down menu.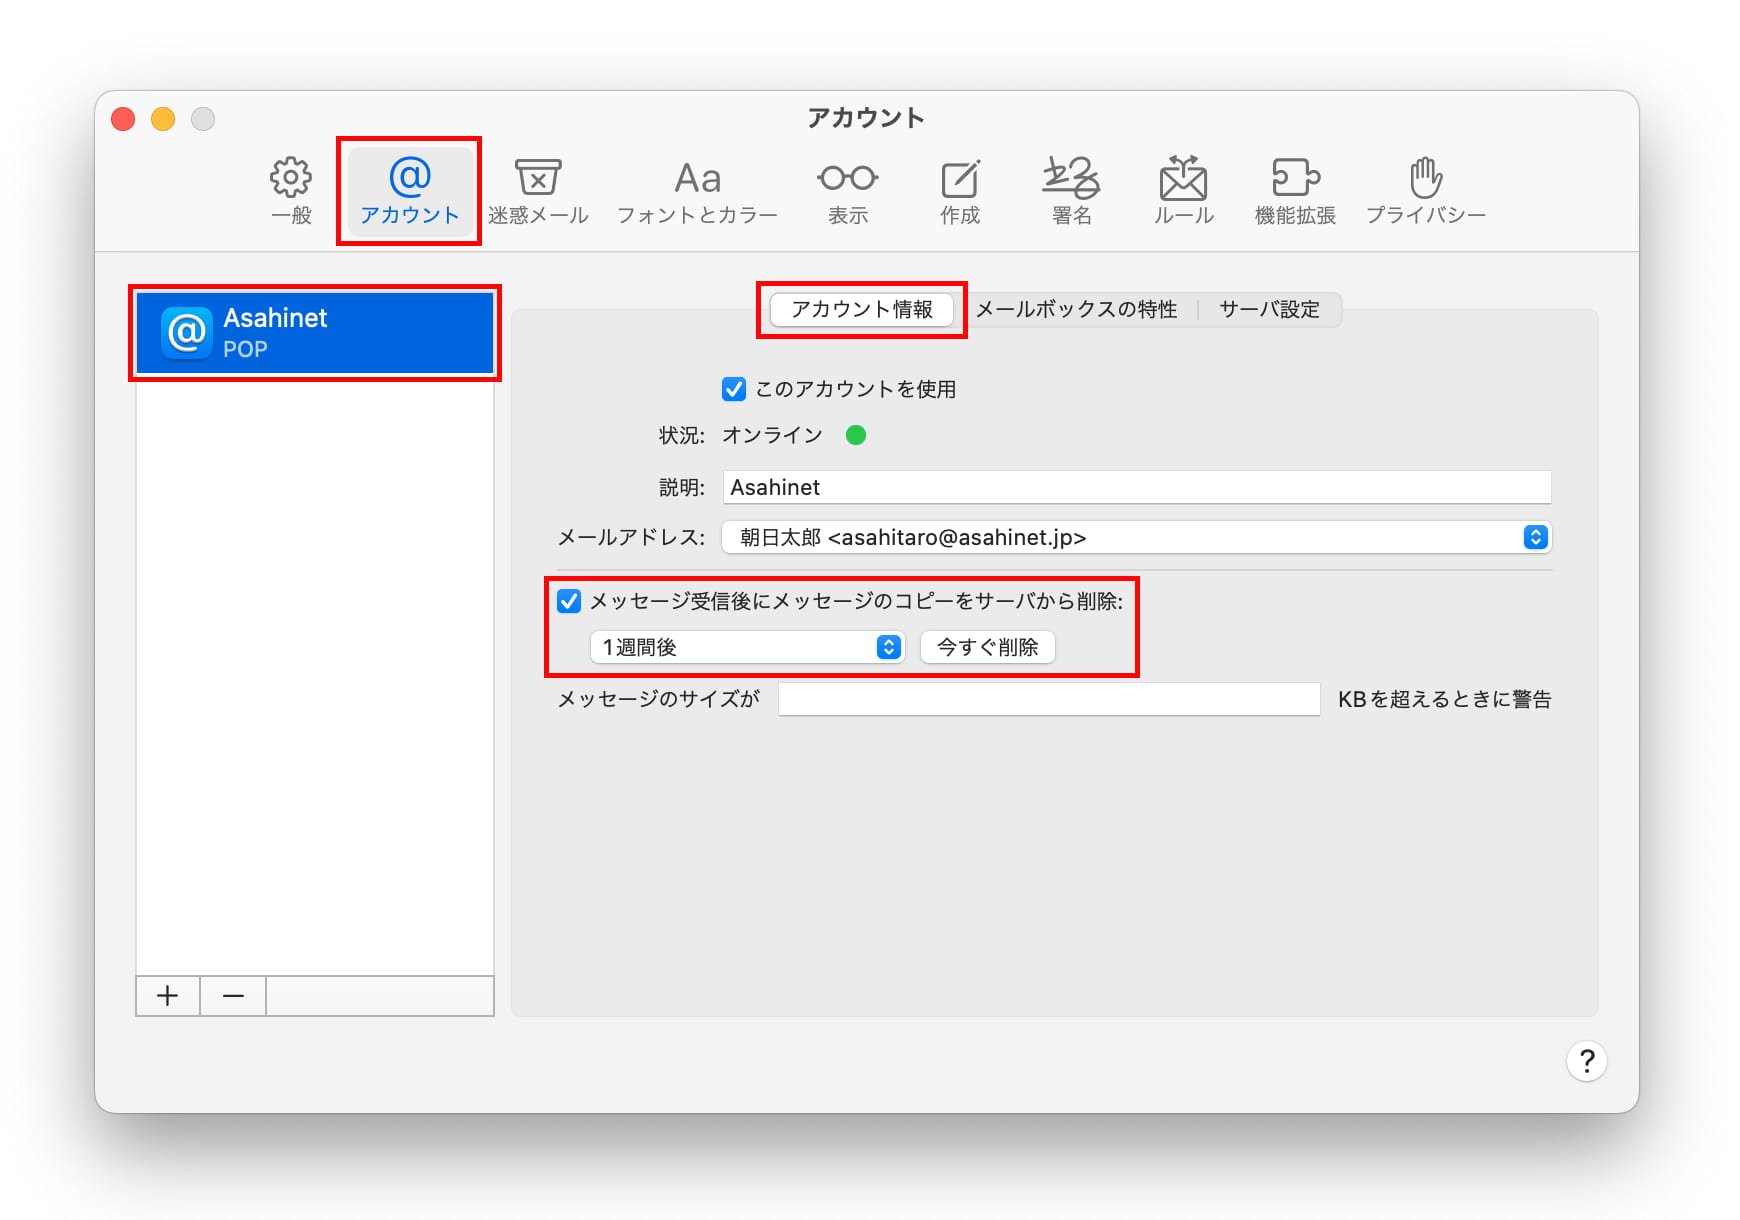
メッセージ受信後にメッセージのコピーをサーバから削除
Remove copy from server after retrieving a message(Optional) - *If you are using an email address attached to the same ID for Web Mail, do not put a check mark.
-
STEP7
サーバ設定 (= Server Settings)
Switch to サーバ設定 (= Server settings).
After removing the two check marks, each one next to 接続設定を自動的に管理 (= Automatically manage connection settings), refer to the following to set up and click 保存 (= Save).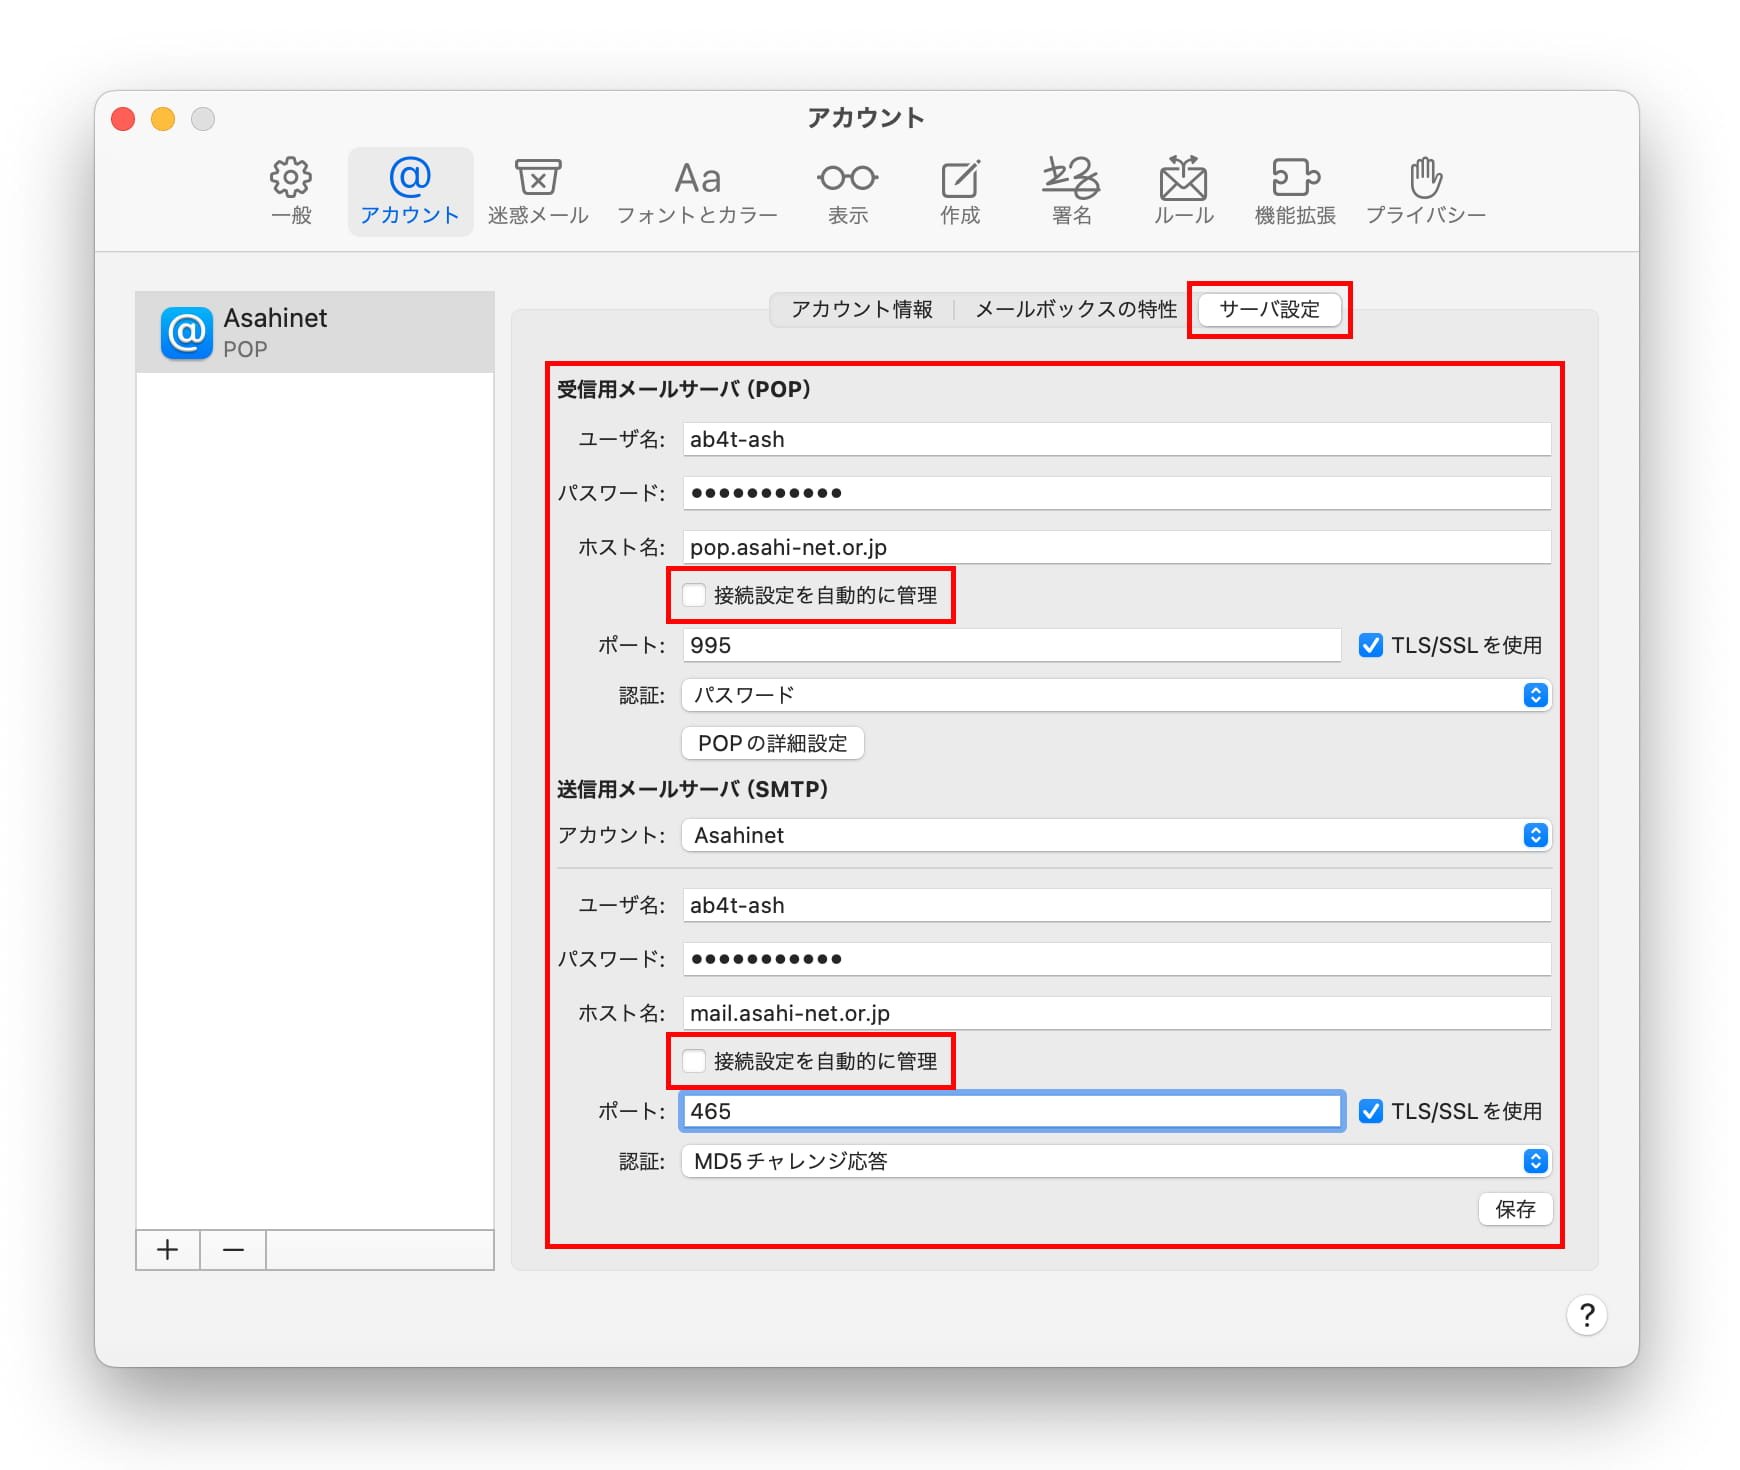
Incoming Mail Server (POP)
ユーザ名
User Name[Your Asahi Net User ID]
E.g., ab4t-ashパスワード
Password[Asahi Net password assigned to your Asahi Net User ID] - *Enter in lowercase (small) characters.
ホスト名
Host Namepop.asahi-net.or.jp 接続設定を自動的に管理
Automatically manage connection settingsUncheck ポート
Port995 TLS/SSLを使用
Use TLS/SSLCheck 認証
AuthenticationPassword Outgoing Mail Server (SMTP)
アカウント
AccountAsahinet - *This is selected automatically.
ユーザ名
User Name[Your Asahi Net User ID]
E.g., ab4t-ashパスワード
Password[Asahi Net password assigned to your Asahi Net User ID] - *Enter in lowercase (small) characters.
ホスト名
Host Namemail.asahi-net.or.jp 接続設定を自動的に管理
Automatically manage connection settingsUncheck ポート
Port465 TLS/SSLを使用
Use TLS/SSLCheck 認証
AuthenticationMD5 Challenge-Response -
STEP8
Setting Complete
Setting up a new email account is done.