New Settings for Thunderbird ver.115
- This page explains the steps to set up a new account for Thunderbird 115.12.2 for Windows
- The items referred to with brackets (= [ ]) in this guide are unique data to each customer.In actual settings, please replace them with your own information.
- The [ASAHI Net User ID] used in this guide as an example is [ab4t-ash].
- You need to be connected to the internet in order to follow the steps below.
- If you are using the IMAP function, see the following page for settings.
Asahi Net Mail Server Settings: IMAP Settings
New Settings
-
STEP1
Start the software
Start Thunderbird.

-
STEP2
Startup
The appearance of the window after startup differs depending on your Thunderbird version.
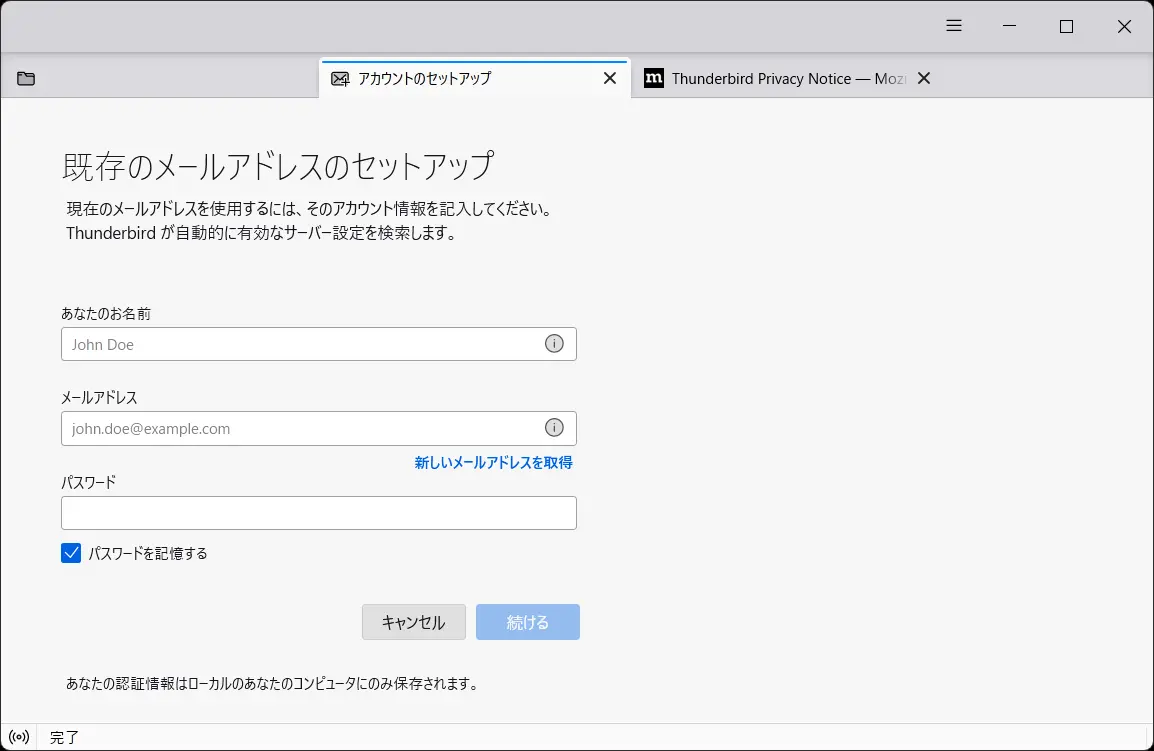
Configure your settings as written on the window.Launching for the first time
If the window below appears, go to STEP 3 既存のメールアドレスのセットアップ (= Set Up Your Existing Email Address).
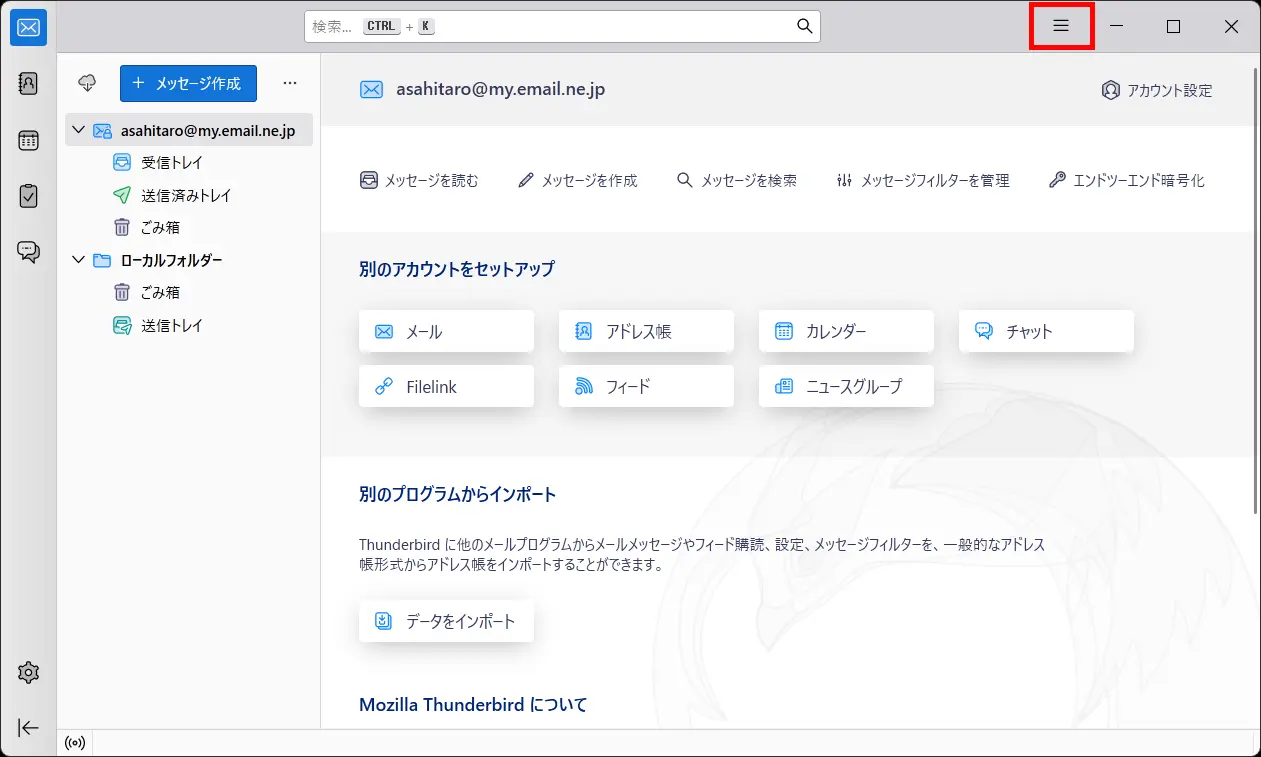
If the main window of Thunderbird appears
Click the menu icon
 in the upper right-hand side of the window.
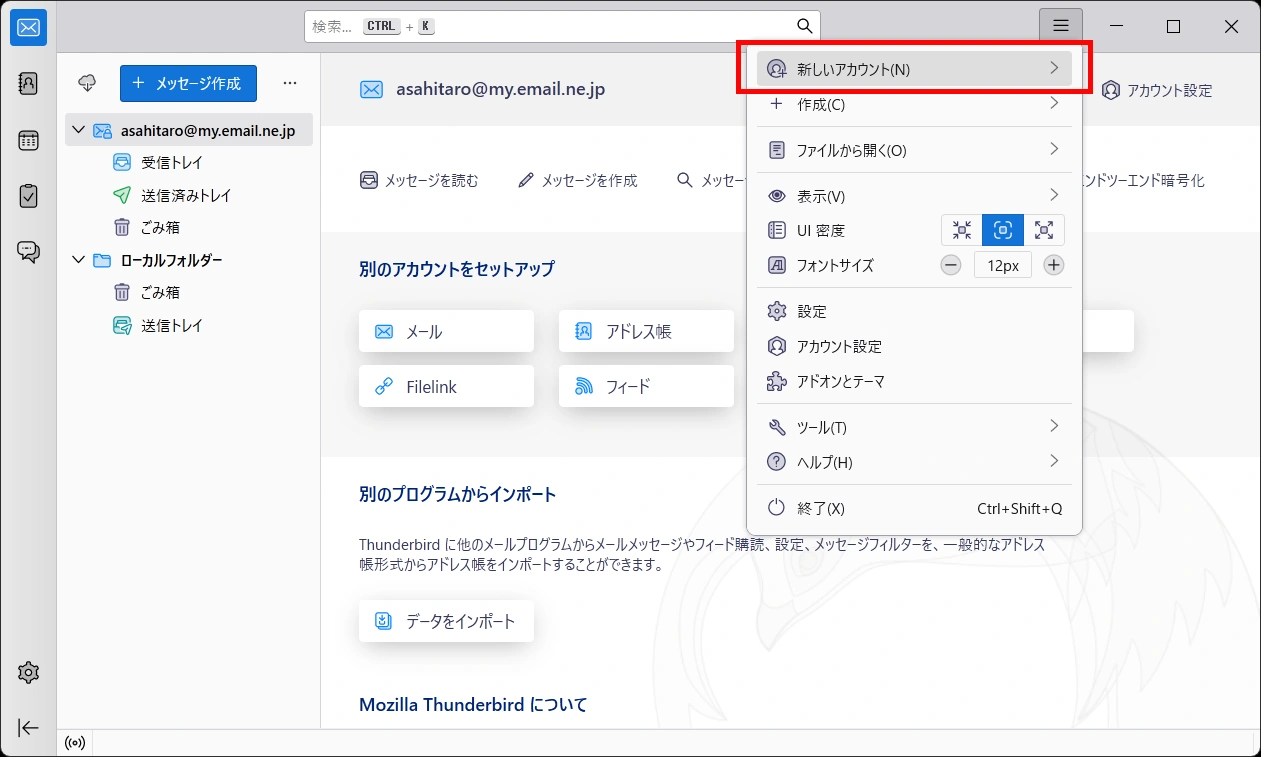
Choose 新しいアカウント設定 (= Add Account) in the menu.
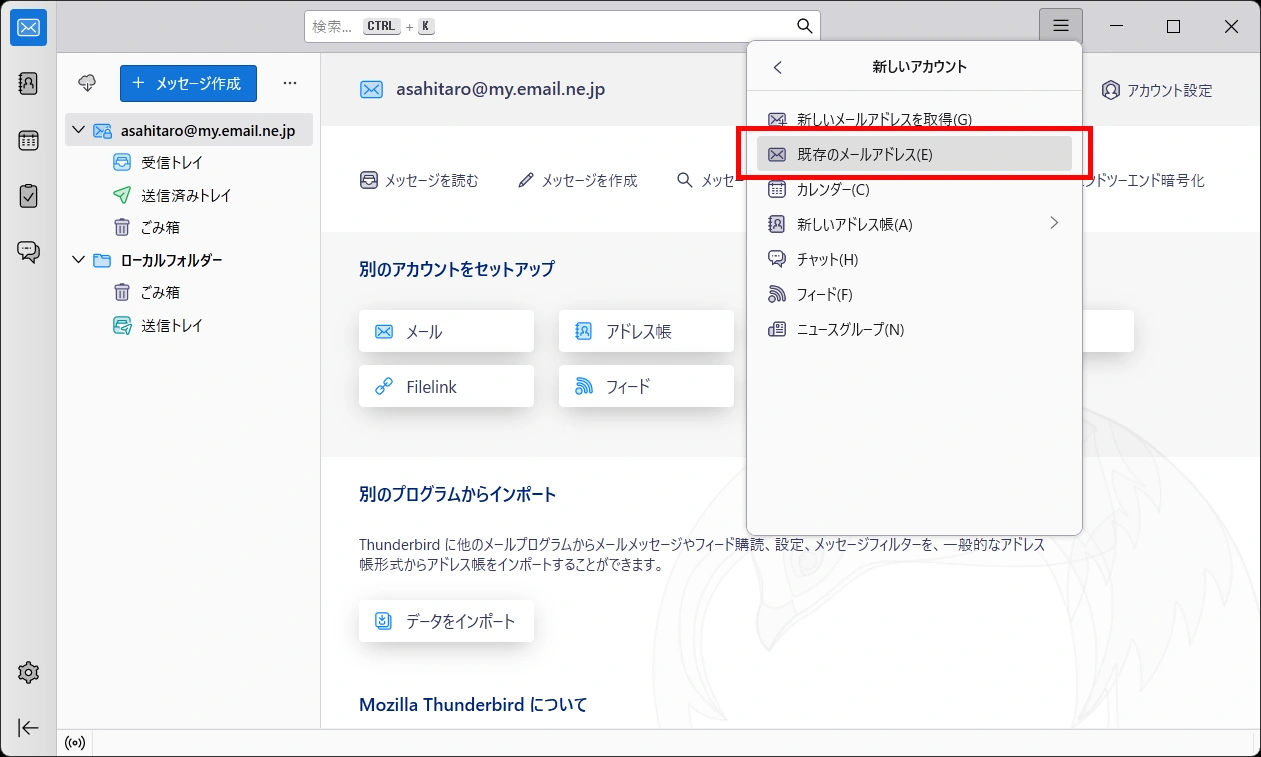
Choose 既存のメールアドレス (= Existing Mail Address) in the menu.
-
STEP3
既存のメールアドレスのセットアップ (= Set Up Your Existing Email Address)
Refer to the following table to set up, and click 手動設定 (= Configure manually).
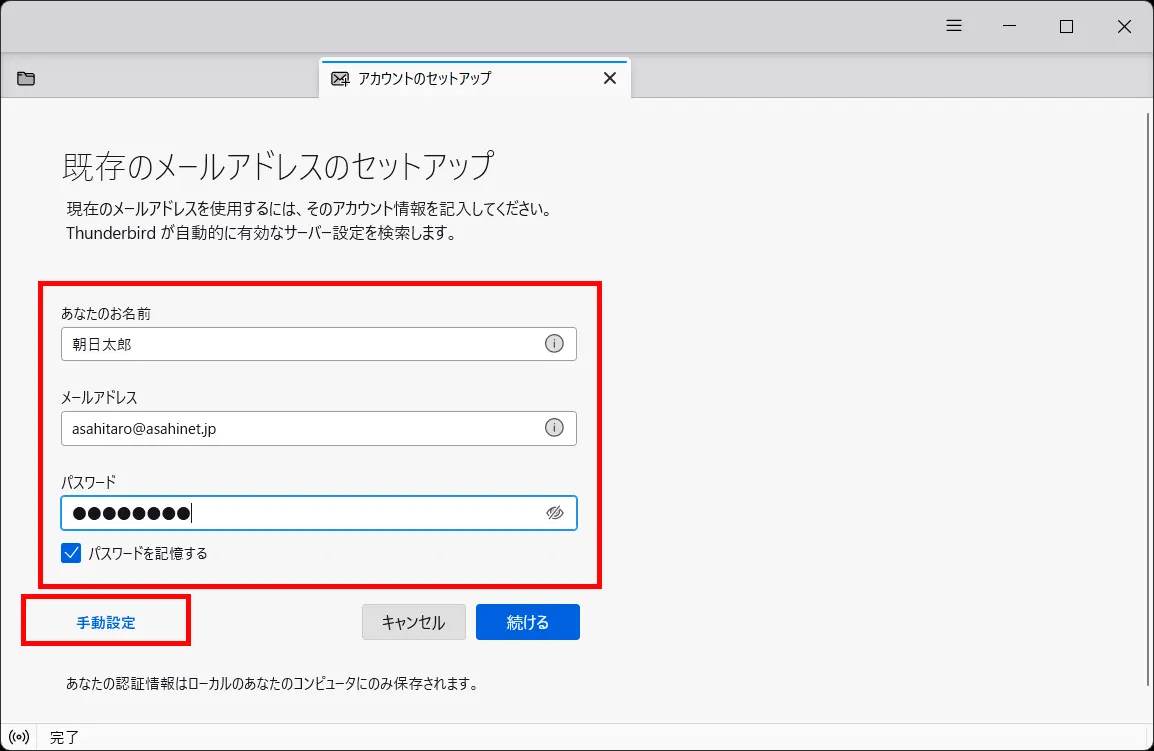
あなたのお名前 (= Your full name) Your name (any name)
E.g., Asahi, Taroメールアドレス (= Email address) [Your email address]
E.g., asahitaro@asahinet.jpパスワード (= Password) [Password corresponds to the Asahi Net ID] - *Enter all in lowercase characters.
パスワードを記録する (= Remember password) Place a check mark (recommended) -
STEP4
手動設定 (= Manual configuration)
After setting up, click 完了 (= Done).
- *If you cannot click the grayed-out 完了 (= Done), click 再テスト (= Re-test) and then click 完了 (= Done).
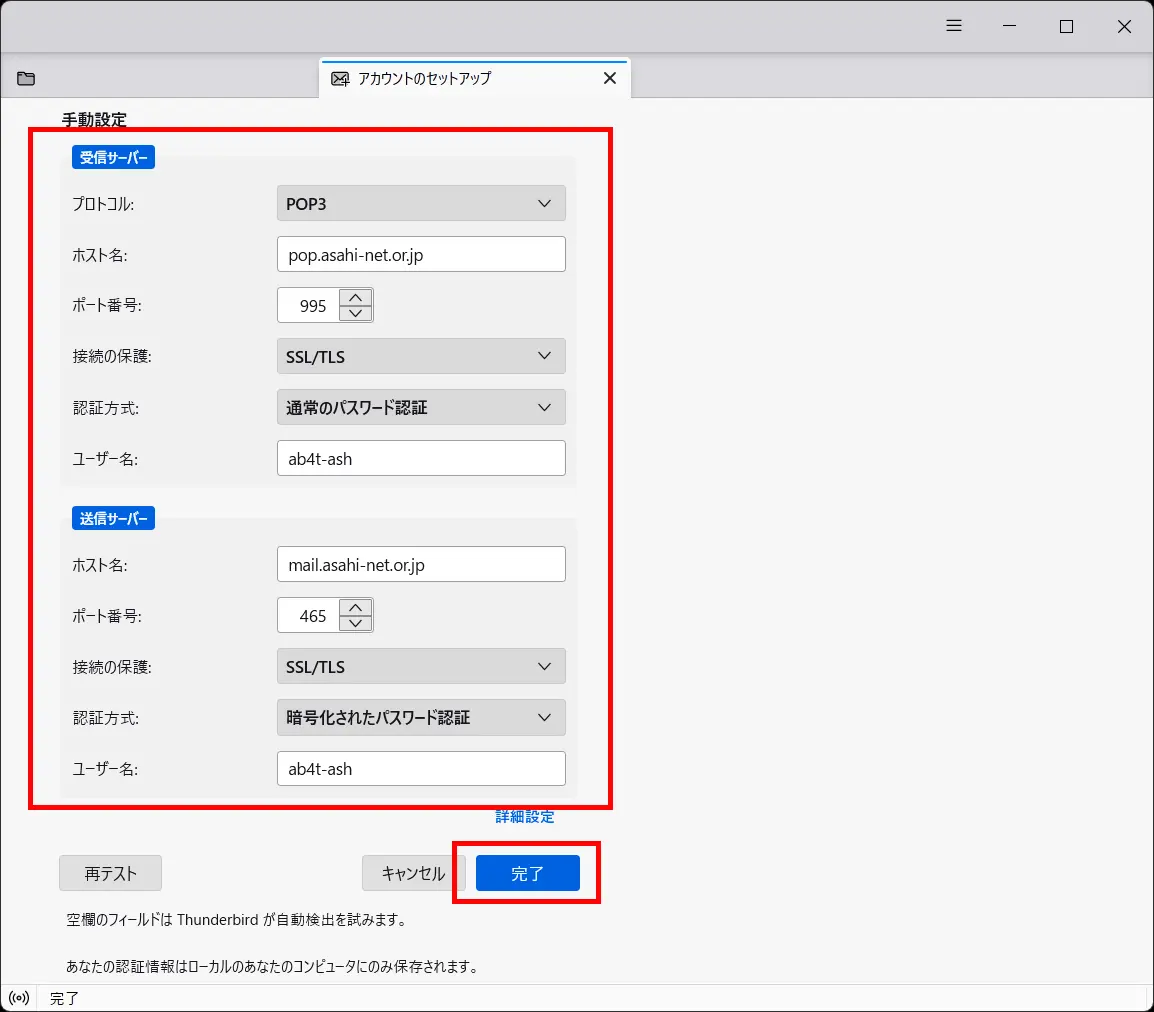
受信サーバー (= INCOMING SERVER)
プロトコル (= Protocol) POP3 ホスト名 (= Hostname) pop.asahi-net.or.jp ポート (= Port) 995 接続の保護 (= Connection security) SSL/TLS 認証方式 (= Authentication method) 通常のパスワード認証 (= Normal password) ユーザー名 (= Username) Corresponding ID
E.g., ab4t-ash, u1234ab567c, m1234ab567c送信サーバー (= OUTGOING SERVER)
ホスト名 (= Hostname) mail.asahi-net.or.jp ポート (= Port) 465 接続の保護 (= Connection security) SSL/TLS 認証方式 (= Authentication method) 暗号化されたパスワード認証 (= Encrypted password) ユーザー名 (= Username) Corresponding ID
E.g., ab4t-ash, u1234ab567c, m1234ab567c -
STEP5
Confirm Account Settings
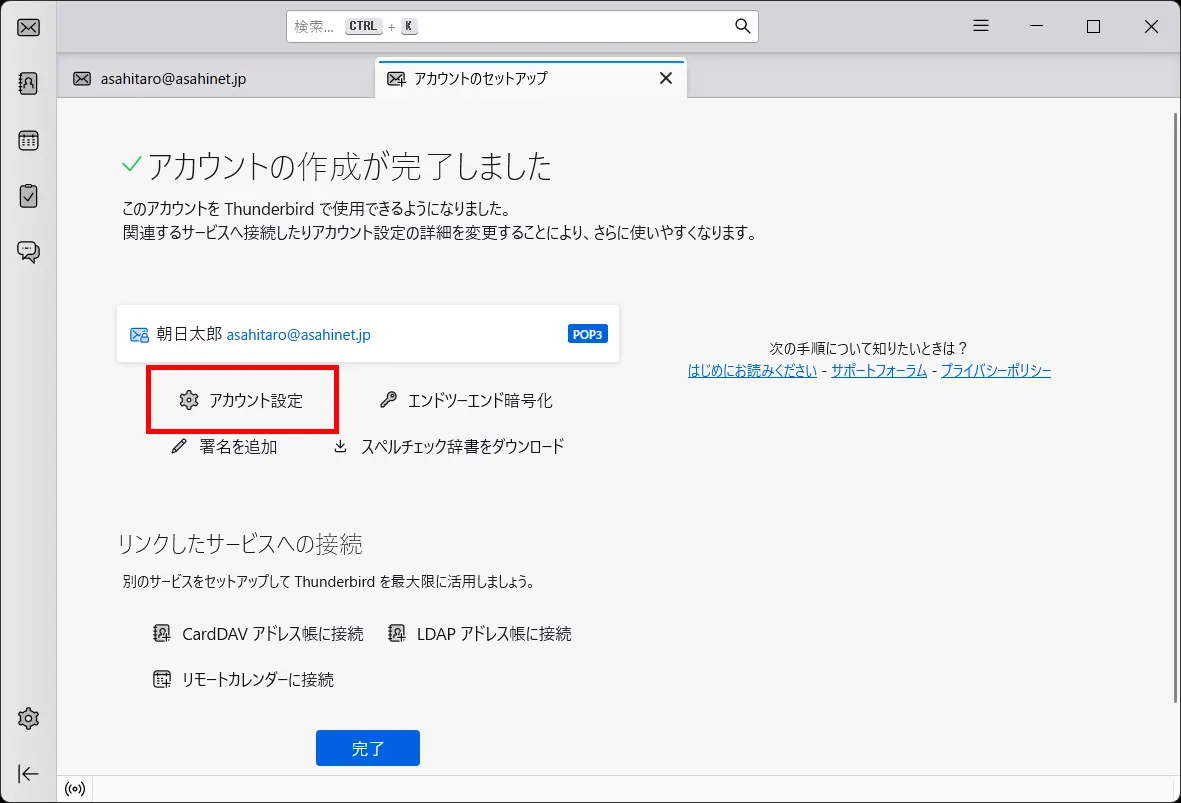
When the message “アカウントの作成が完了しました (= Account successfully created)” appears, click アカウント設定 (= Account Settings).
-
STEP6
アカウント設定 (= Account Settings)
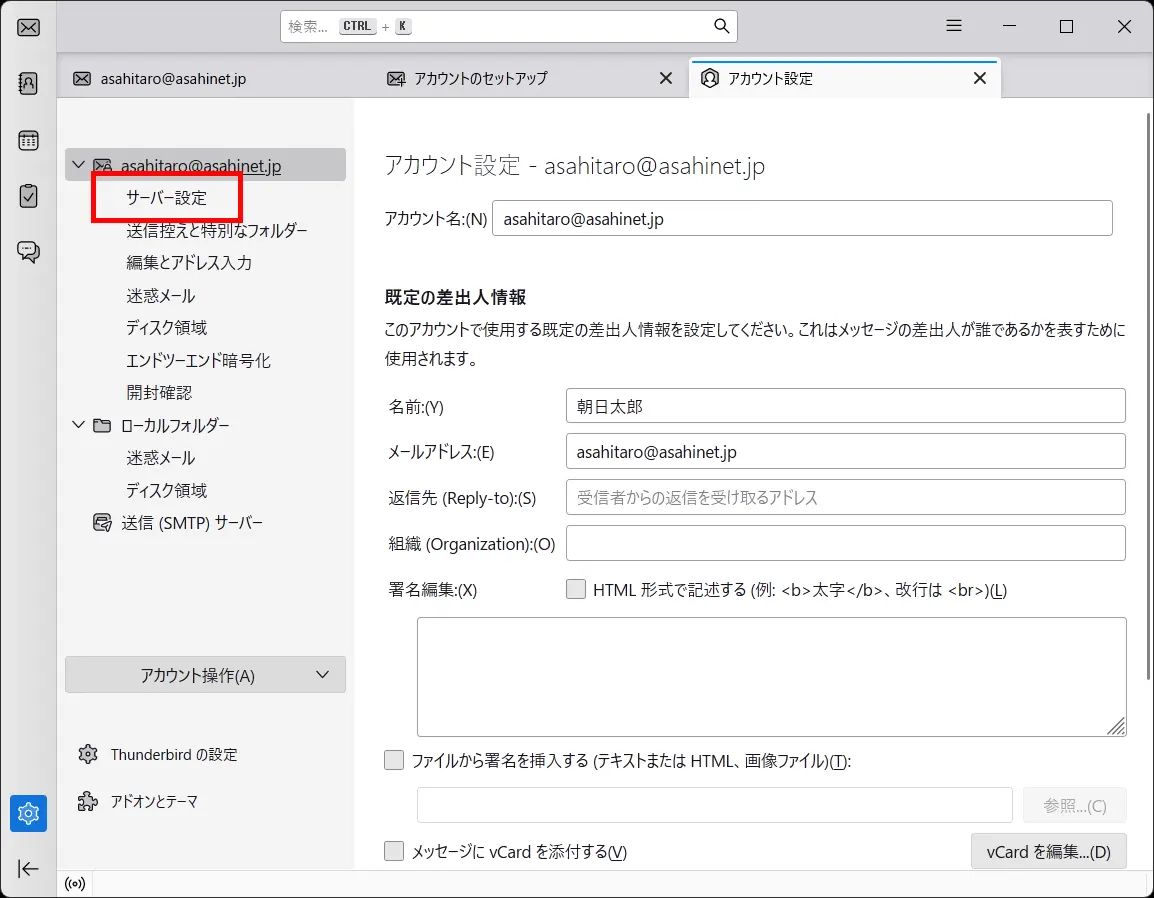
When the アカウント設定 (= Account Settings) window appears, click サーバー設定 (= Server Settings) under the account which you just created from in the menu in the left-hand side of the window.
-
STEP7
サーバー設定 (= Server Settings)
Refer to the following to set up, and click x on the アカウント設定 (= Account Settings) tab.
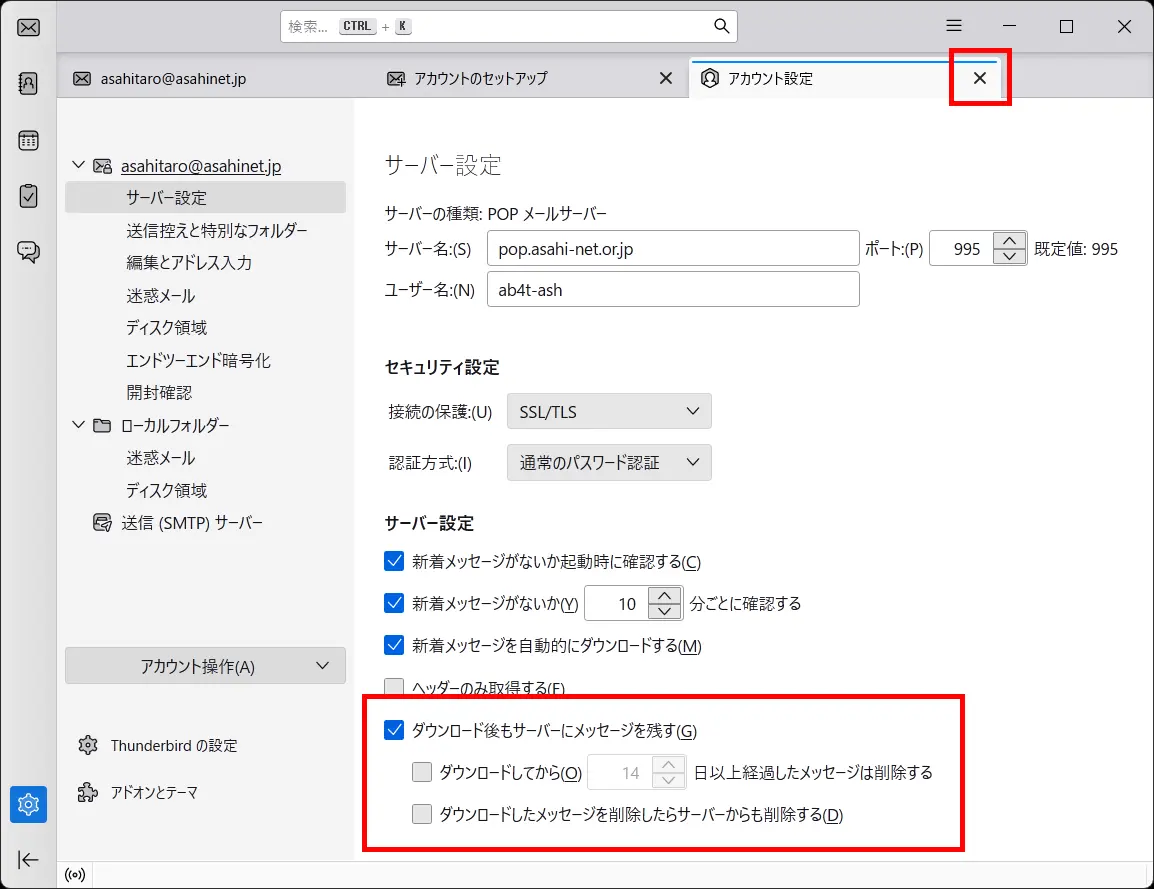
ダウンロード後もサーバーにメッセージを残す (= Leave messages on server) On your preference - *If you are using an email address attached to the same ID for IMAP or Web Mail, put a check mark.
ダウンロードしてから○日以上経過したメッセージは削除する (= Leave messages on server for at most xx days) On your preference - *If you are using an email address attached to the same ID for IMAP or Web Mail, do not put a check mark.
ダウンロードしたメッセージを削除したらサーバーからも削除する (= Leave messages on server until I delete them) On your preference -
STEP8
Account Created
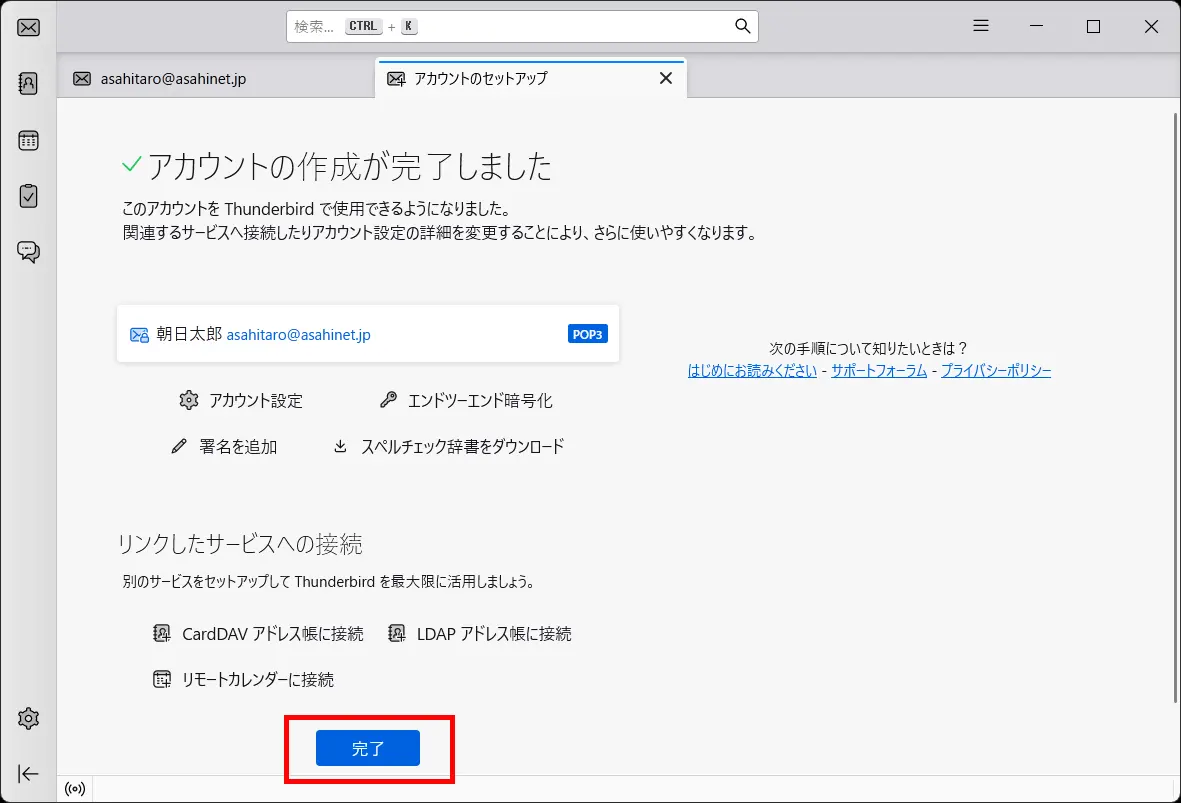
The message “アカウントの作成が完了しました (= Account successfully created)” appears again. Click 完了 (= Done) to finish.
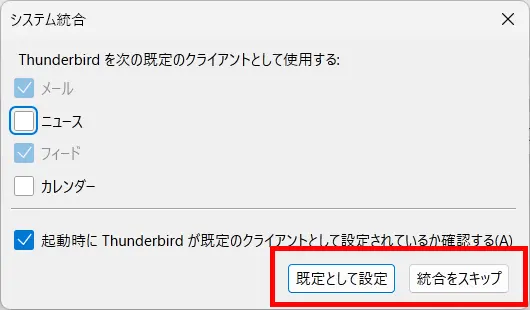
- システム統合 (= System Integration)
-
If the window below appears, set this option on according to your preference.
- Reference (JP-EN translation)
-
Thunderbirdを次の規定のクライアントとして使用する: Use Thunderbird as the default client for: メール E-Mail ニュース Newsgroups フィード Feeds カレンダー Calendar 起動時にThunderbirdが既定のクライアントとして設定されているか確認する Always perform this check when starting Thunderbird 既定として設定 Set as Default 統合をスキップ Skip Integration
Setting up a new email account is done.