Create/Delete Settings for Outlook 2016
- The settings on this page show how to create new settings and delete settings on Microsoft Outlook 2016 for Windows.
- The items referred to with [ ] marks in this guide are unique to each customer.
In actual settings, please replace them with your own information. - The [ASAHI Net User ID] used in this guide as an example is [ab4t-ash].
- Settings for IMAP function could be found in the following page.
Mailer Setup: Before Setting Up
Adding a New Account
-
STEP1
Launching the software
From the Start screen
 or Desktop
  , launch Outlook 2016.
 -
STEP2
Startup
The appearance of the screen after startup differs depending on your Outlook 2016 version.
Configure your settings as indicated on the screen.If Welcome to Outlook appears (For Office 365)
If Welcome to Outlook appears, follow the procedure in Adding a New Account (For Office 365).
If Welcome to Outlook 2016 appears (For Office 2016)
If Welcome to Outlook 2016 appears, follow the procedure in Adding a New Account (For Office 2016).

If main window of the Outlook 2016 appears
If the main window for Outlook 2016 appears, please follow the steps below:
Click File in the top left.

Select Add Account.

After that, follow the procedure in Adding a New Account (For Office 365). When Office 2016 is used, follow the procedure starting at Auto Account Setup of Adding a New Account (For Office 2016).
Adding a New Account (For Office 365)
-
STEP1
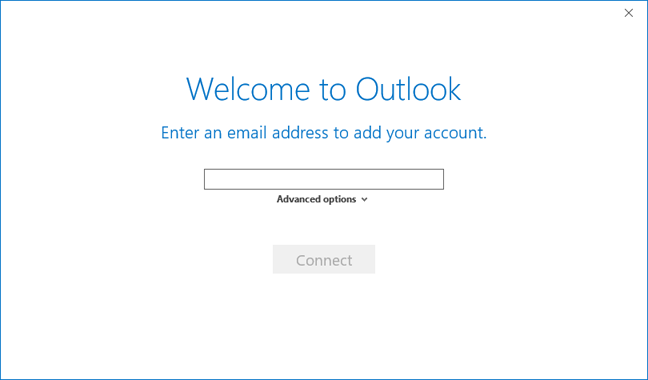
Welcome to Outlook screen
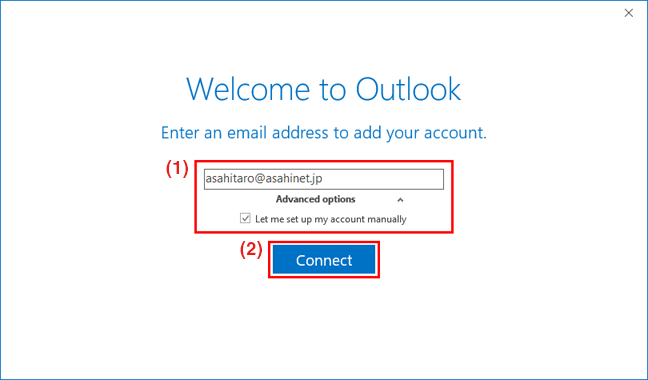
Click Advanced options.
Email Address [your email address]
e.g., asahitaro@asahinet.jpLet me set up my account manually Check the box. (1) Set as shown above, and then (2) click Connect.
-
STEP2
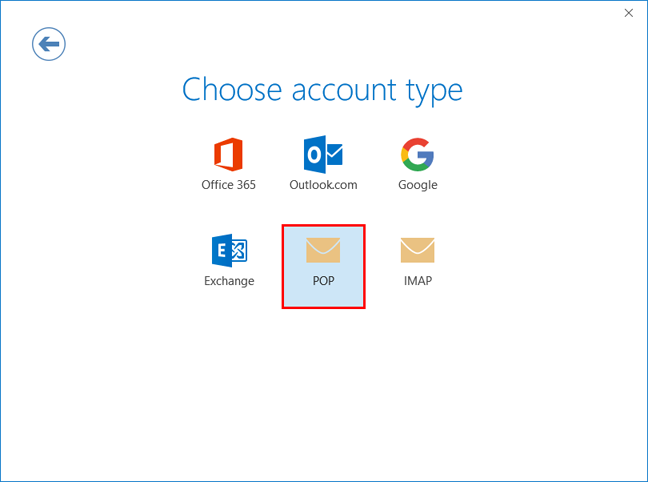
Choose account type
Click POP.
-
STEP3
POP account settings
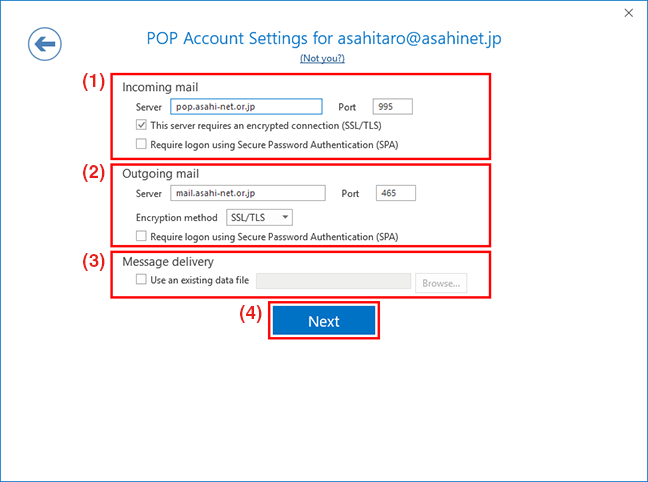
(1) Incoming mail
Server pop.asahi-net.or.jp Port 995 This server requires an encrypted connection (SSL/TLS) Check the box. - *POP over SSL/TLS
Require logon using Secure Password Authentication (SPA) Leave unchecked. (2) Outgoing mail
Server mail.asahi-net.or.jp mails.asahi-net.or.jp - * If your service includes Email Virus Check
Port 465 Encryption method Select SSL/TLS. - *SMTP over SSL/TLS
Require logon using Secure Password Authentication (SPA) Leave unchecked. (3) Message delivery
Use an existing data file (optional) - *Check this option when loading email data from other devices. Furthermore, Asahi Net cannot provide guidance on how to load email data.
(1) - (3) Set as shown above, and then (4) click Next.
- *Settings for IMAP function could be found in the following page.
Mailer Setup: Before Setting Up
-
STEP4
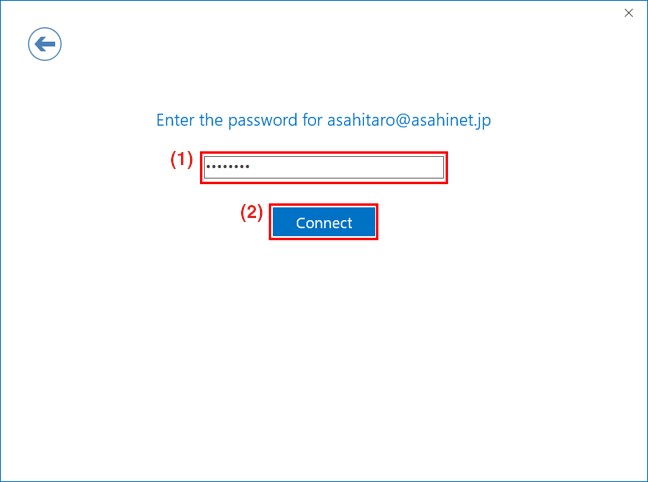
Enter the password
(1) Enter [Asahi Net password assigned to your Asahi Net ID], and then (2) click Connect.
-
STEP5
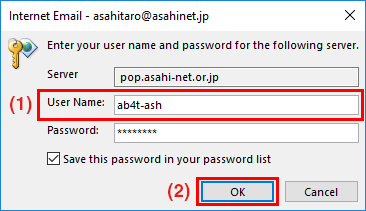
Enter the ID
When the Internet Email window appears, (1) change User Name to [your Asahi Net User ID] (e.g., ab4t-ash) and then (2) click OK.
-
STEP6
Account setup is complete screen
(1) Uncheck Set up Outlook Mobile on my phone, too and then (2) click OK.

Adding a New Account (For Office 2016)
-
STEP1
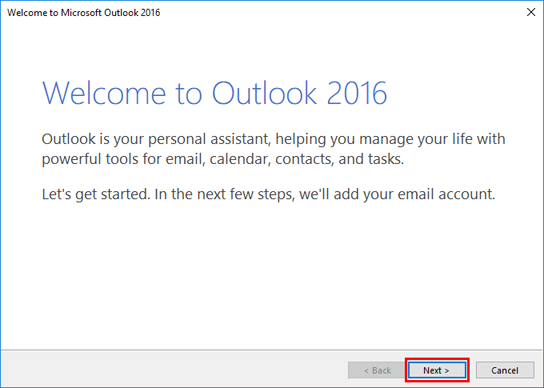
Welcome to Outlook 2016 screen
Click Next.
-
STEP2
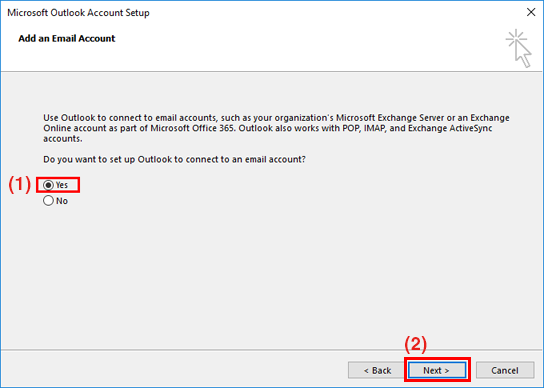
Add an Email Account
(1) Select Yes and then (2) click Next.
-
STEP3
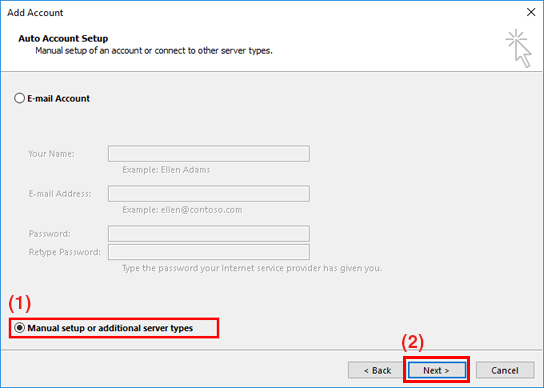
Auto Account Setup
(1) Select Manual setup or additional server types and then (2) click Next.
-
STEP4
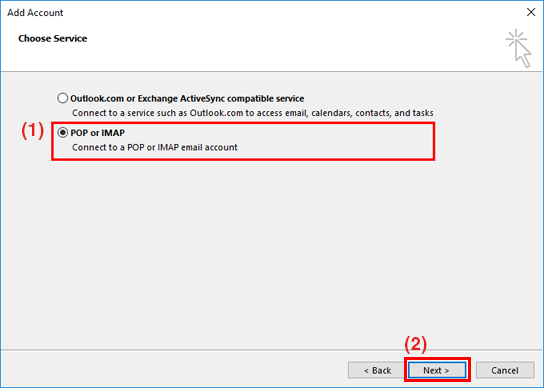
Choose Service
(1) Select POP or IMAP and then (2) click Next.
-
STEP5
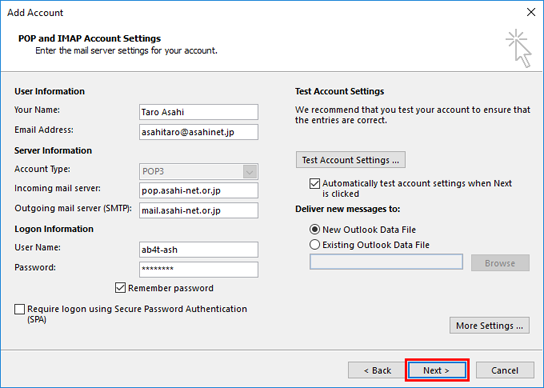
POP and IMAP Account Settings
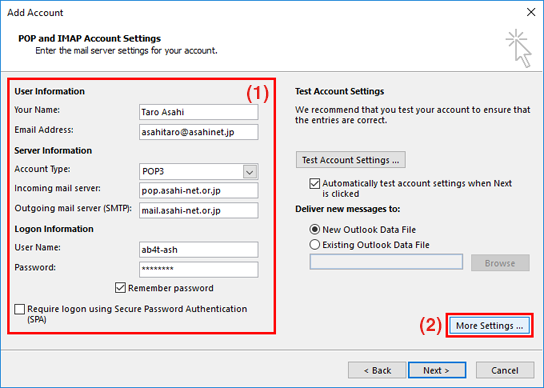
Your Name Your name (optional)
e.g., Taro AsahiEmail Address [your email address]
e.g., asahitaro@asahinet.jpAccount Type POP3 Incoming mail server (POP3) pop.asahi-net.or.jp Outgoing mail server (SMTP) mail.asahi-net.or.jp mails.asahi-net.or.jp - *If your service includes Email Virus Check
User Name [your Asahi Net User ID]
e.g., ab4t-ashPassword [the Asahi Net password assigned to your Asahi Net User ID] - *Enter in lowercase (small) characters.
Remember password (optional) Require logon using Secure Password Authentication (SPA) Leave unchecked. (1) Set as shown above, and then (2) click More Settings.
- *Settings for IMAP function could be found in the following page.
Mailer Setup: Before Setting Up
-
STEP6
Outgoing Server tab
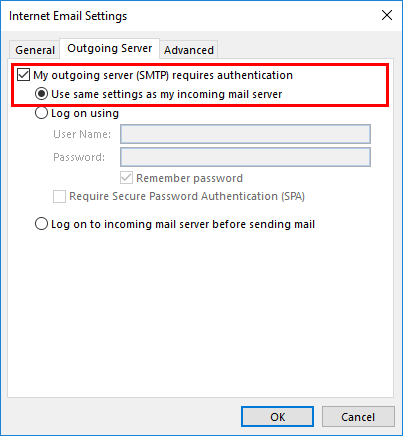
Set the items in the General tab to your choice.
Switch to the Outgoing Server tab.My outgoing server (SMTP) requires authentication Check the box. - *SMTP Authentication
Use same settings as my incoming mail server Click to enable. Set as shown above, and then switch to the Advanced tab.
-
STEP7
Advanced tab
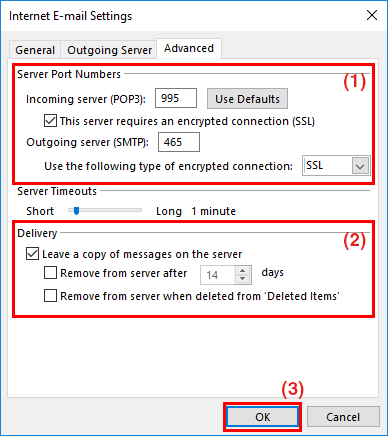
(1) Server Port Numbers
Incoming server 995 This server requires an encrypted connection (SSL) Click the box. - *POP over SSL/TLS
Outgoing server 465 Use the following type of encrypted connection Select SSL in the pull-down menu. - *SMTP over SSL/TLS
(2) Delivery
Leave a copy of messages on the server (optional) (1) - (2) Set as shown above.
After your settings are complete, (3) click OK. -
STEP8
POP and IMAP Account Settings
When returned to the settings screen, click Next.
-
STEP9
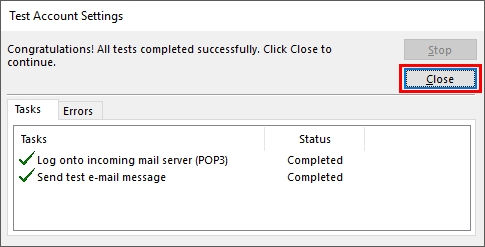
Test Account Settings
The account testing begins. Once completed, click Close.
-
STEP10
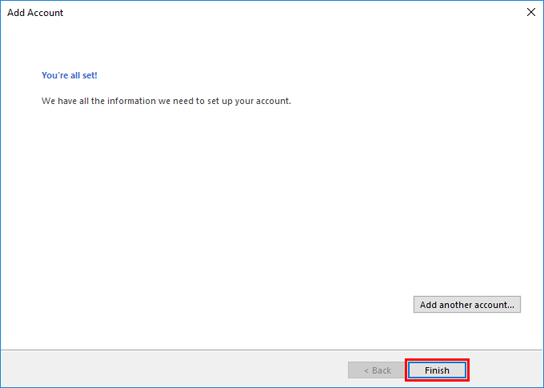
Settings completed
Click Finish.
Deleting an Account
If any of the following cases applies, it may be better to delete unnecessary accounts.
- There is more than one account for one mailbox in the email software (an account is recreated).
- There are settings for a mailbox that cannot be used in the email software.
-
STEP1
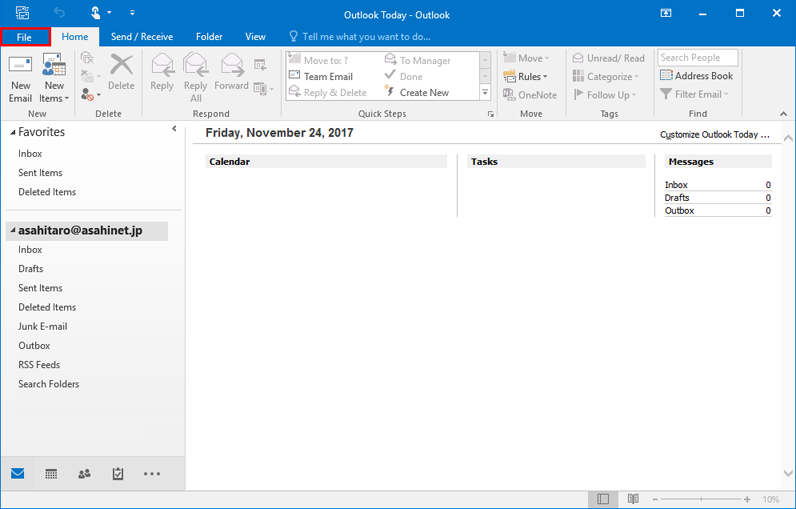
Click File in the top left.
-
STEP2
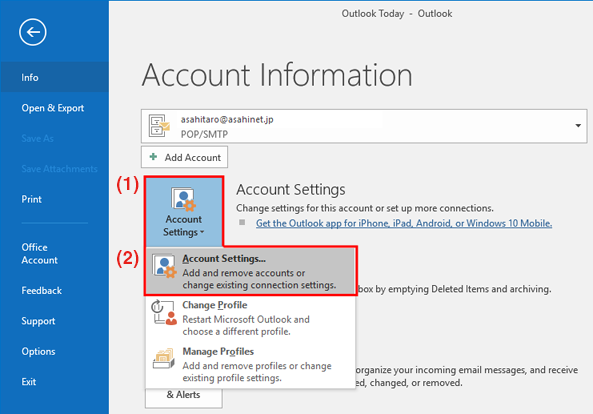
Under the (1) Account Settings icon, (2) select Account Settings.
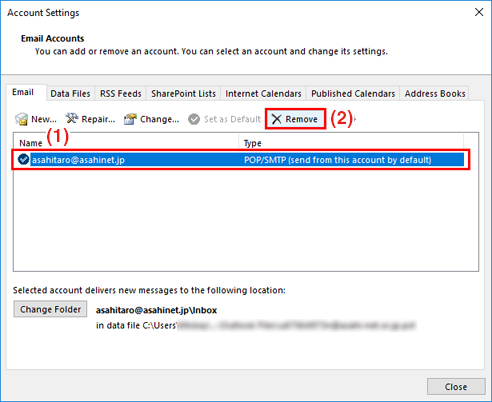
 STEP3
STEP3(1) Select an account to delete (e.g., asahitaro@asahinet.jp), and then (2) click Remove.
 STEP4
STEP4Click Yes.
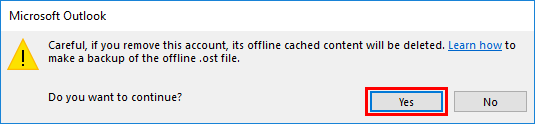
The account is deleted.