How to Complete macOS v10.15 Dial-up Connection Settings New Settings
Before Making Settings
Connect mac and analog modem to complete necessary wiring.
New Settings
-
STEP1
System Preferences Settings
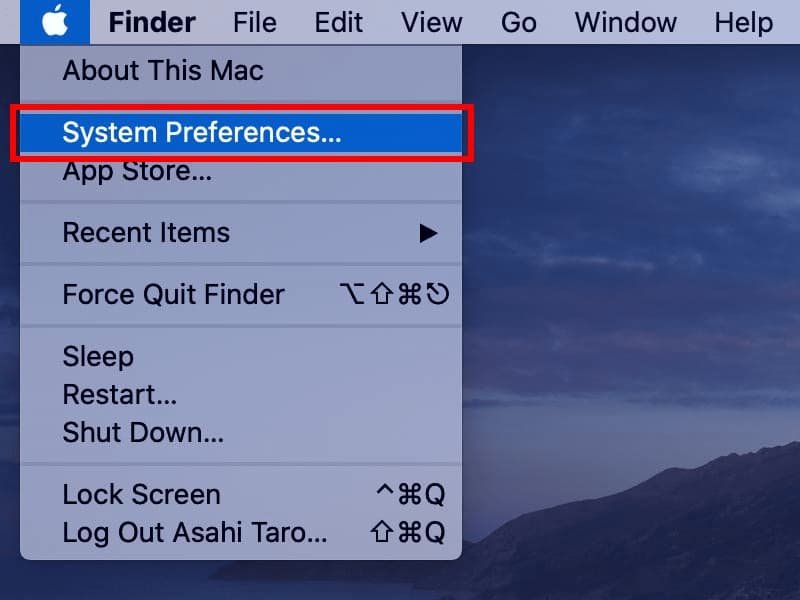
Select System Preferences from Apple menu. (Or click System Preferences in Dock.)

-
STEP2
Network
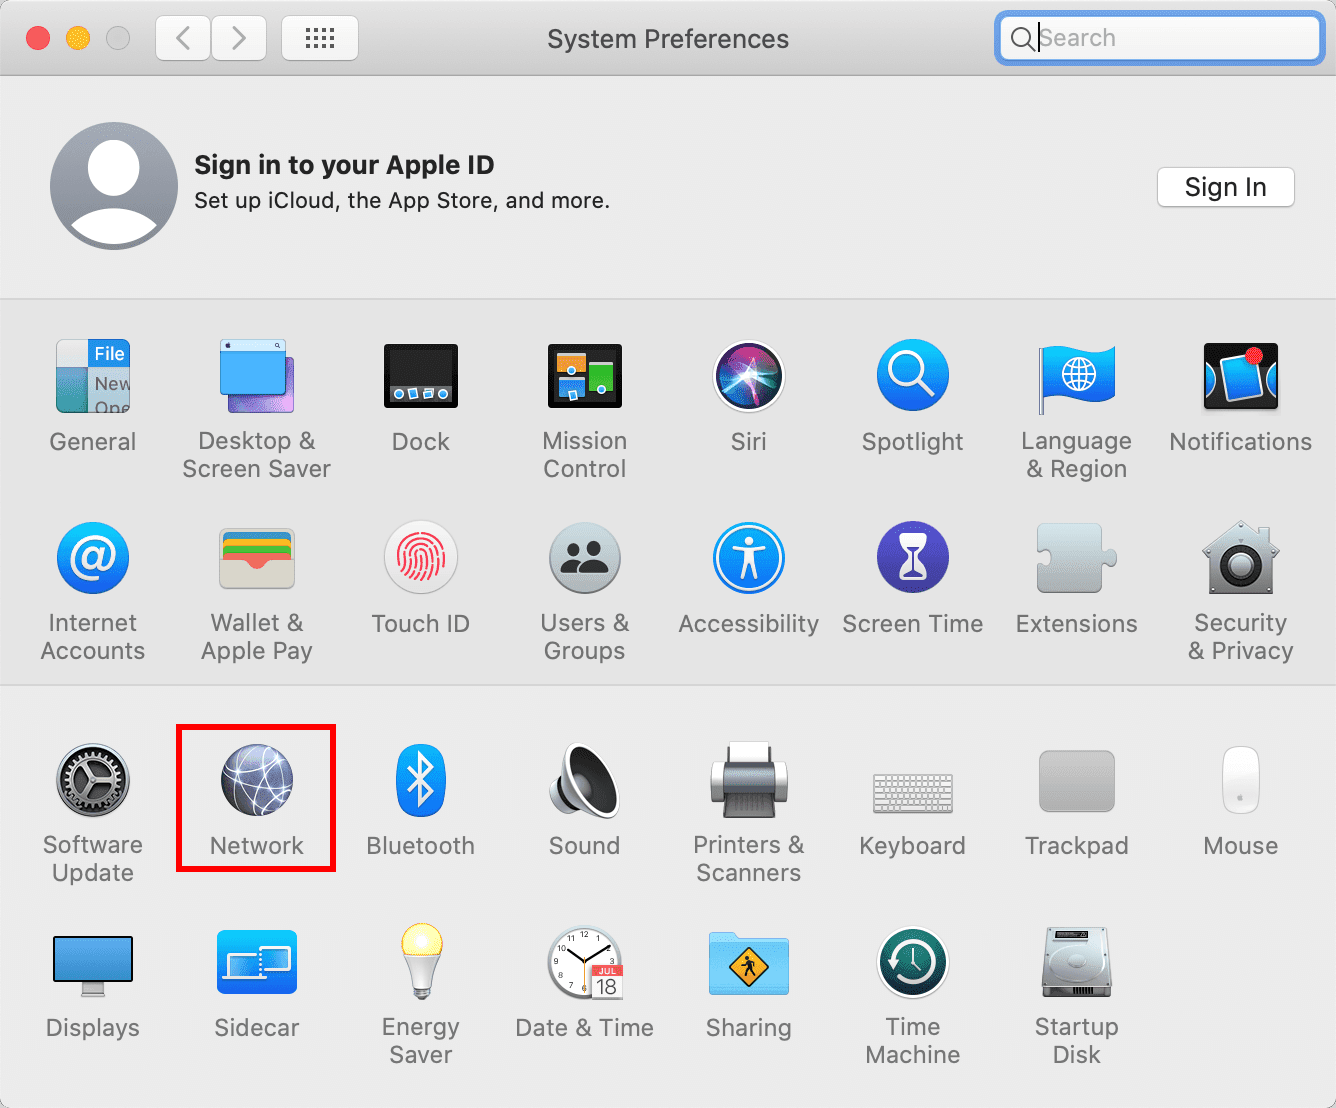
Click Network in System Preferences.
-
STEP3
Select modem
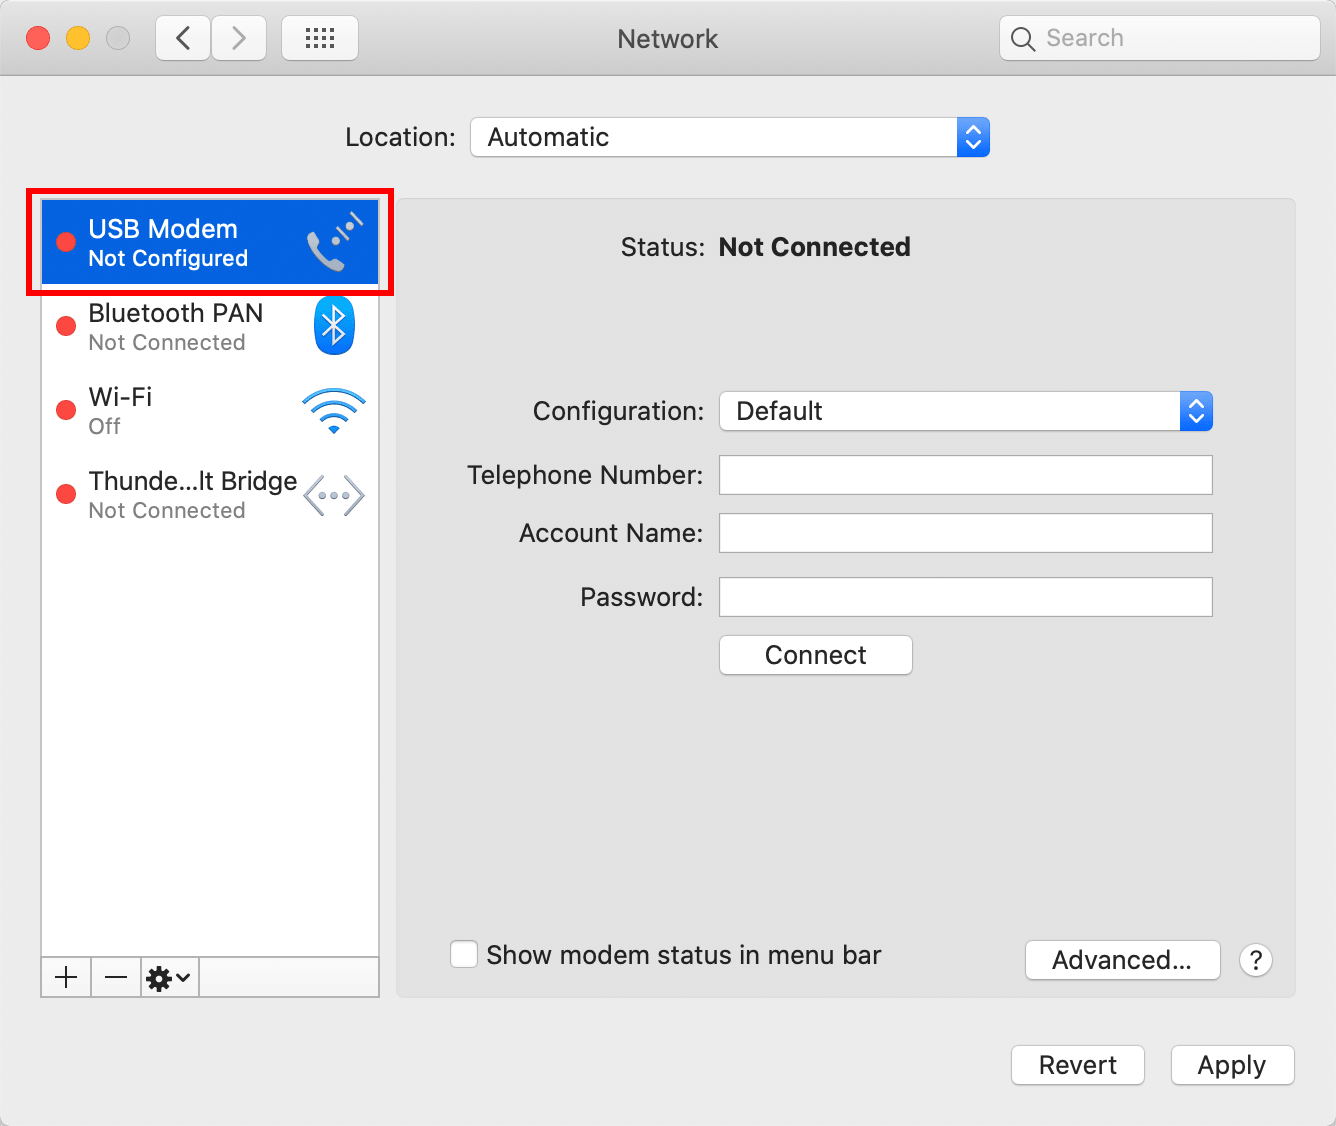
Select the modem you are using from the modem list.
-
STEP4
Enter
Click Advanced… after entering the values.
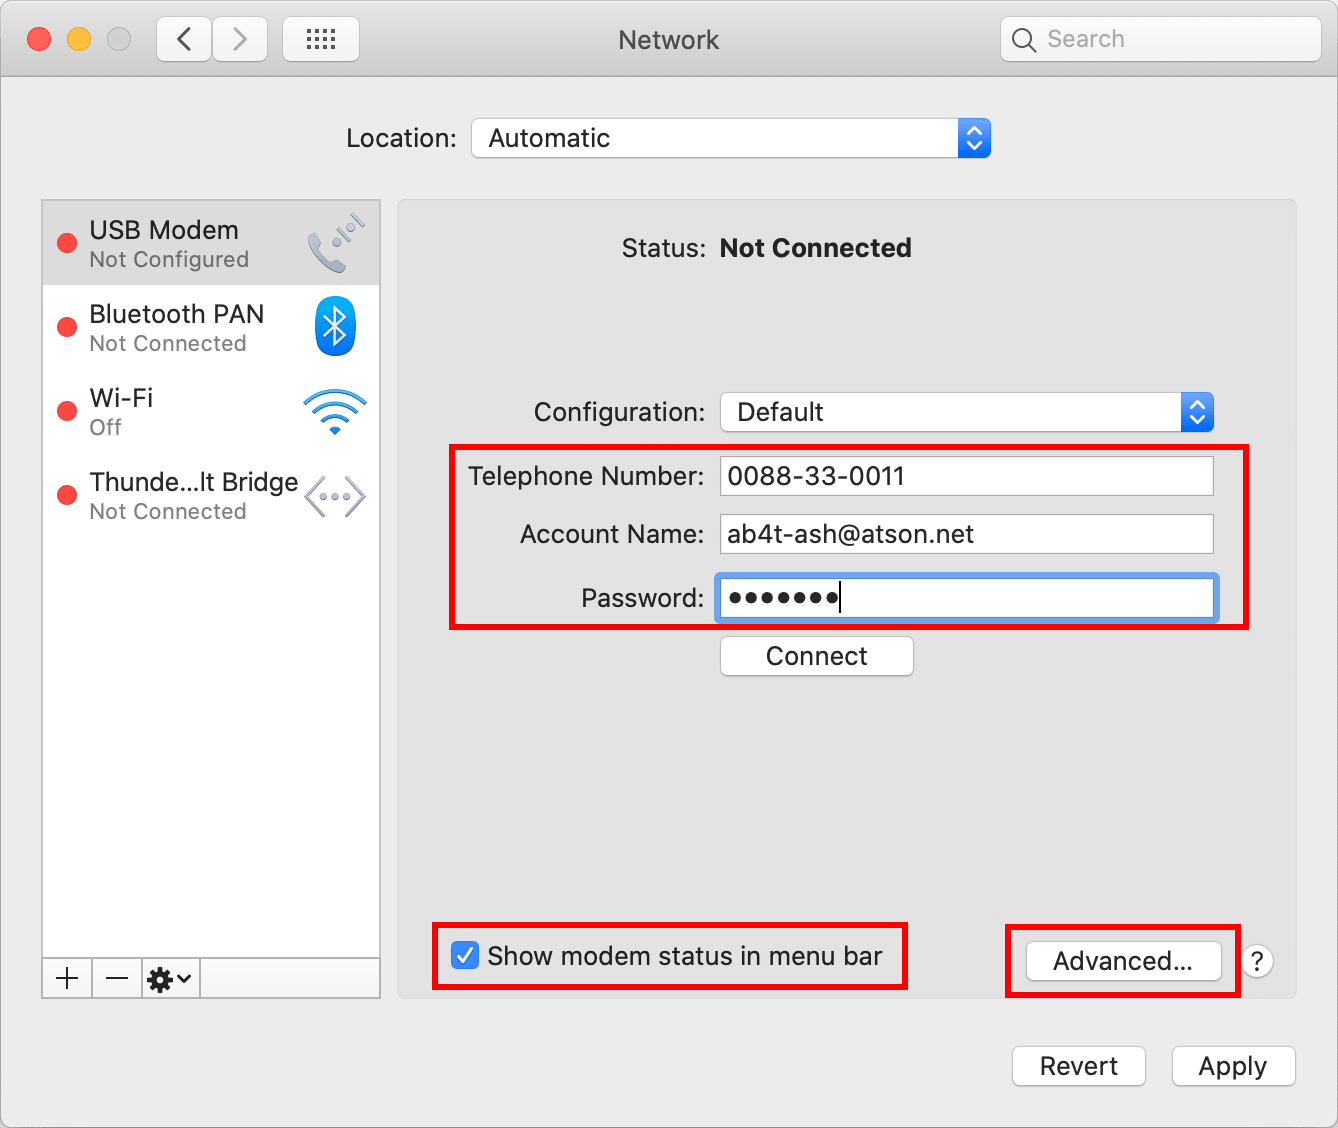
Telephone Number 0570-055-027 Account Name Asahi Net ID@atson.net
(E.g., ab4t-ash@atson.net)Password Asahi Net password corresponding to the ID
(Use lowercase characters)Connection Name Any name (E.g., Dial-up connection) Show modem status in menu bar Put a check mark -
STEP5
Modem
Click Modem.
For Dialing, select Tone or Pulse in accordance with the analog phone line you are using. For ISDN, select Tone.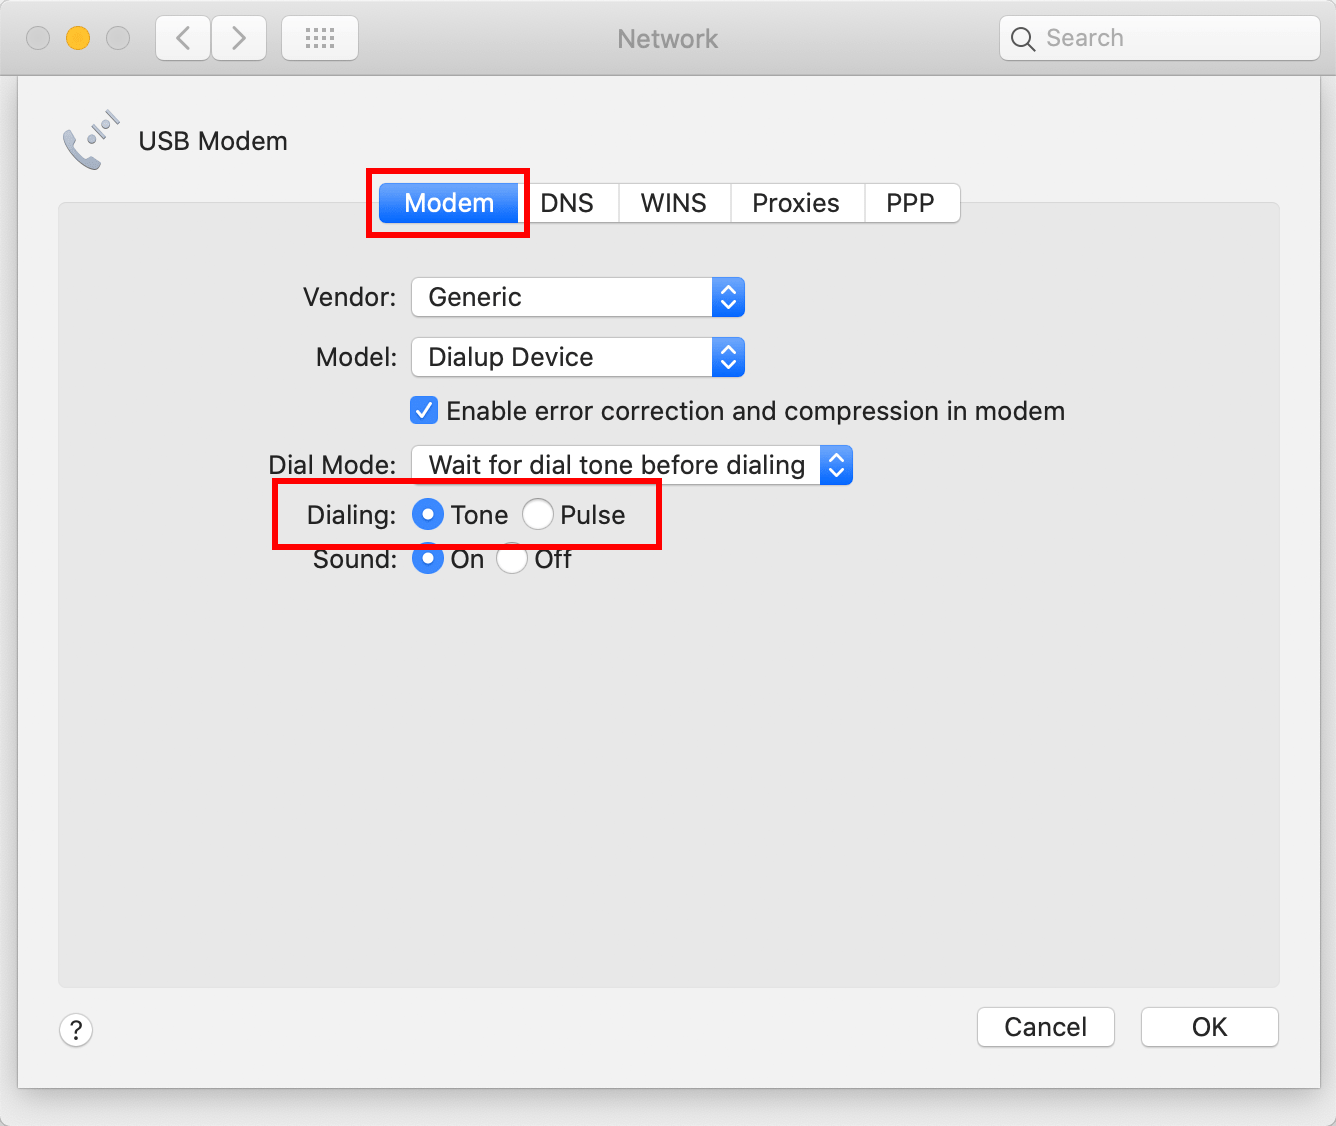
-
STEP6
DNS
Click DNS.
Leave the field for DNS Servers and Search Domains blank.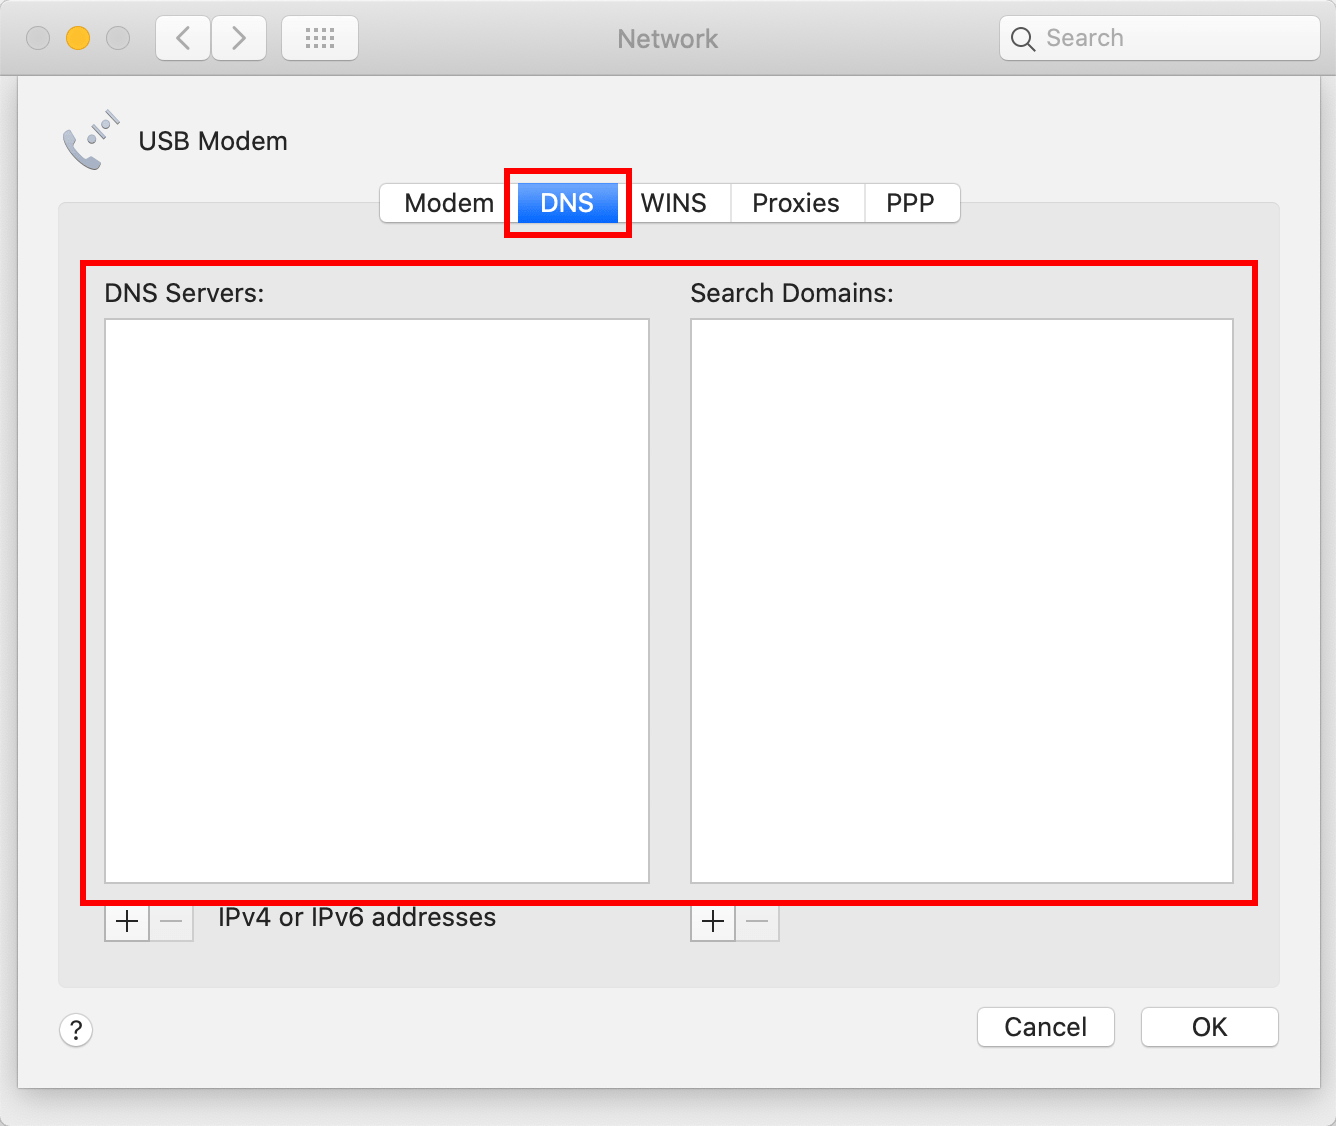
-
STEP7
WINS
Click WINS.
Use default name for NetBOS Name and Workgroup. Also, leave the field for WINS Servers blank.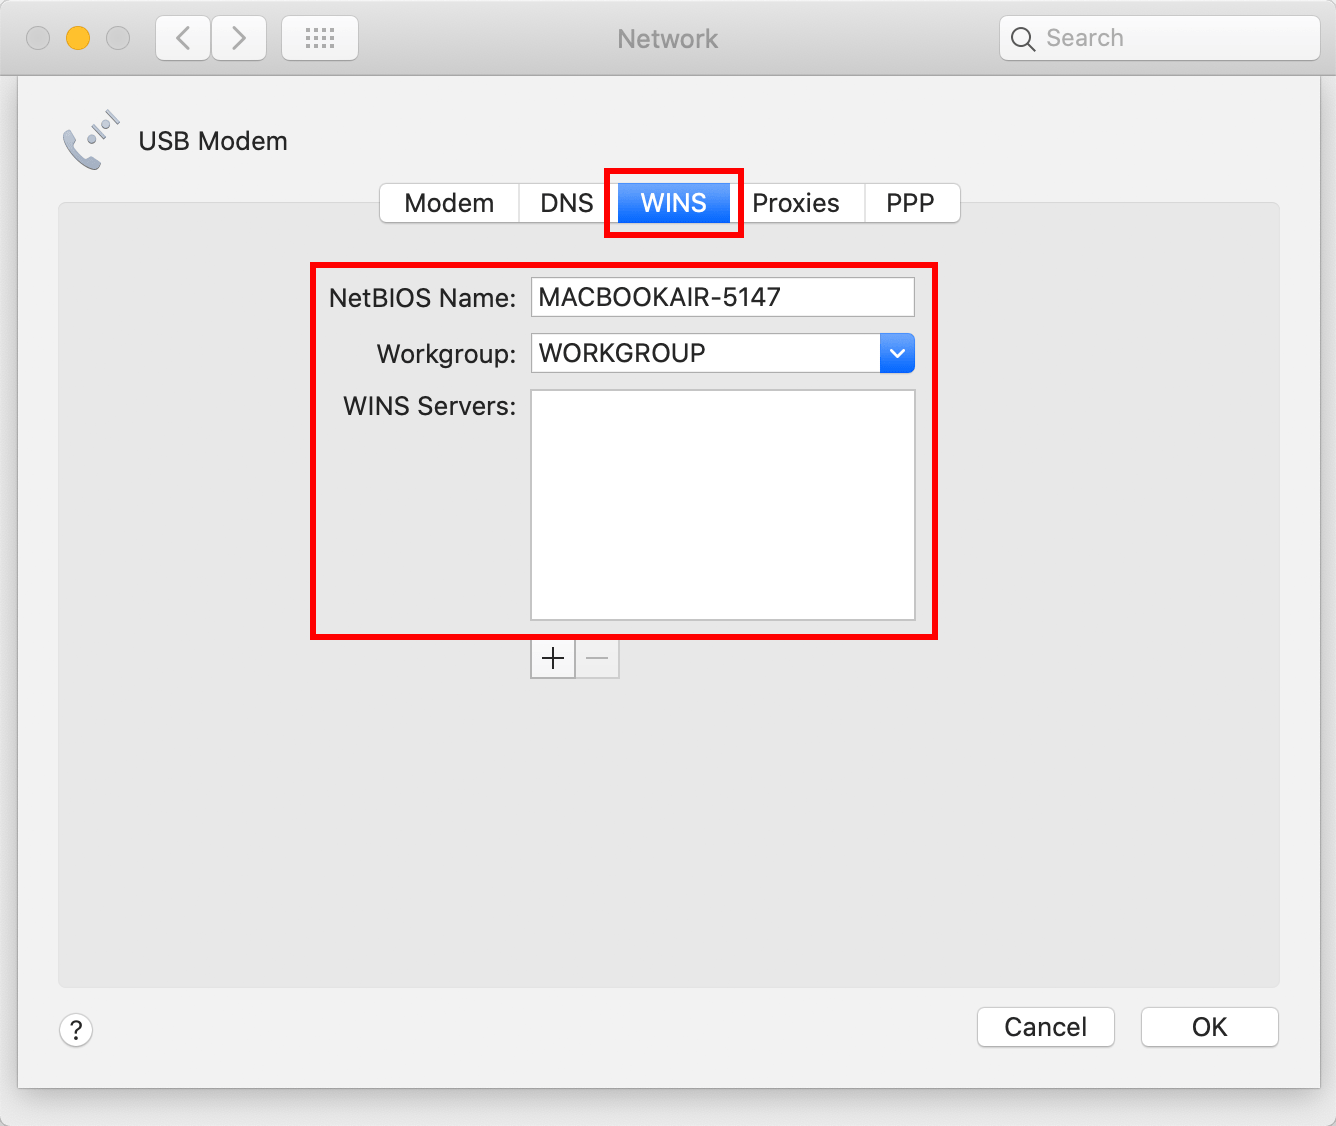
-
STEP8
Proxies
Click Proxies.
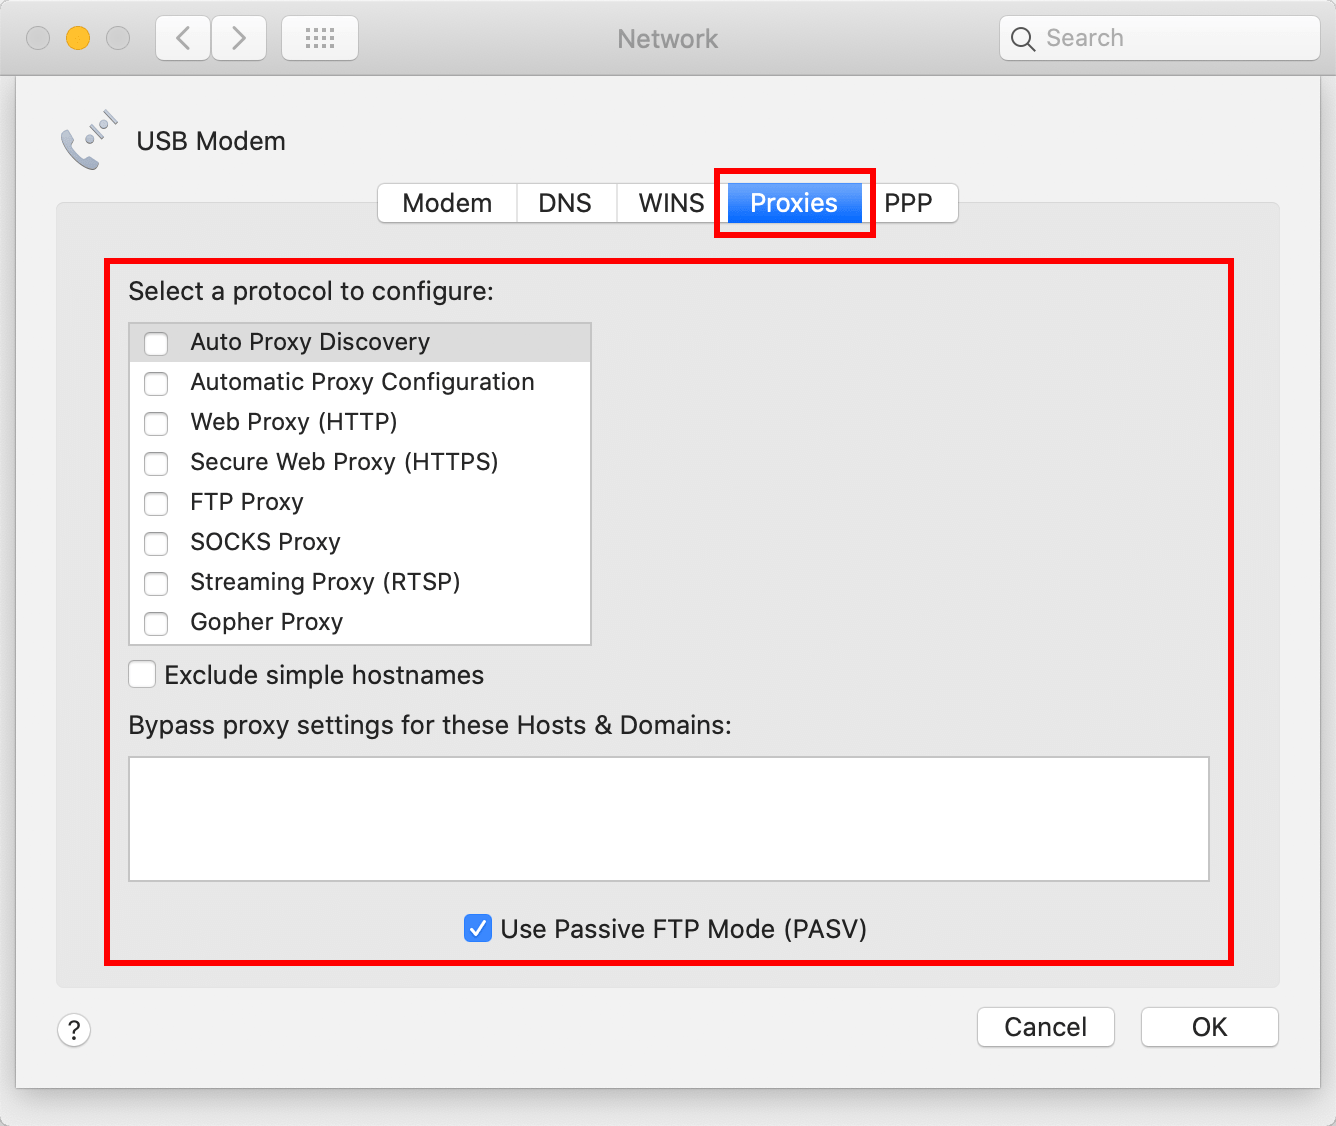
Select a protocol to configure Remove all check marks Exclude simple hostnames Remove the check mark Bypass proxy settings for these Hosts & Domains Leave the field blank Use Passive FTP Mode (PASV) Put a check mark -
STEP9
PPP
Click PPP.
Use default settings for each check box.
After checking the settings, click OK.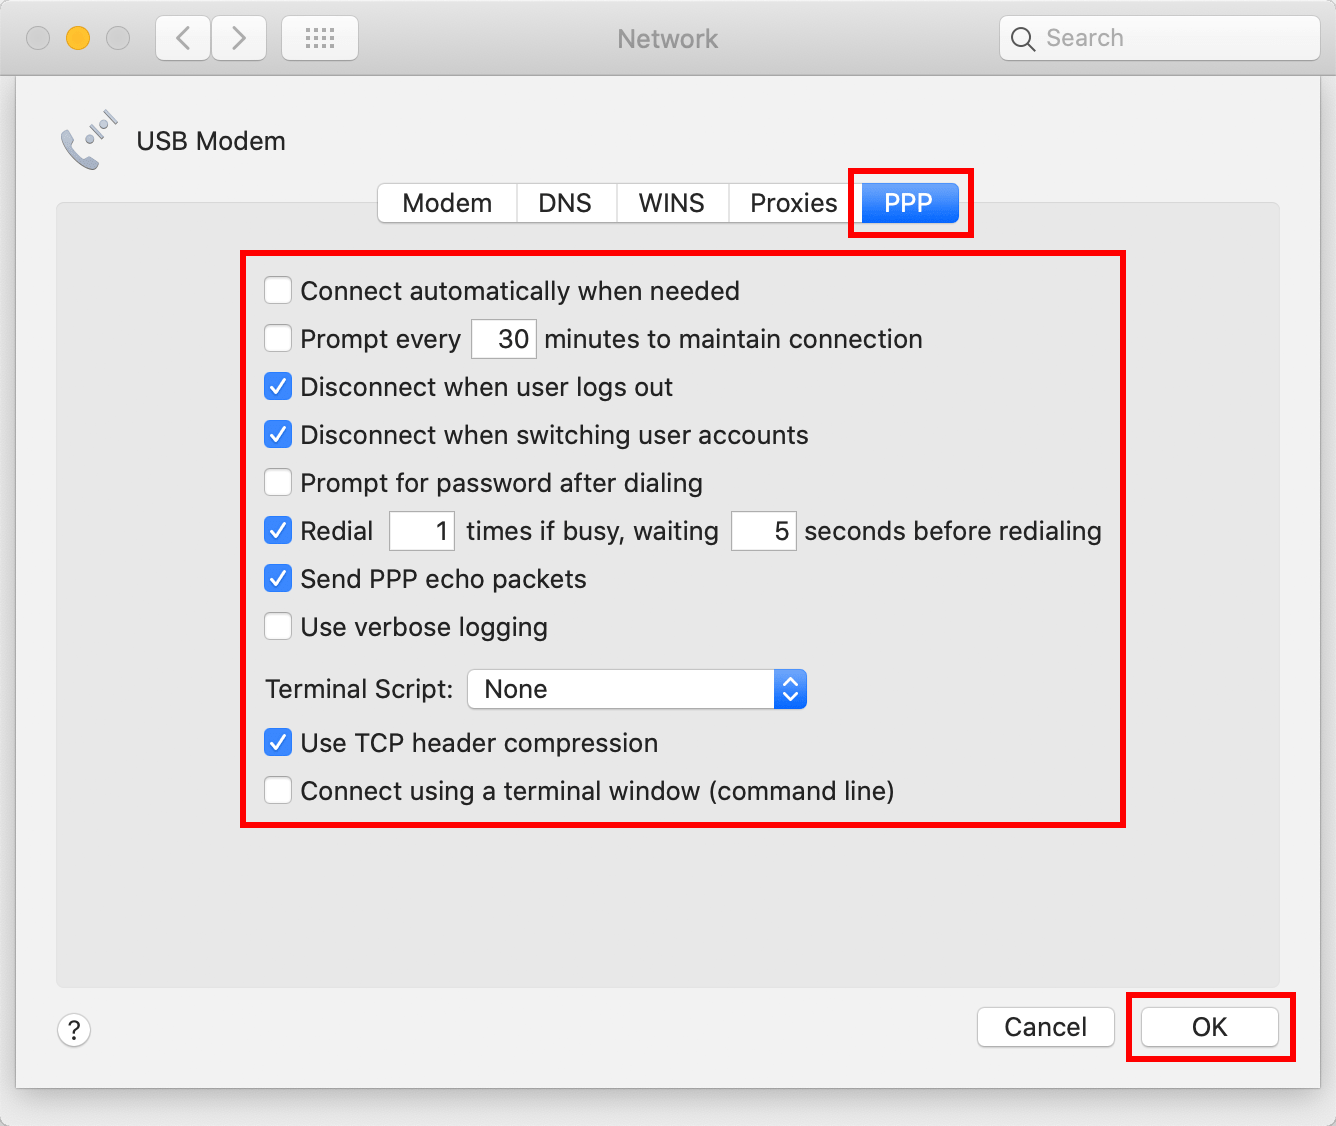
-
STEP10
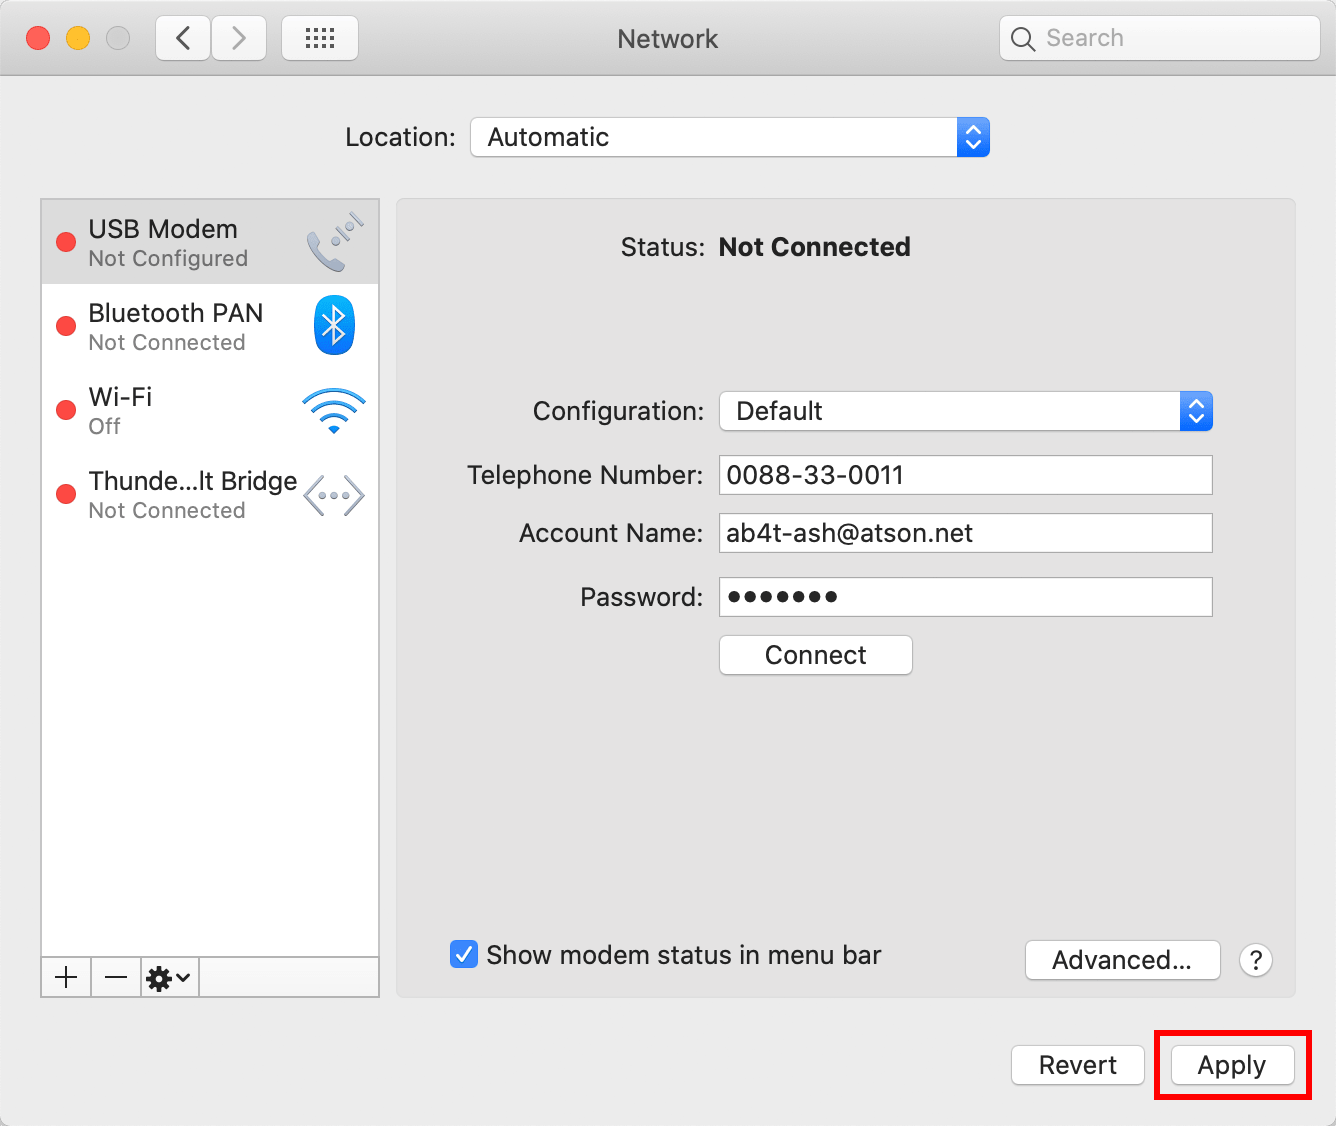
Apply
After returning to the Network window, click Apply.
-
STEP11
Connection Test
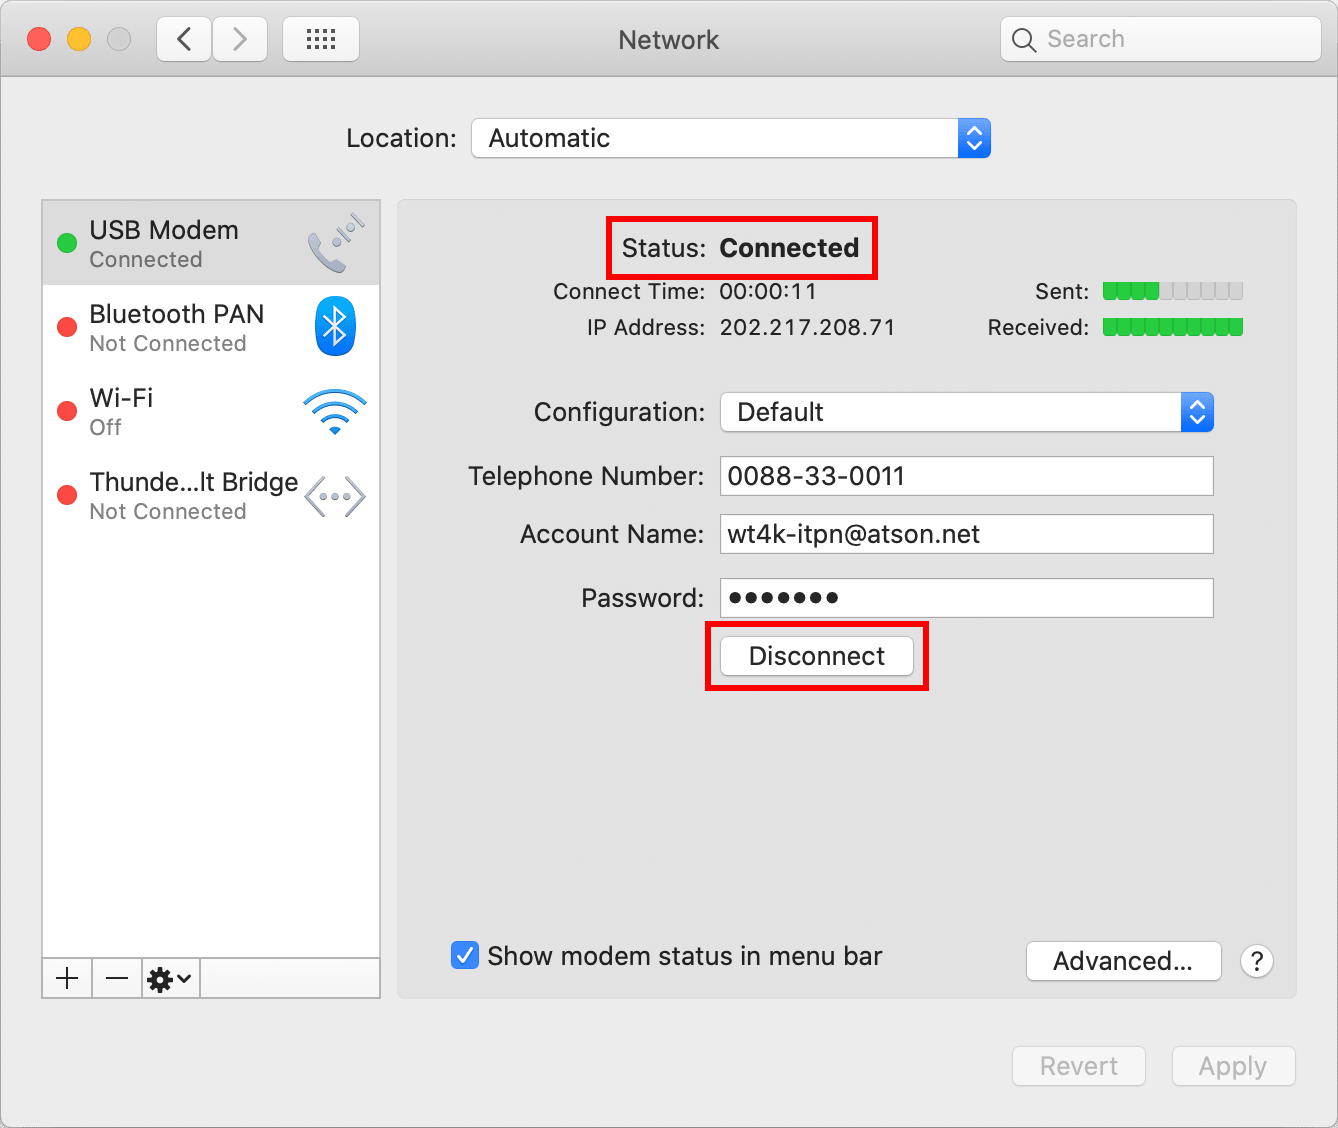
Perform a connection test if there is no problem with the connection.
Click Connect.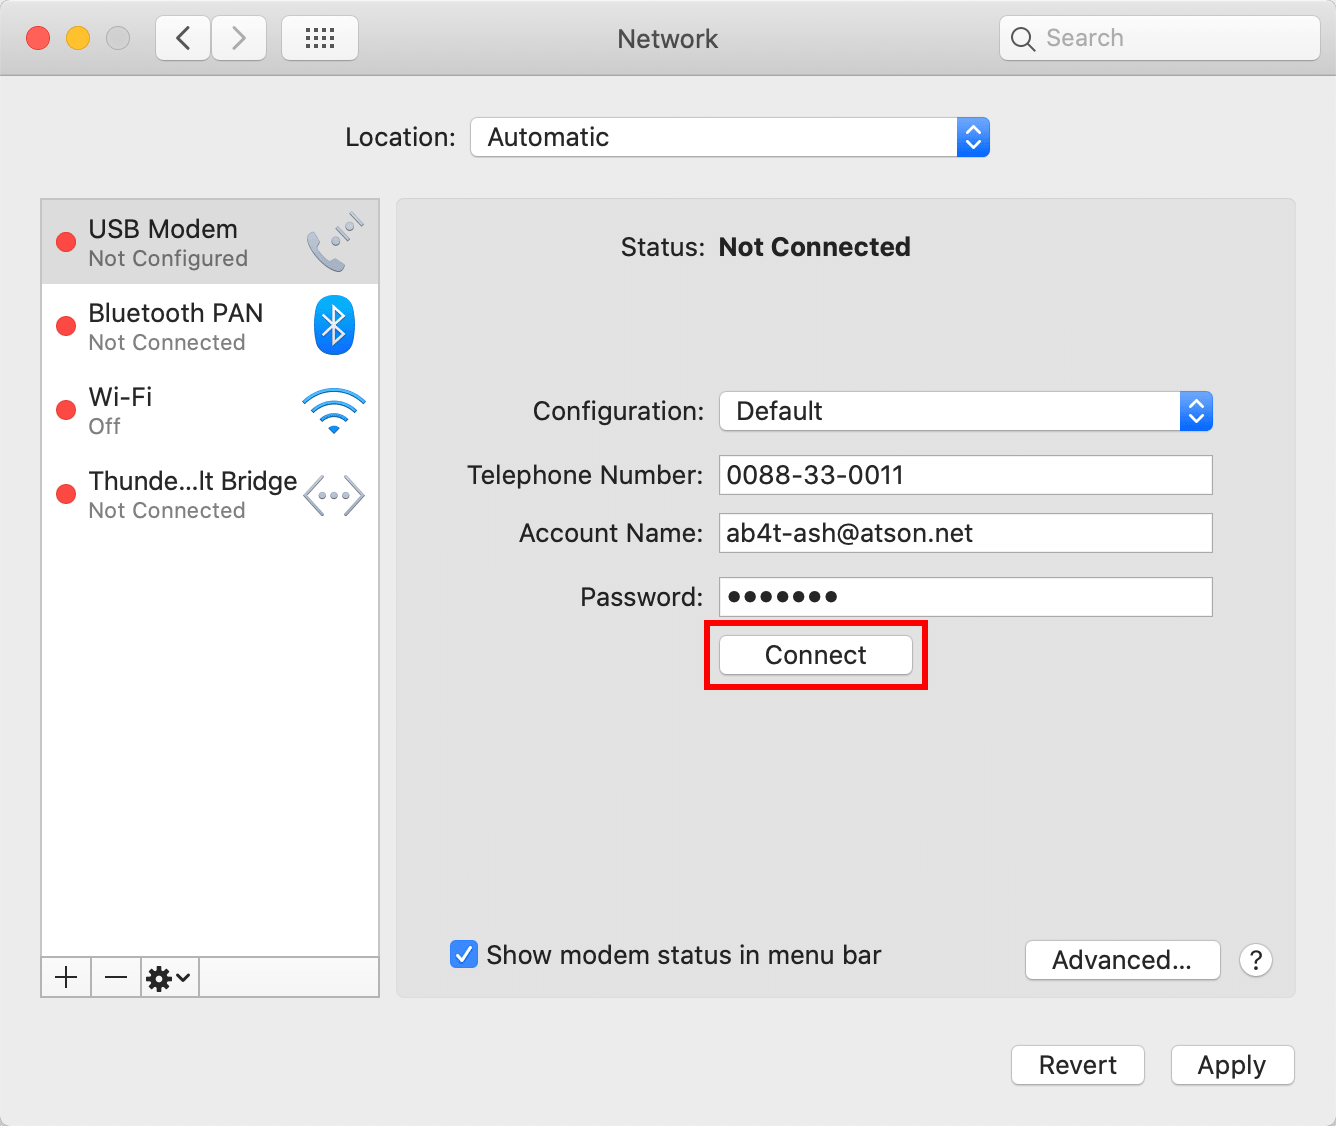
When connection is established, the Status becomes Connected.
Click Disconnect to end the connection test.