Windows 10: Wireless Connection Settings
Before setting up
- The settings on this page show how to make a wireless LAN connection with a Windows 10 PC (client).
- The SSID (network name) used on this page is "ASAHI-NET_Wireless". The guide shows an example of connecting with encryption, but without stealth settings.
What is SSID (Network Name)?
An SSID is the name of a wireless local area network (WLAN), which is used to prevent interference between different wireless networks. An SSID is needed when setting up your wireless LAN connection.
Connecting to the Wireless Network
-
STEP1
Open the Network list
From the Windows 10 desktop, go to the bottom, right-hand corner and left-click the Network icon
 .
.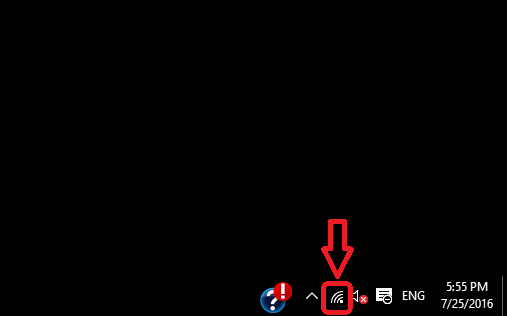
- *If your PC does not have a wireless function, or if there is a problem with its wireless function, please contact the manufacturer for support.
-
STEP2
Selecting the wireless network you wish to use
A list of nearby networks (SSIDs) will appear. Please select the network you wish to connect to.
Example: ASAHI-NET_Wireless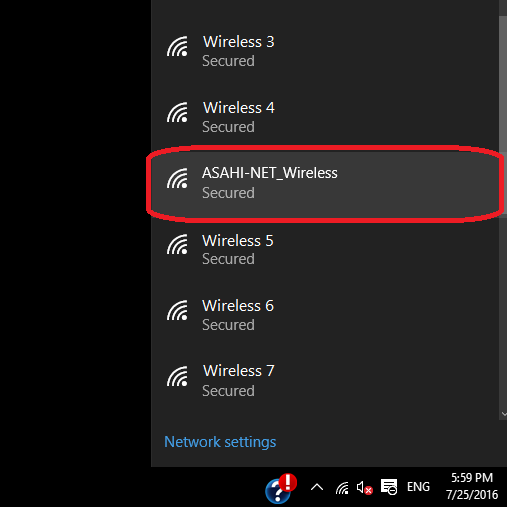
Then, click the Connect button.
(Check the Connect automatically option at your preference.)
-
STEP3
Entering the security key
Enter the network security key and click Next.
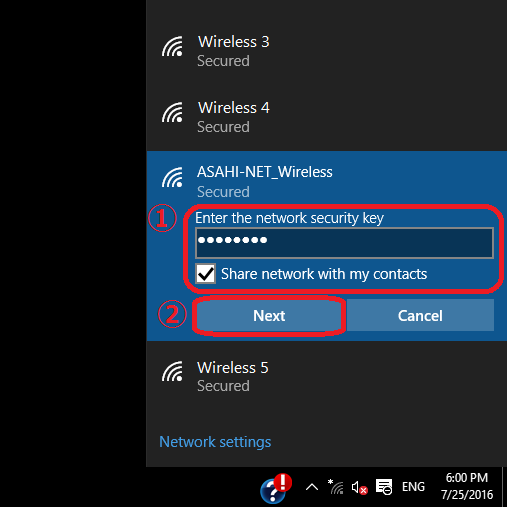
- *Security key (セキュリティキー) is generally written on the main body of the wireless LAN device. Security key may be written as 暗号化キー (encryption key) or 認証キー (authentication key) depending on the device. If you unsure, refer to the manual of the device or contact the manufacturer.
-
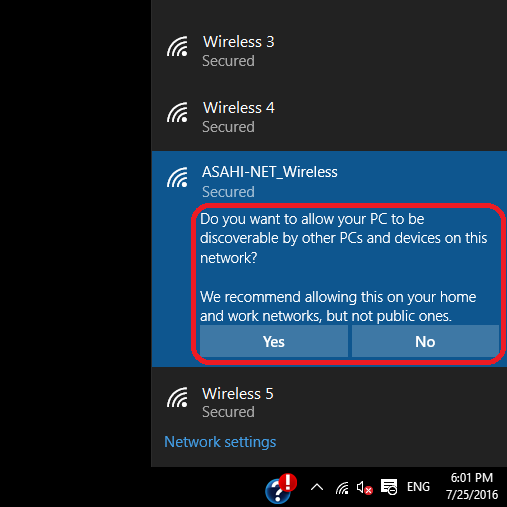
STEP4
Settings for sharing the PC network
Please choose based on your preferences.
-
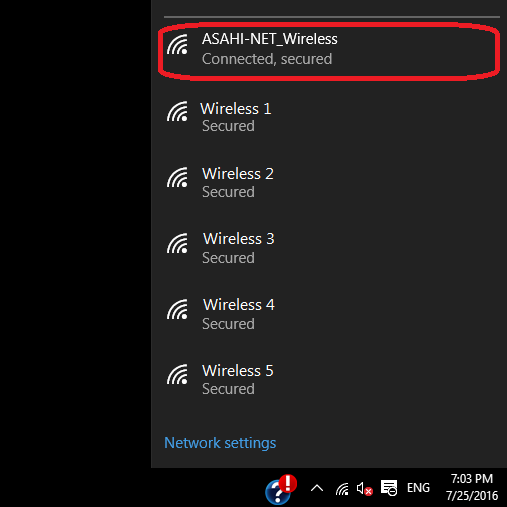
STEP5
Connection settings completed
Once connected, the status under the SSID will display Connected.