Confirm Settings for Thunderbird (Version 91 or Later)
- This page explains the steps to setup a new account for Thunderbird 91.5 for Windows.
- The items referred to with brackets (= [ ]) in this guide are unique data to each customer.
In actual settings, please replace them with your own information. - The [ASAHI Net User ID] used in this guide as an example is [ab4t-ash].
- Settings for IMAP function could be found in the following page.
Mailer Setup: Before Setting Up
Confirm Settings
-
STEP1
Start the software
Start Thunderbird.
-
STEP2
Account Setup
Click the menu
 in the top right.
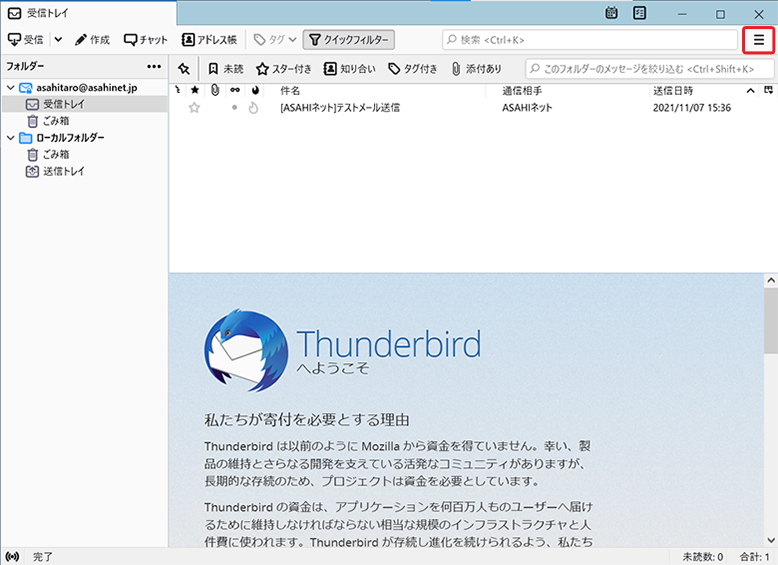
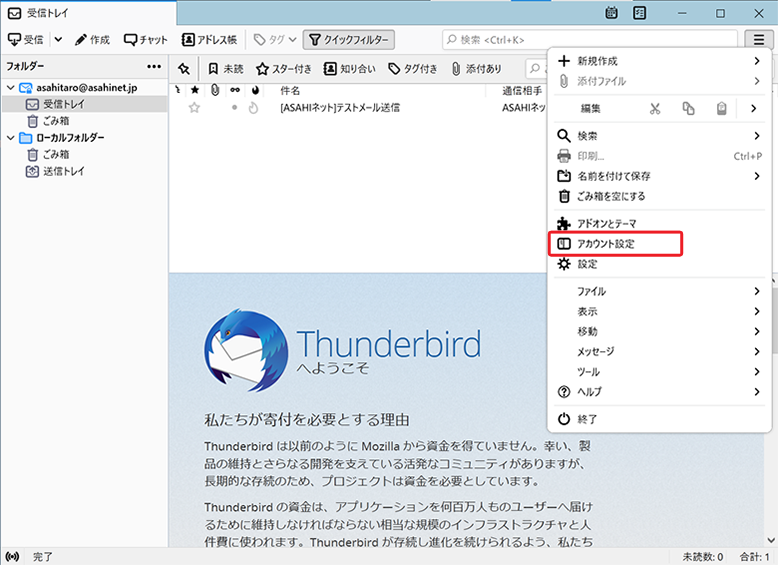
Choose "アカウント設定 (= Account Setup)" in the Menu.
-
STEP3
差出人情報 (= Sender Information)
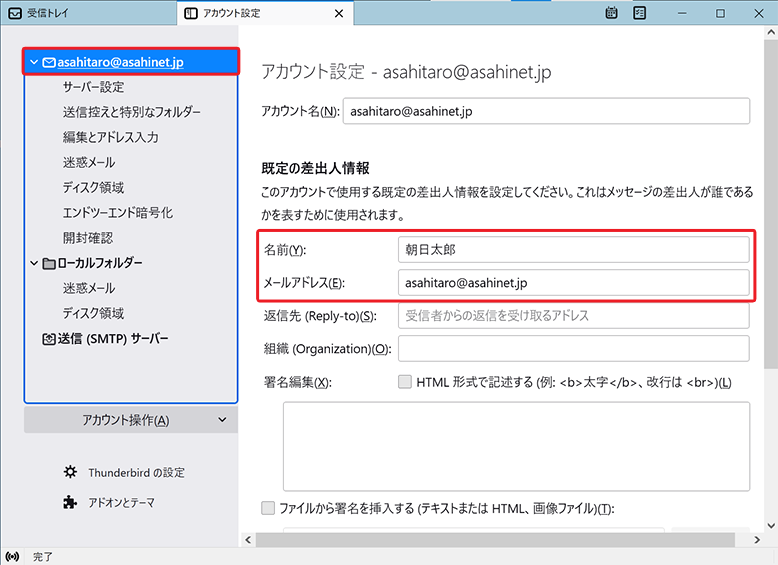
名前 (= Name) Your name (any name)
E.g., Taro Asahiメールアドレス (= Email address) [Your email address]
E.g., asahitaro@asahinet.jpCheck if the above information is set, and switch to "サーバー設定 (= Server Setup)".
-
STEP4
サーバー設定 (= Server Setup)
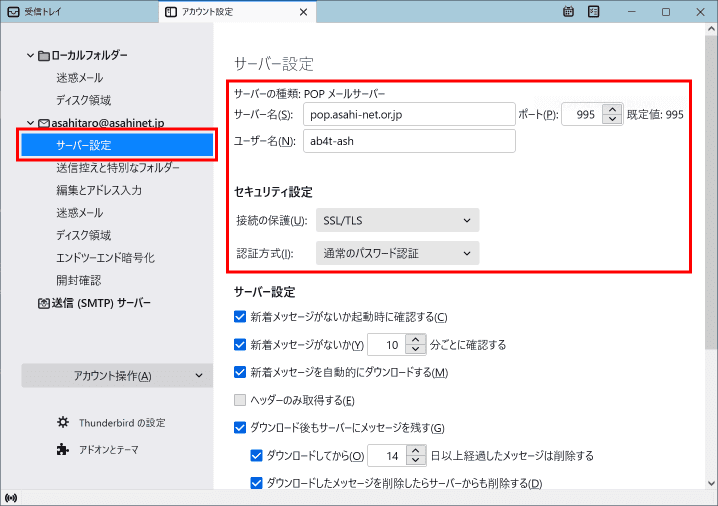
サーバー名 (= Server name) pop.asahi-net.or.jp ポート (= Port) 995 ユーザー名 (= Username) ID you can use 接続の保護 (= Connection security) SSL/TLS 認証方式 (= Authentication method) Regular password Check if the above information is set, and click "送信(SMTP)サーバー (= Outgoing (SMTP) Server)".
- *Settings for IMAP function could be found in the following page.
Mailer Setup: Before Setting Up
- *Settings for IMAP function could be found in the following page.
-
STEP5
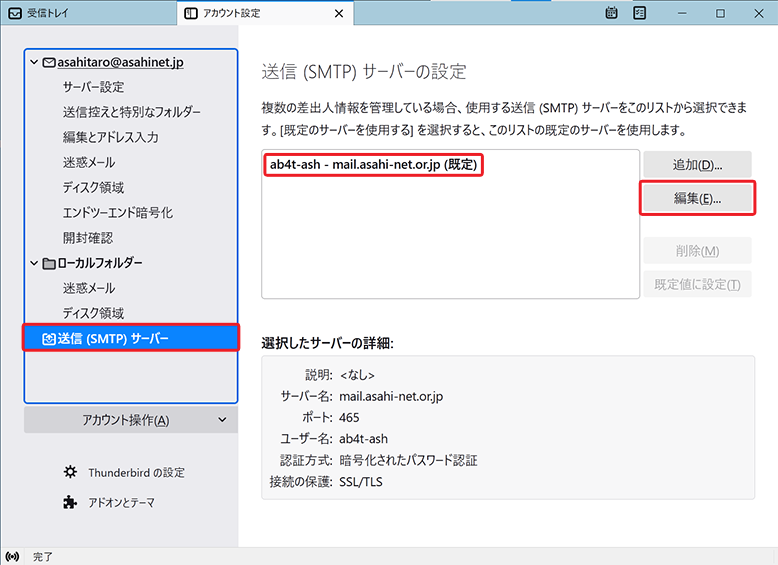
送信(SMTP)サーバー (= Outgoing (SMTP) Server)
Choose the already-set Asahi Net server and click "編集 (= Edit)".
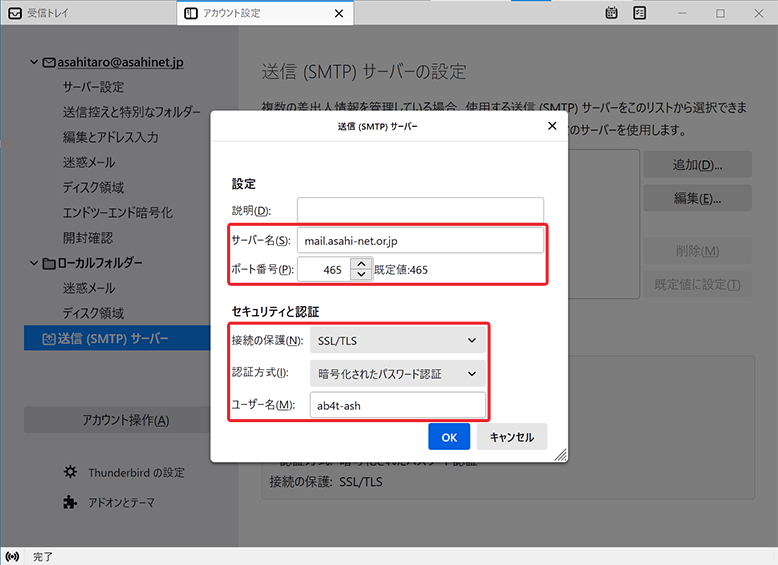
サーバー名 (= Server name) mail.asahi-net.or.jp mails.asahi-net.or.jp - *If you are subscribed to Email Virus Check.
ポート (= Port) 465 接続の保護 (= Connection security) SSL/TLS 認証方式 (= Authentication method) Encrypted password authentication ユーザー名 (= Username) ID you can use Check if the above information is set, and click "OK".
Checking of settings has completed.
| Asahi Net ID | Eg., ab4t-ash |
|---|---|
| Family ID | Eg., ab4t-ash |
| Mail ID | E.g., m1234ab567c |