Confirm Settings for iOS 14
- This page explains the steps to confirm settings for iPhone (iOS 14.3).
-
The items referred to with brackets (= [ ]) in this guide are unique data to each customer.
In actual settings, please replace them with your own information. - The [ASAHI Net User ID] used in this guide as an example is [ab4t-ash].
- Settings for IMAP function could be found in the following page.
Mailer Setup: Before Setting Up
Confirm Account Settings
-
STEP1
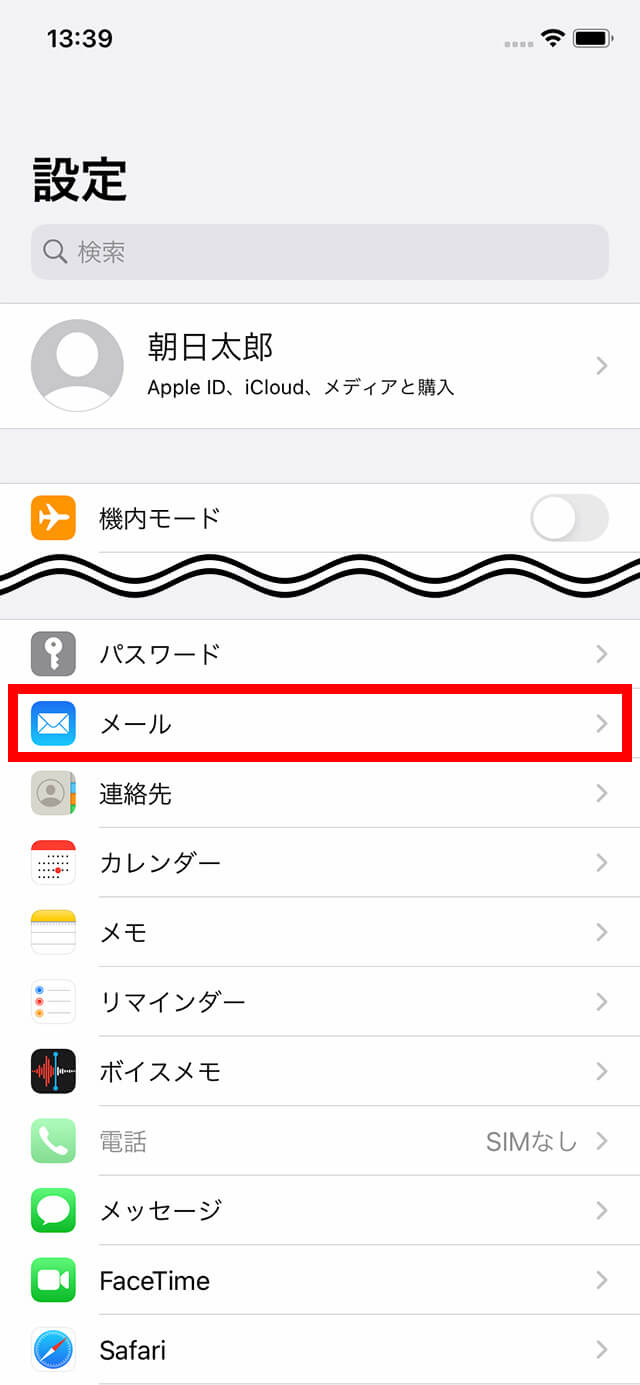
Show Settings screen
Tap 設定 (= Settings) in the iPhone Home screen.
-
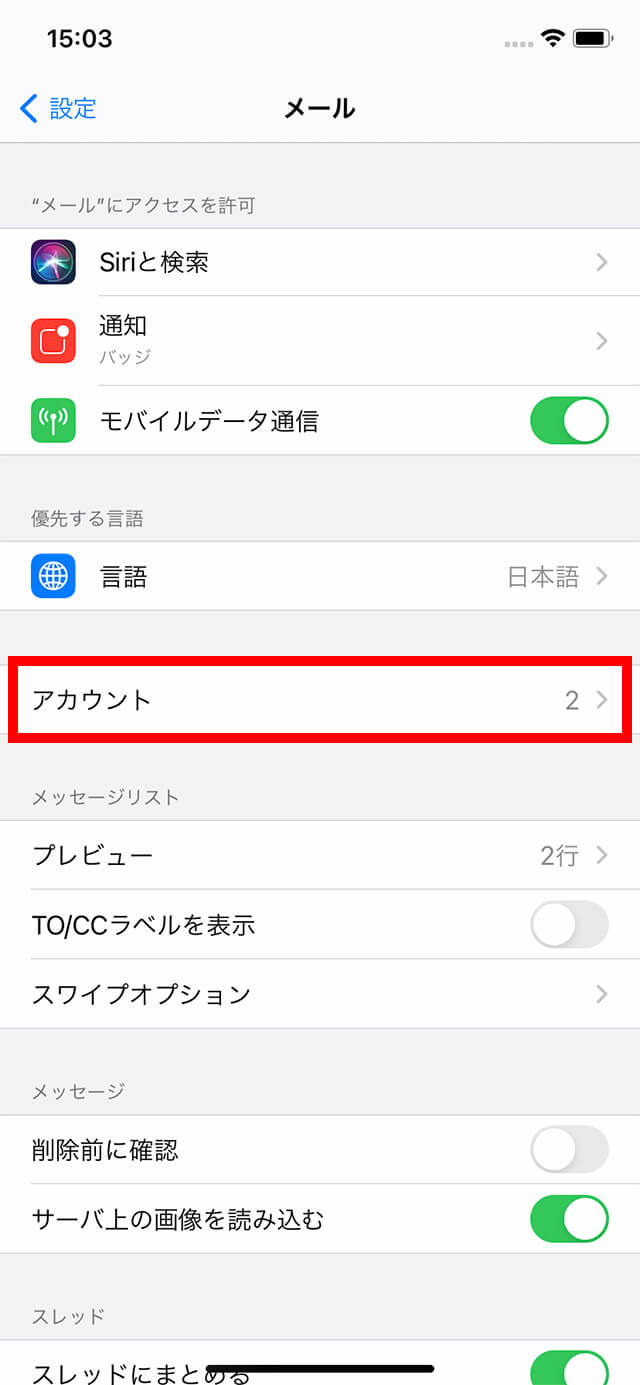
STEP2
Select アカウント (= Accounts)
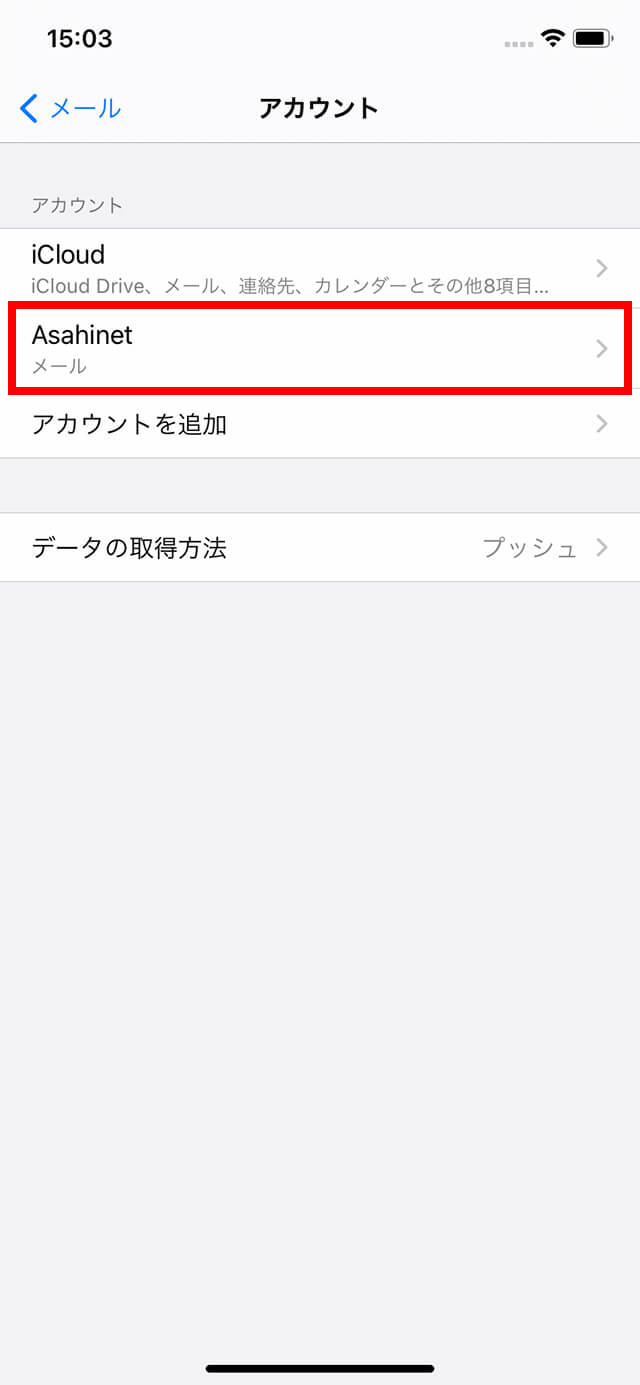
Scroll down the 設定 (= Settings) screen, tap メール (= Mail), アカウント (= Accounts), and then tap the account which you want to confirm.
-
-
STEP3
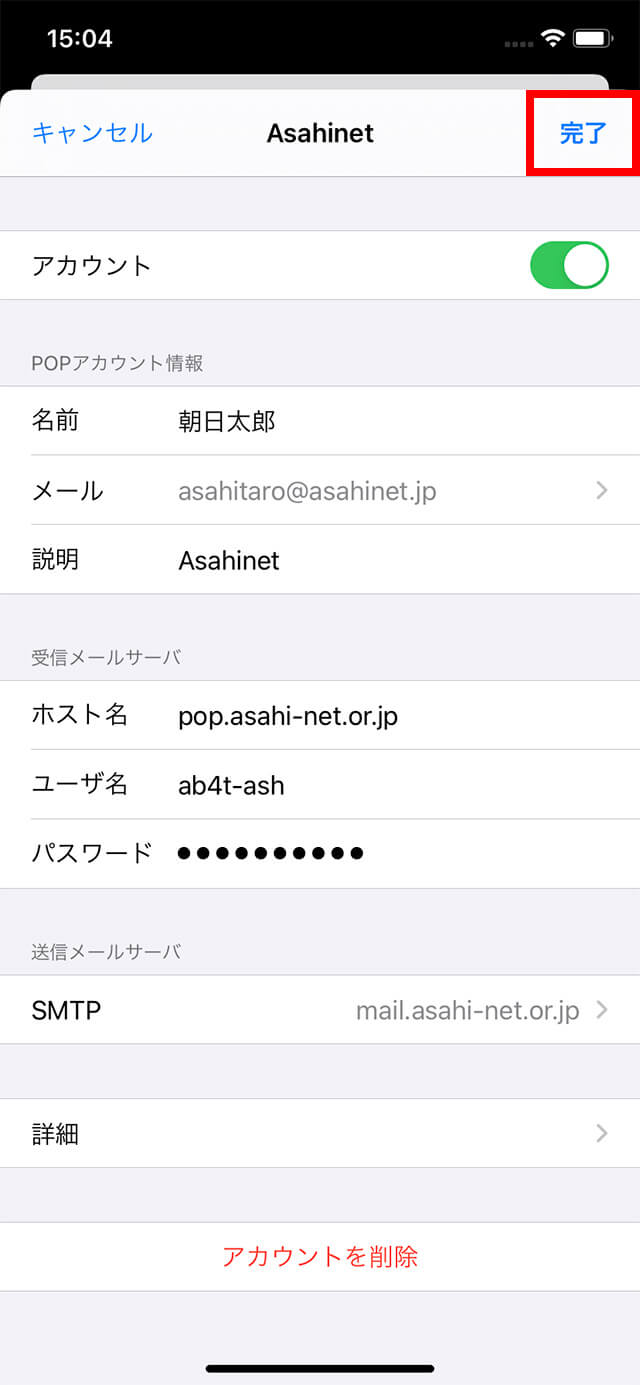
Confirm POP ACCOUNT INFORMATION and INCOMING MAIL SERVER
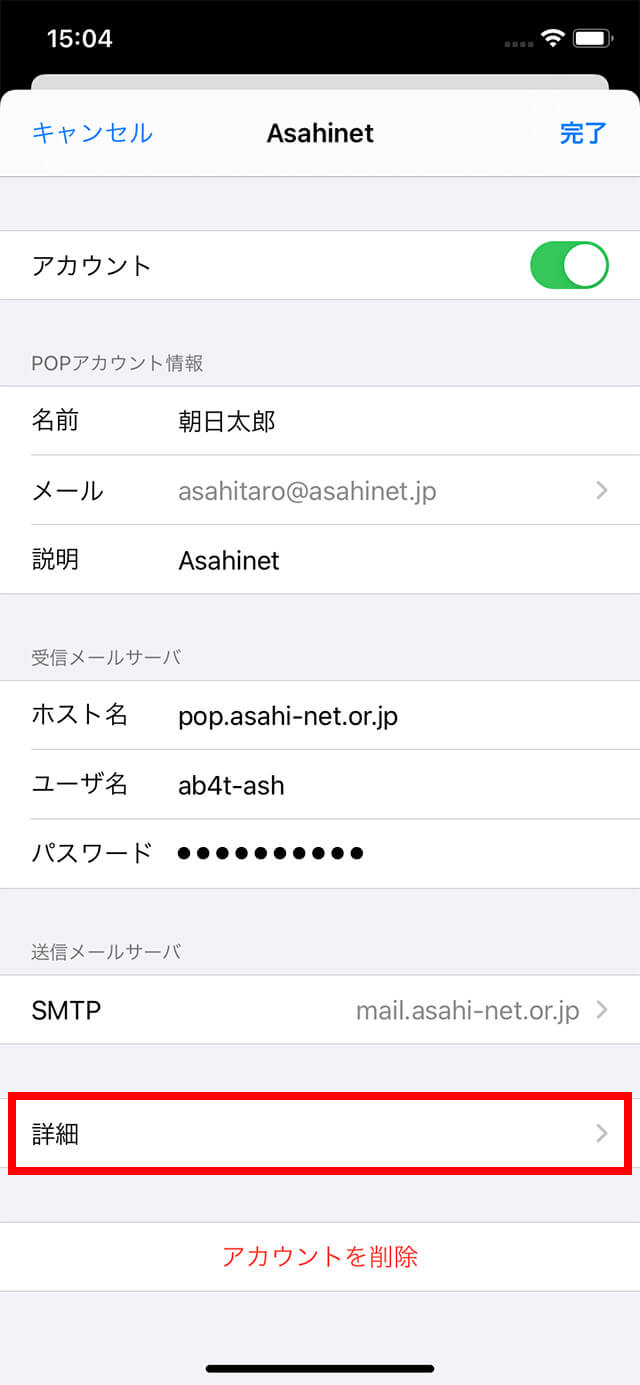
Confirm the settings of POPアカウント情報 (= POP ACCOUNT INFORMATION) and 受信メールサーバ (= INCOMING MAIL SERVER).
When you are done checking, tap SMTP.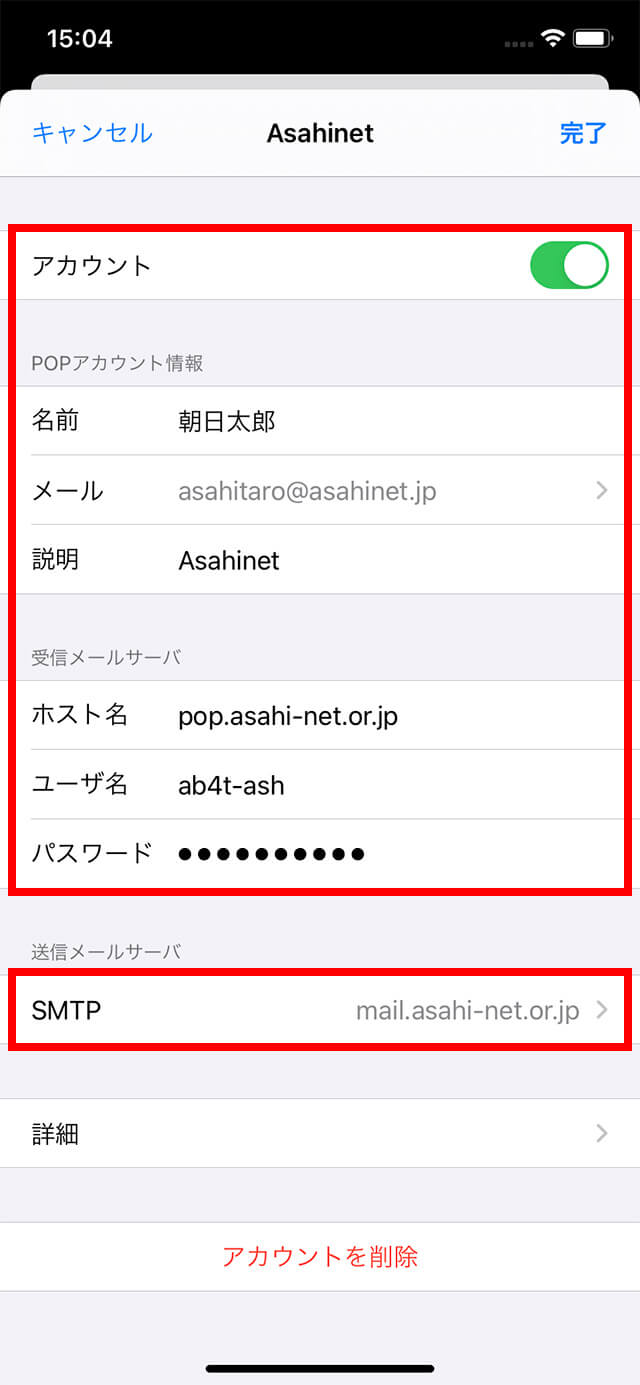
アカウント
AccountOn POPアカウント情報 (= POP ACCOUNT INFORMATION)
名前
NameYour name (any name)
E.g., Asahi, Taroメール
Email[Your email address]
E.g., asahitaro@asahinet.jp説明
DescriptionEntered automatically 受信メールサーバ (= INCOMING MAIL SERVER)
ホスト名
Host Namepop.asahi-net.or.jp ユーザー名
User NameID which you can use パスワード
Password[Asahi Net password which corresponds to the ID] - *Enter all in lowercase characters.
- *Settings for IMAP function could be found in the following page.
Mailer Setup: Before Setting Up
-
STEP4
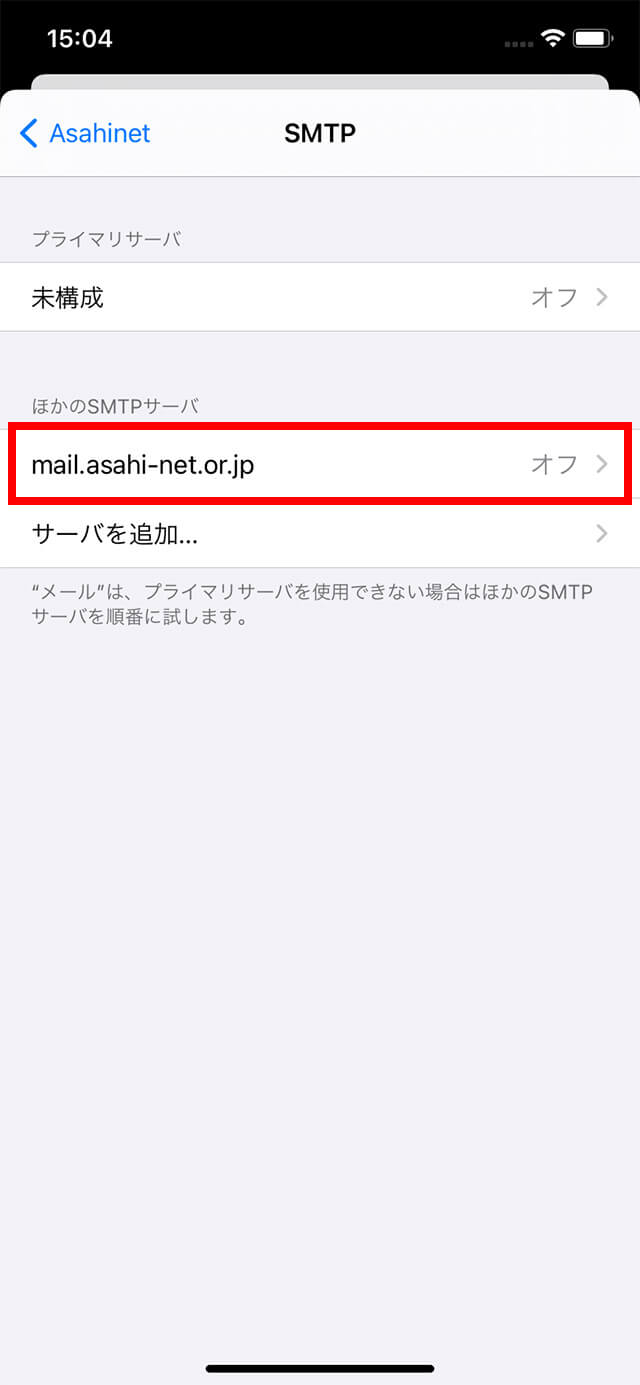
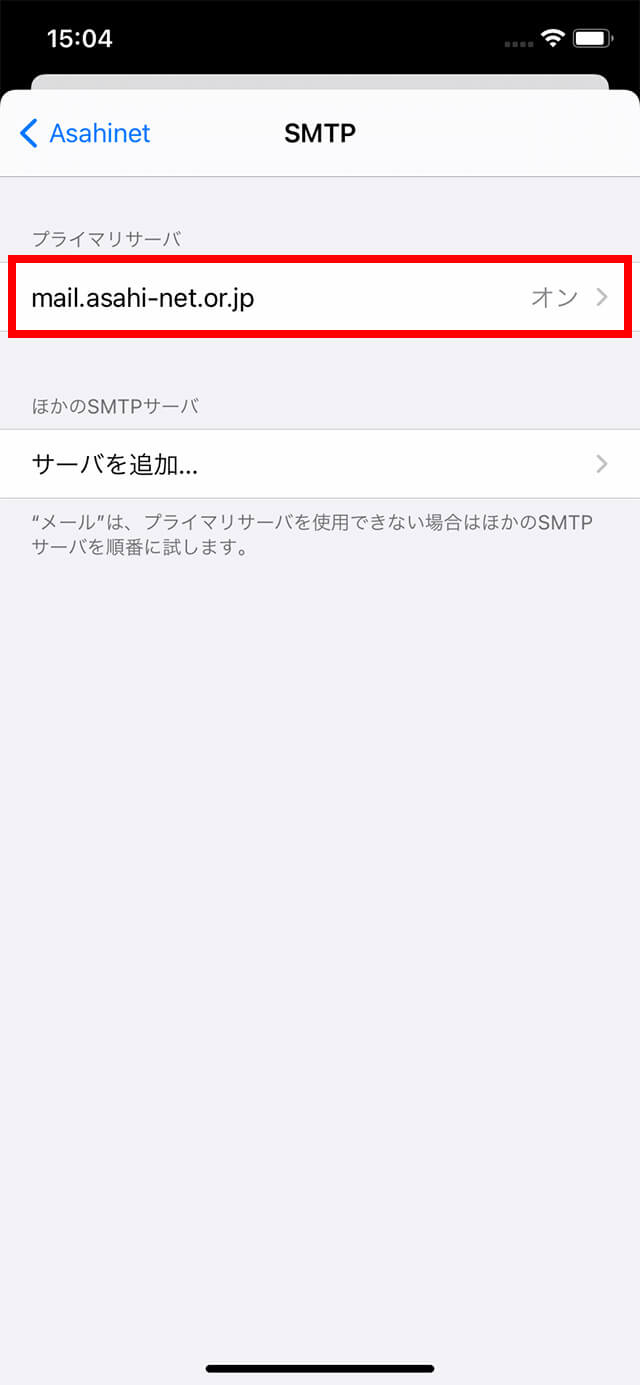
Select OUTGOING SERVER
Tap ほかのSMTPサーバ (= OTHER SMTP SERVER) or mail.asahi-net.or.jp in プライマリサーバ (= PRIMARY SERVER).
-
- Or
-
-
-
STEP5
Confirm OUTGOING MAIL SERVER
See the details of 送信メールサーバ (= OUTGOING MAIL SERVER), and tap 完了 (= Done) in the top right corner. The screen will go back to SMTP. Tap the < (e.g., < Asahinet) in the left top corner to go back.
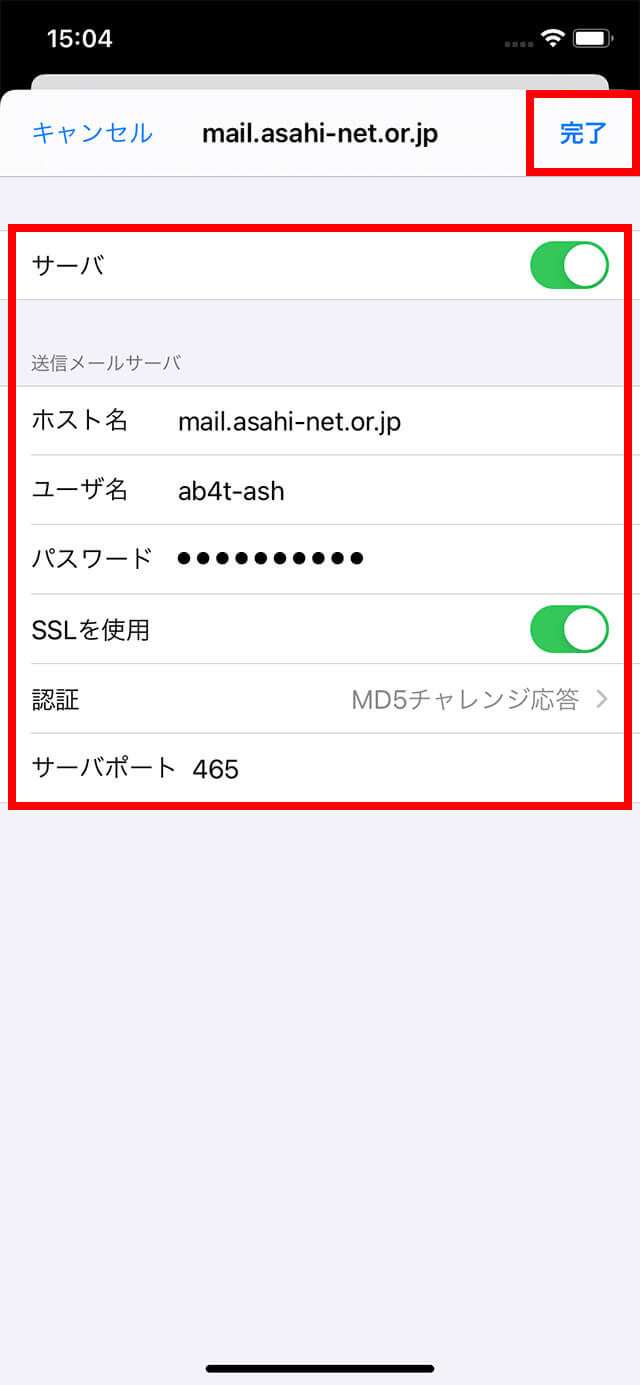
サーバ
ServerOn 送信メールサーバ (= OUTGOING MAIL SERVER)
ホスト名
Host Namemail.asahi-net.or.jp mails.asahi-net.or.jp - *If you are subscribed to Email Virus Check.
ユーザー名
User NameID which you can use パスワード
Password[Asahi Net password which corresponds to the ID] - *Enter all in lowercase characters.
SSLを使用
Use SSLOn 認証
AuthenticationMD5チャレンジ応答
MD5 Challenge-Responseサーバポート
Server Port465 -
STEP6
Confirm Advanced settings for INCOMING MAIL SERVER
In the アカウント (= Accounts) screen, tap 詳細 (= Advanced).
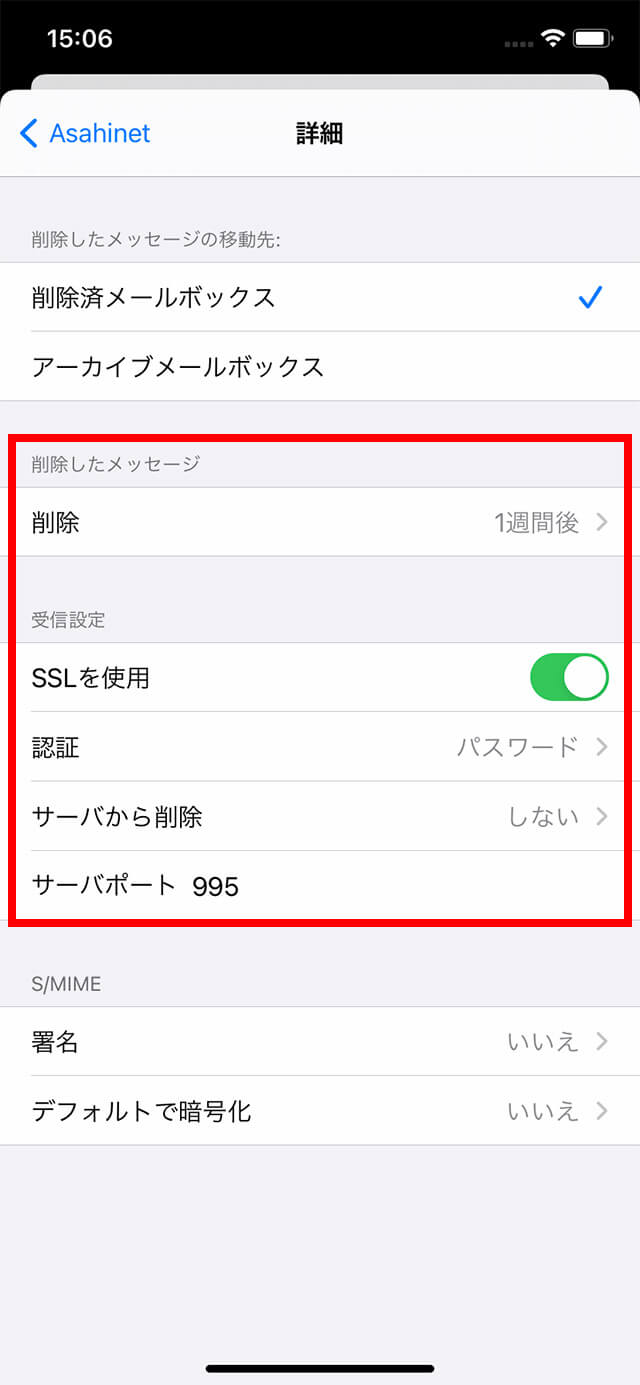
After checking the details in the Advanced screen, tap < (e.g., < Asahinet) to go back.削除したメッセージ (= DELETED MESSAGES)
削除
RemoveOptional 受信設定 (= INCOMING SETTINGS)
SSLを使用
Use SSLOn 認証
AuthenticationPassword サーバから削除
Delete from serverOptional Server Port 995 -
-
STEP7
完了 (= Done)
Tap 完了 (= Done) in the top right to close the screen. Setup is complete.
| Asahi Net ID | Eg., ab4t-ash |
|---|---|
| Family ID | Eg., ab4t-ash |
| Mail ID | E.g., m1234ab567c |