Confirm Settings for IMAP in Gmail App
- This page explains the steps to confirm your account settings for Gmail app (ver. 2025.09.29).
- The items referred to with brackets (= [ ]) in this guide are unique data to each customer. In actual settings, please replace them with your own information.
- The [ASAHI Net User ID] used in this guide as an example is [ab4t-ash].
- You need to be connected to the internet in order to follow the steps below.
- You need to apply for IMAP function in prior. See the following page for more service details.
IMAP Function
Confirm Settings
-
STEP1
Start the software
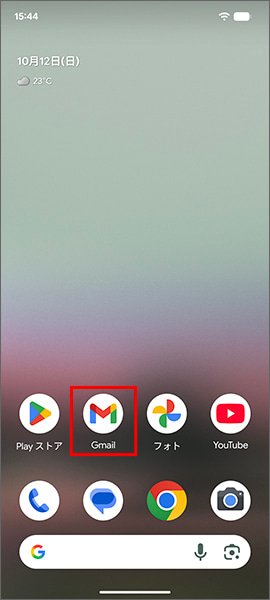
Open the Gmail app.
-
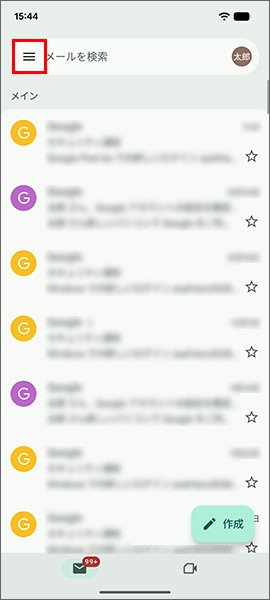
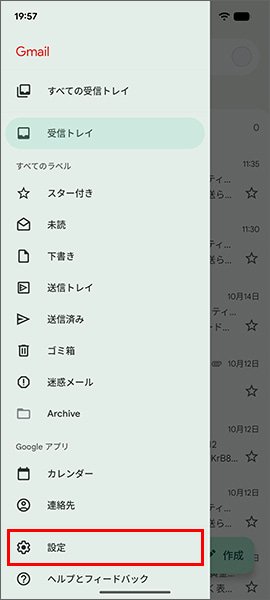
STEP2
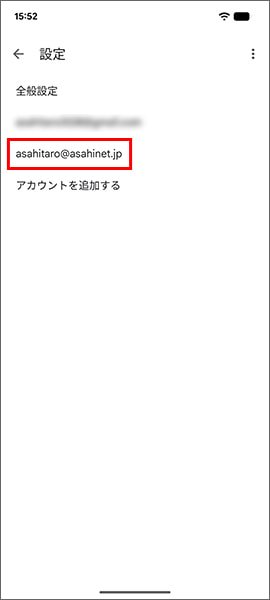
Go to account settings page
Tap the settings icon in the upper right-hand corner, tap 設定 (= Settings), and then tap the account which you want to check its settings (e.g., asahitaro@asahinet.jp).
-
-
STEP3
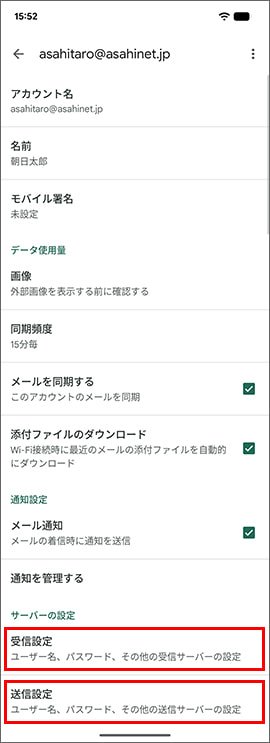
Settings page
You can adjust your settings on this page according to your preference.
If you tap 受信設定 (= Incoming settings), the incoming settings page will be shown. If you tap 送信設定 (= Outgoing settings), the outgoing settings page will be shown.
- *If the entire page does not show, please scroll up or down to find the content.
-
STEP4
受信設定 (= Incoming settings)
On the Settings page shown in the previous section, the settings for the server will be shown. You can check and edit your incoming settings when you tap 受信設定 (= Incoming settings).
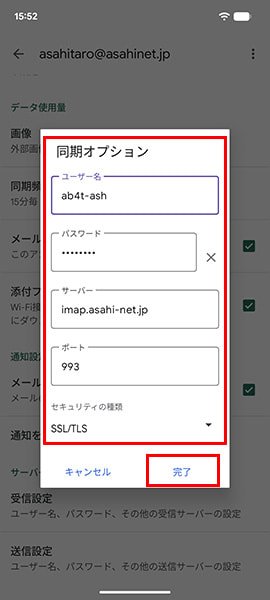
ユーザー名 (= Username) [Asahi Net ID which corresponds to the email address]
E.g., ab4t-ash, u1234ab567c, m1234ab567パスワード (= Password) [Password corresponds to the Asahi Net ID] - *Enter all characters in lowercase.
サーバー (= Server) imap.asahi-net.jp ポート (= Port) 993 セキュリティの種類 (= Security type) SSL/TLS Check that the settings shown above are being applied.
If you change the settings, tap 完了 (= Done). If you are not changing anything, tap キャンセル (= Cancel).
-
STEP5
送信設定 (= Outgoing settings)
On the Settings page shown in the previous section, the settings for the server will be shown. You can check and edit your outgoing settings when you tap 送信設定 (= Outgoing settings).
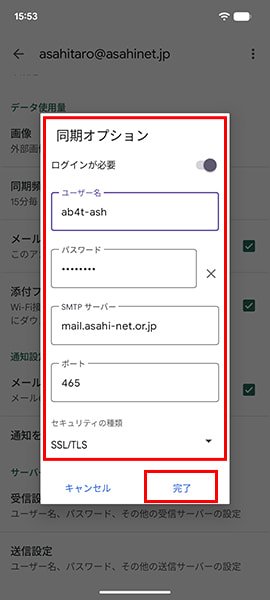
ログインが必要 (= Require sign-in) Enabled ユーザー名 (= Username) [Asahi Net ID which corresponds to the email address.]
E.g., ab4t-ash, u1234ab567c, m1234ab567パスワード (= Password) [Password corresponds to the Asahi Net ID] - *Enter all characters in lowercase.
SMTPサーバー (= SMTP server) mail.asahi-net.or.jp ポート (= Port) 465 セキュリティの種類 (= Security type) SSL/TLS Check that the settings shown above are being applied.
If you change the settings, tap 完了 (= Done). If you are not changing anything, tap キャンセル (= Cancel).
Confirming the settings is complete.
| Asahi Net ID | Eg., ab4t-ash |
|---|---|
| Family ID | Eg., ab4t-ash |
| Mail ID | E.g., m1234ab567c |