New Settings for IMAP in Gmail App
- This page explains the steps to set up a new account for Gmail app (ver. 2025.09.29).
- The items referred to with brackets (= [ ]) in this guide are unique data to each customer. In actual settings, please replace them with your own information.
- The [ASAHI Net User ID] used in this guide as an example is [ab4t-ash].
- You need to be connected to the internet in order to follow the steps below.
- You need to apply for IMAP function in prior. See the following page for more service details.
IMAP Function
New Settings
-
STEP1
Start the software
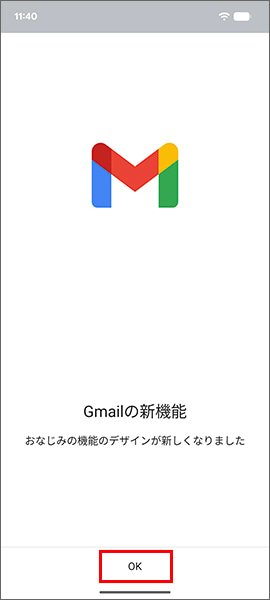
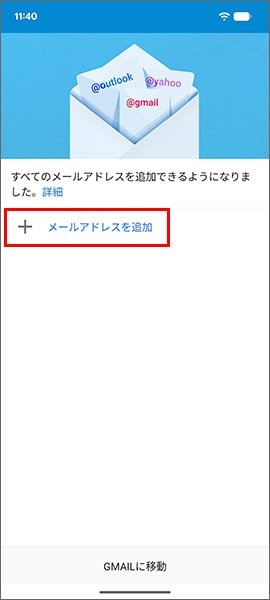
Open the Gmail app.
If the page shown below appears, follow the information on the page. Tap メールアドレスを追加 (= Add account) and then go to STEP 3 Add account.
-
-
STEP2
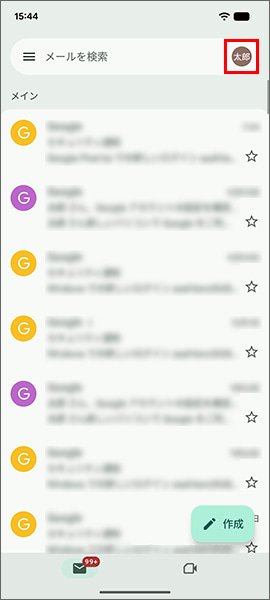
Add account
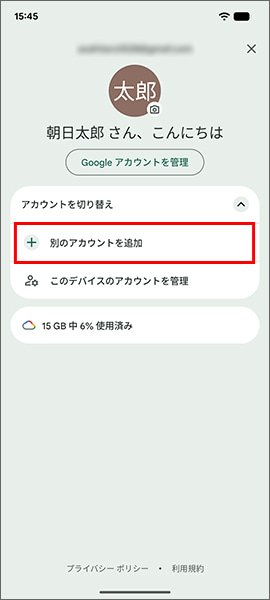
Tap your profile in the upper right-hand corner, and then tap 別のアカウントを追加 (= Add another account).
-
-
STEP3
Add account
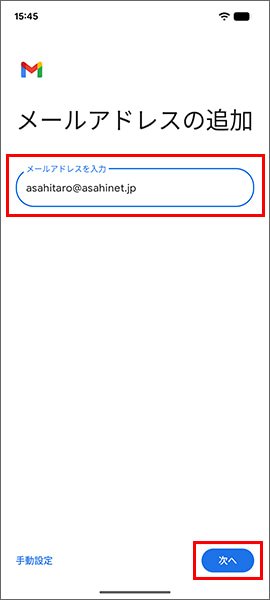
Tap その他 (= Other), enter your email address, and then tap 次へ (= Next).
メールアドレス (= Email address) [Your email address]
E.g., asahitaro@asahinet.jp -
-
STEP4
Enter password
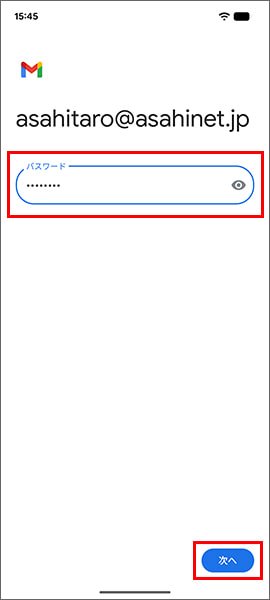
Tap 個人用(IMAP) (= Other [IMAP]), enter the password and then tap 次へ (= Next).
パスワード (= Password) [Password which corresponds to the email address.]
- *Enter all characters in lowercase.
-
-
STEP5
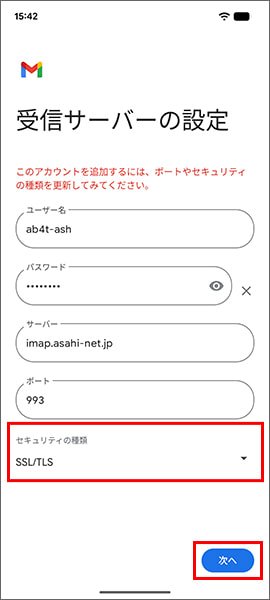
Settings of incoming server
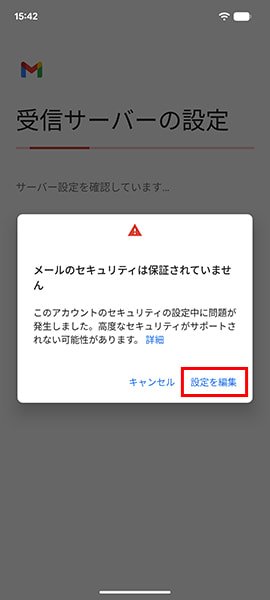
Refer to the following information to enter the username and server, and then tap 次へ (=Next).
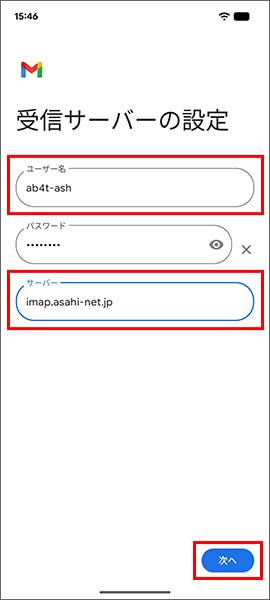
ユーザー名 (= Username) Corresponding ID
E.g., ab4t-ash, u1234ab567c, m1234ab567サーバー (= Server) imap.asahi-net.jp ポート (= Port) 993 セキュリティの種類 (= Security type) SSL/TLS If the page below appears (In English, it should say “Certificate not valid”), tap 設定を編集 (= Advanced), change the セキュリティの種類 (= Security type) to SSL/TLS and then tap 次へ (= Next).
-
-
STEP6
Settings of outgoing server
Refer to the following information to enter the SMTP server settings, and then tap 次へ (=Next).
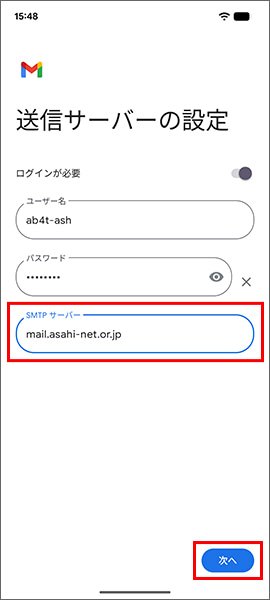
SMTPサーバー (= SMTP server) mail.asahi-net.or.jp -
STEP7
Account options
Tap 次へ (= Next) if you do not need to change the settings shown below.
- *Settings can be changed according to your preference.
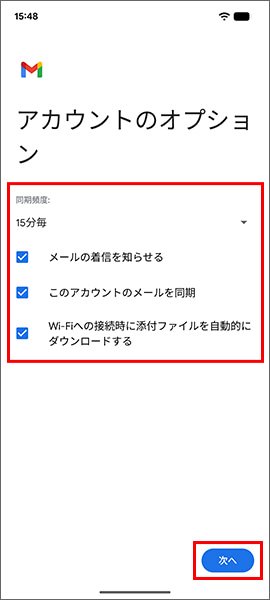
同期頻度 (= Sync frequency) To your preference (at default: 15 minutes) - *The frequency to automatically receive your email
メールの着信を知らせる (= Notify me when email arrives) To your preference (at default: enabled) - *Notifies you when you receive any email.
このアカウントのメールを同期 (= Sync email for this account) Recommended to be enabled (at default: enabled) - *If you disable it, you will not automatically receive email or sync with the server.
Wi-Fiへの接続時に添付ファイルを自動的にダウンロードする (= Automatically download attachments when connected to Wi-Fi) To your preference (at default: enabled) - *Attachments will automatically be downloaded only when you are connected to a Wi-Fi.
-
STEP8
Setting up the sender’s name
Set up the following items according to your preference and tap 次へ (= Next ) to complete your settings.
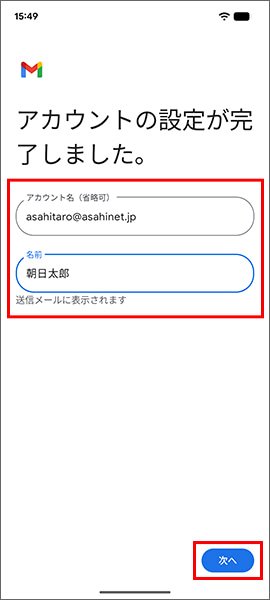
アカウント名 (= Account name [optional]) To your preference (at default: email address) - *It will be shown as your setting name of your inbox and for similar items.
名前 (= Your name) Any name - *It will be shown as the sender's name when sending email.

![個人用(IMAP) (= Other [IMAP])](/asset/img/support/guide/mail_setting/img-gmail-app-01-08.jpg)
| Asahi Net ID | Eg., ab4t-ash |
|---|---|
| Family ID | Eg., ab4t-ash |
| Mail ID | E.g., m1234ab567c |