iPhone/iPad: How to Connect to a Wireless Network
Before Setting Up
- This page explains how to connect to a wireless network from iPhone/iPad (iOS 15.0.1).
- In this page, the SSID (network name) is ASAHI-NET_Wireless. The steps described here are without SSID stealth function and with encryption,
SSID (Network Name)
SSID is the name for each wireless network to prevent interference between wireless networks, and it is required when setting up a wireless network connection. Please refer to the following page for more details.
Setting Up a New Wireless Network Connection
-
STEP1
Tap Settings
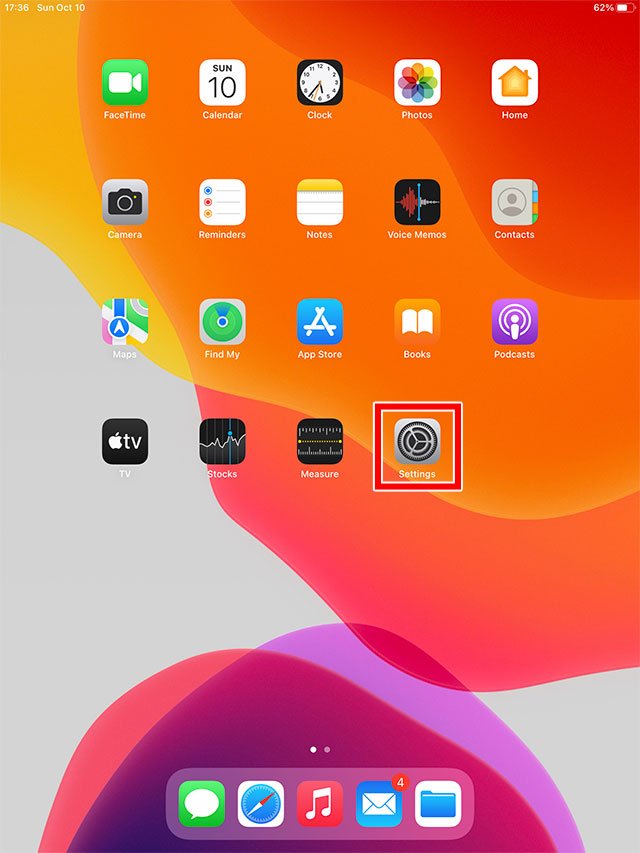
In the Home screen of iPhone or iPad, tap Settings.
-
STEP2
Tap Wi-Fi
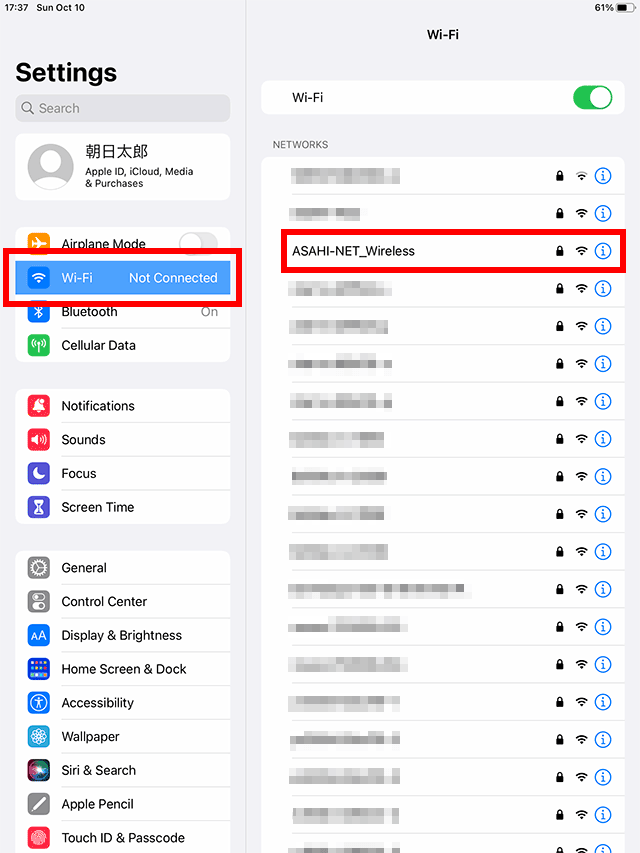
In the Settings menu, tap Wi-Fi, and then tap the network name you are going to use. E.g., ASAHI-NET_Wireless
-
STEP3
Enter the Password
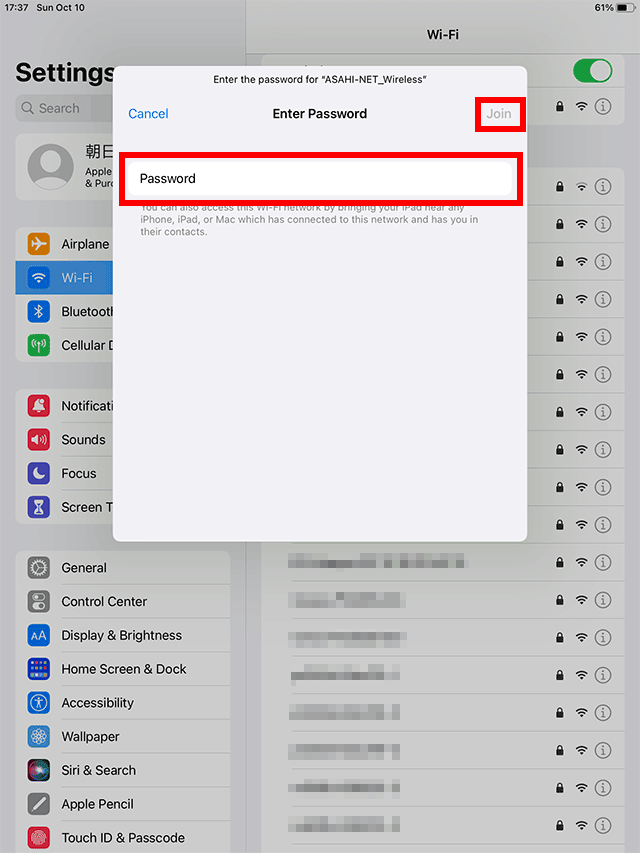
Enter the password (security key/encryption key) when prompted, and tap Join.
-
STEP4
Connection Established
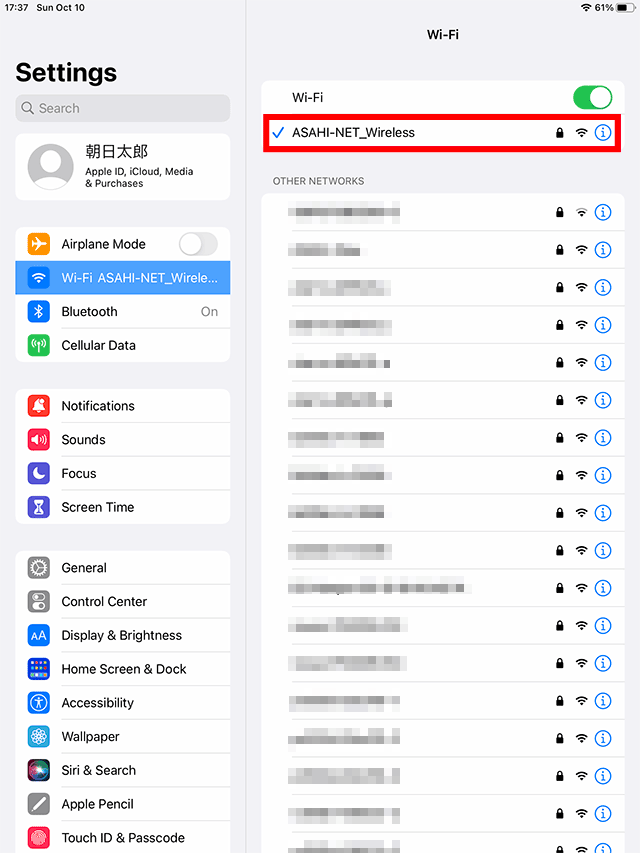
When connection is established, the selected wireless network name will have a check mark (
) next to it.
Deleting Wireless Connection Settings
-
STEP1
Tap Settings
In the Home screen of iPhone or iPad, tap Settings.

-
STEP2
Tap Wi-Fi
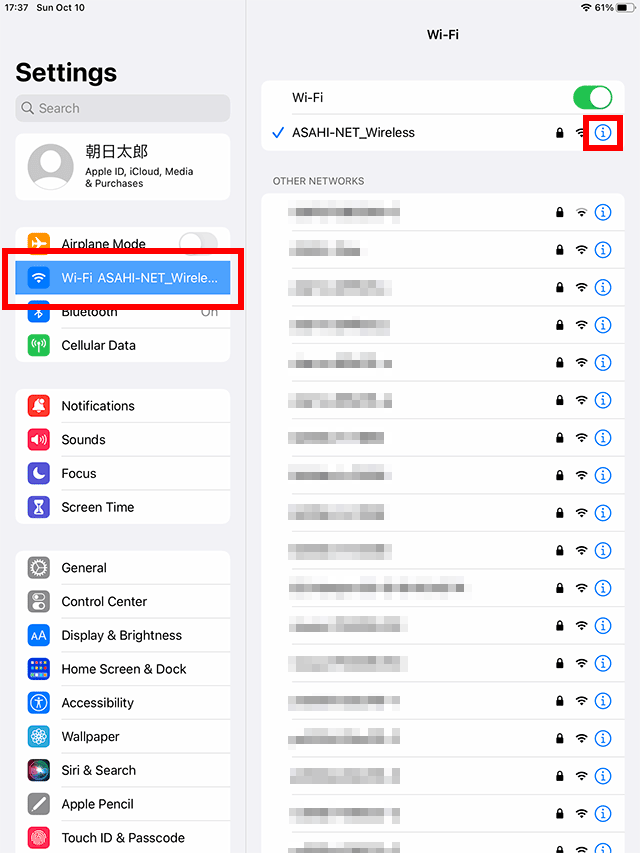
In the list of Settings menu, tap Wi-Fi, and then tap the "i" button of the Wi-Fi which you want to delete its settings.
-
STEP3
Delete (Forget) Network Settings
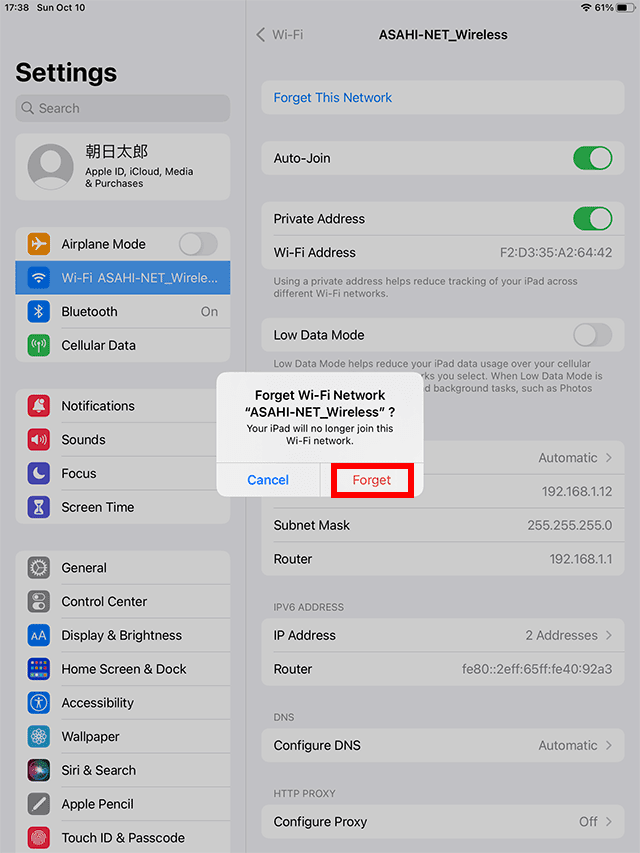
Tap Forget This Network.
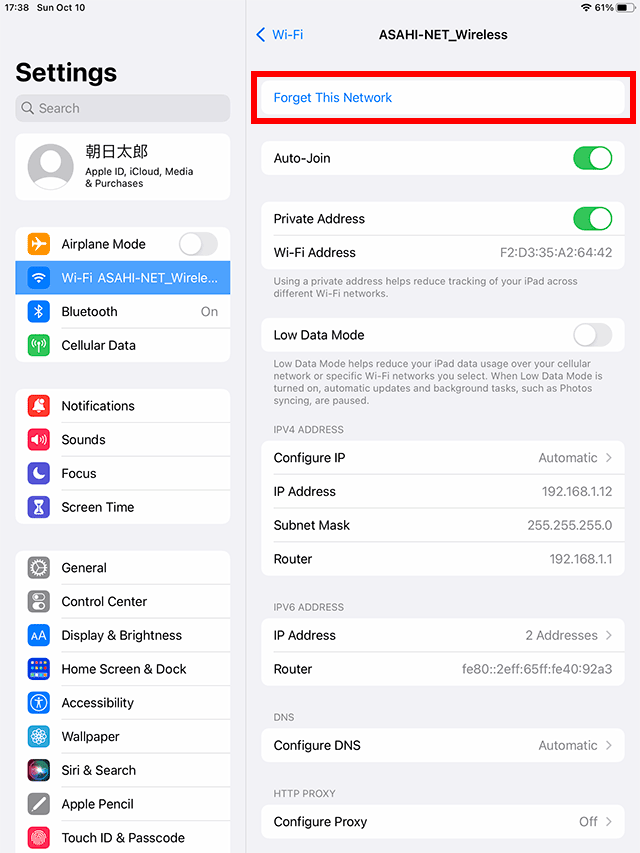
Tap Forget and the selected settings will be deleted.
