Confirm/Change Connection Settings of Hikari Denwa Router (For Users of All Apartments Plan)
Confirm/Change Connection Settings of Internet Connection
Before configuration
This page offers guide on how to confirm and change internet connection settings (on the WAN side) of Hikari Denwa router PR500KI for users of All Apartments Plan.
This guide is based on Windows 10, Internet Explorer (for Windows).
The steps are the same for Macintosh and other OS.
Before configuring connection settings, please check the followings and adjust settings on your browser (Internet Explorer, Mozilla Firefox, Google Chrome, etc.) as needed.
- *Please enable JavaScript if it has been disabled.
- *Please disable proxy server setting if it has been enabled.
-
STEP1
Open a Browser
Open a browser (Internet Explorer, Mozilla Firefox, Google Chrome, etc.)
Enter 192.168.1.1 in the address bar, and then press the [Enter] key.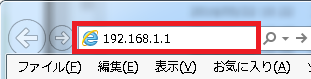
-
STEP2
Login
A login window will appear; enter user name and password as shown above, then click OK.
- *Password for Device Setting is the arbitrary password you have entered when configuring initial setting for PR-500KI.

-
STEP3
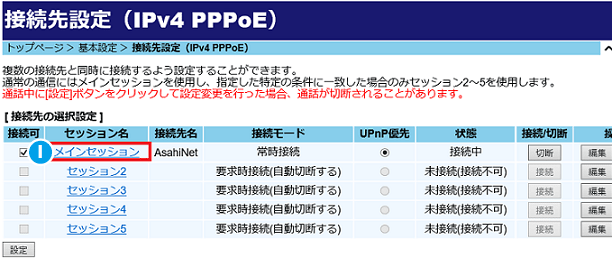
Internet Connection Settings
Internet connection setting window will appear; click I Main session, marked in red box.
- *Internet connection setting window will appear; click I Main session, marked in red box.
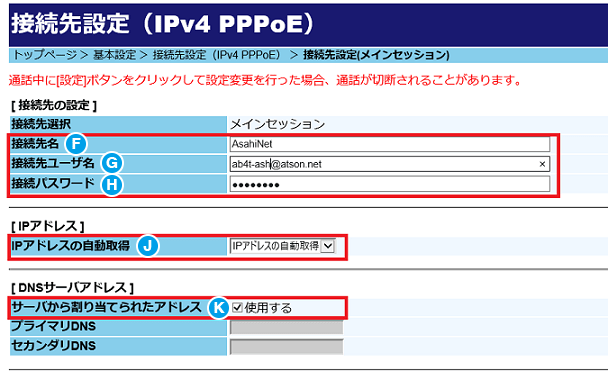
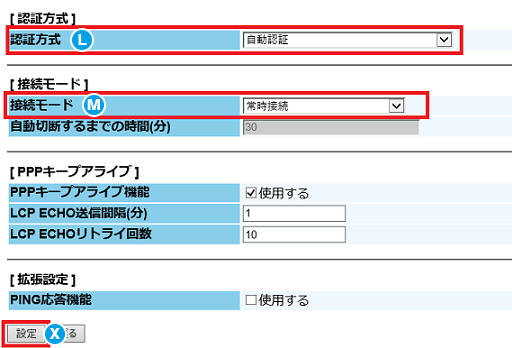
Configure settings referring to the following table, and then click X Set up.
F Name of the Access Point Input arbitrary name of the access point
(e.g. Asahi Net)G User Name for Internet Connection*1 User Name@atson.net
(e.g. 11111111@atson.net)f.ASAHIネットID@atson.net - * If you are connecting with fixed IP address
H Password for Internet Connection*1 Password corresponding to User Name for Internet Connection J Obtain an IP address automatically IPアドレスの自動取得
(written as "Obtain an IP address automatically" in Japanese)K Address assigned from the server 使用する
(written as "Use" in Japanese)L Authentication Method 自動認証
(written as "Automatic authentication" in Japanese)M Connection Mode 常時接続
(written as "Always on" in Japanese)- *1Password for Internet Connection is case-sensitive and must be input in half-width letters.
Click OK when you see the message window (written as process completed in Japanese) as shown above.
-
STEP4
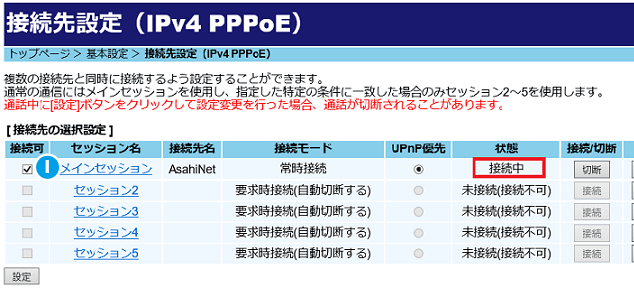
Confirming Internet Connection
If 接続中 (Connected) appears at the right side of the I Main Session, (marked in red box in the window shown above) connection is established. Close this window and check if you can connect to internet. If connected, settings are completed.