Windows 10 Connection Settings
This is a connection setup guide for those using Windows 10 on the following services: FLET’S Hikari Next, FLET’S Hikari Light, B FLET’S, FLET’S ADSL.
Before setting up
You can connect with NTT's FLET'S fiber-optic lines by using the PPPoE feature in Windows 10. (Please do not install any Japanese software you have received from NTT or other PPPoE software.)
In order to connect with the FLET’S line, there is a need to install the fiber-optic line and have the contract for a matching connection course.
- *If you are using a router, this setup is not required.
Setting up broadband connection (PPPoE)
-
STEP1
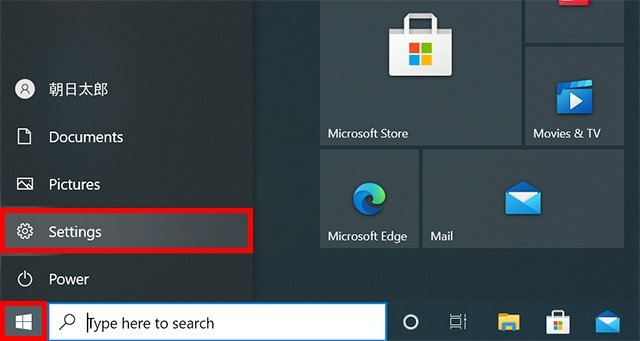
Start Menu
Click Start
 and select Settings
-
STEP2
Settings
Click Network & Internet.

-
STEP3
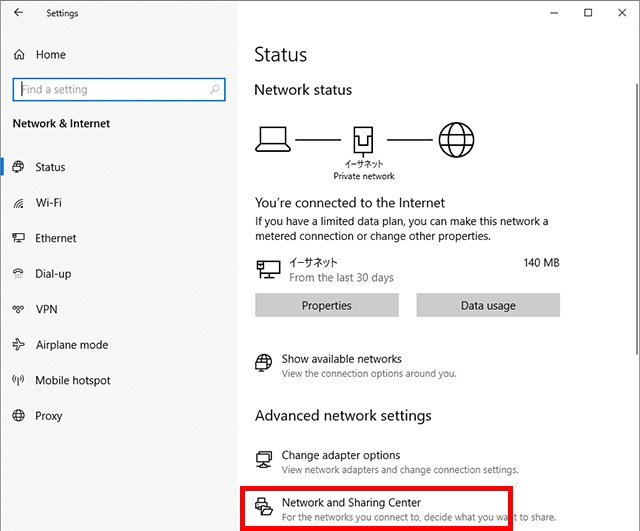
Status
Click Network and Sharing Center.
-
STEP4
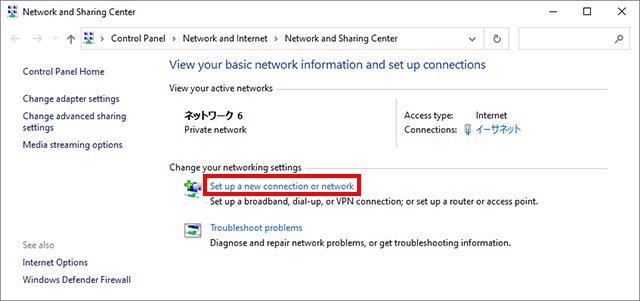
Network and Sharing Center
Click Set up a new connection or network.
-
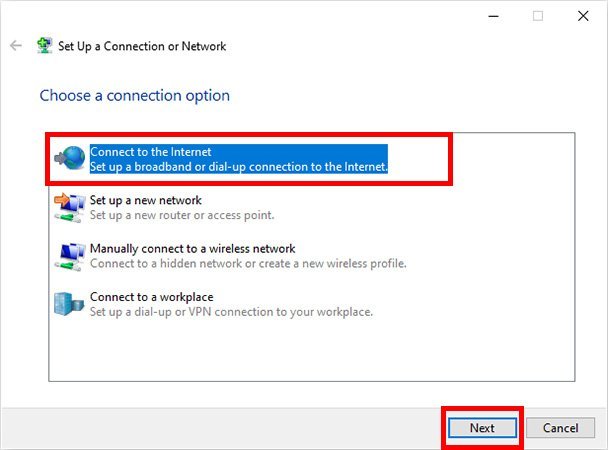
STEP5
Set up a new connection or network
Select Connect to the Internet and click Next.
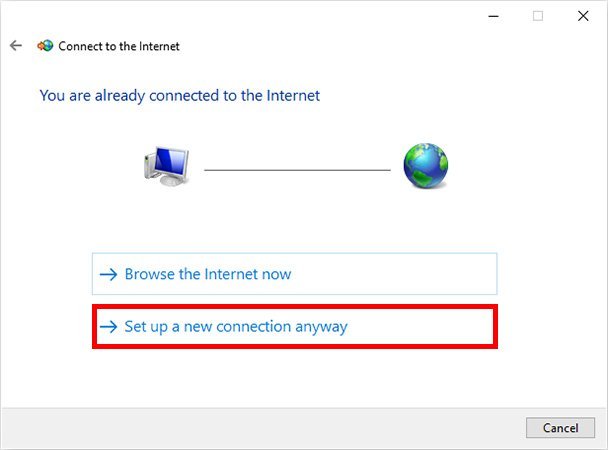
If a message “You are already connected to the Internet” shows up
Select Set up a new connection anyway.
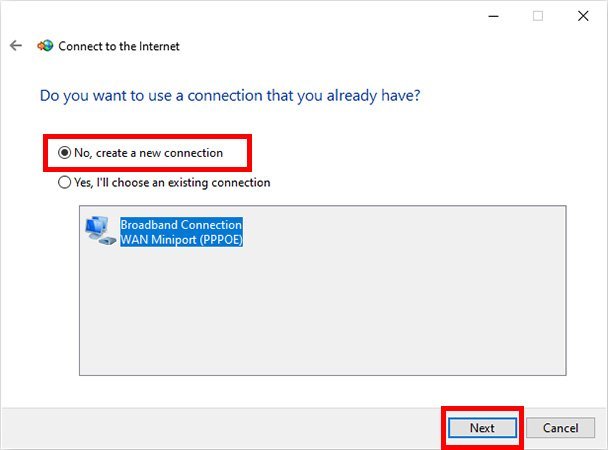
If a message “Do you want to use a connection that you already have?” shows up
Select No, create a new connection and click Next.
-
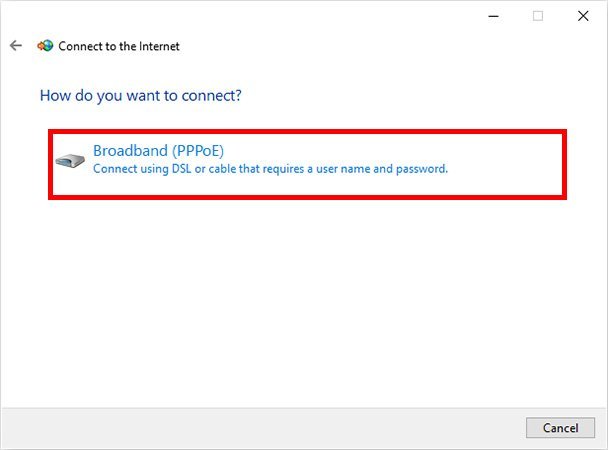
STEP6
Connect to the Internet
Click Broadband (PPPoE).
-
STEP7
Type the information from your Internet service provider (ISP)
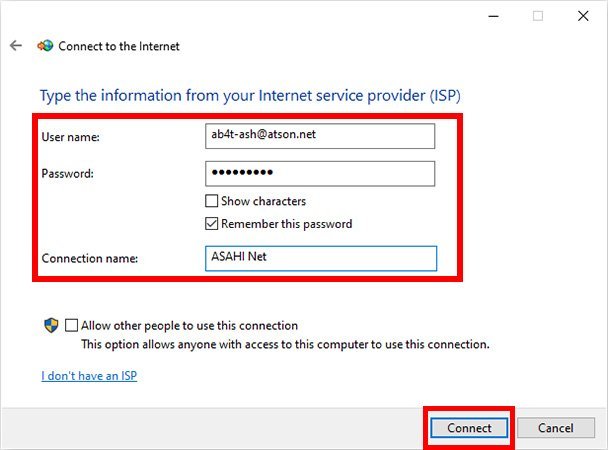
User name Asahi Net ID@atson.net
e.g., ab4t-ash@atson.net、u1234ab567c@atson.net、c1234ab567c@atson.netf.Asahi Net ID@atson.net - *If using the Fixed IP Address Option
Password Corresponding Asahi Net password Connection name Any name (e.g., Asahi Net) - *User name and password must be entered all in lowercase letters.
After typing in the information, click Connect.
-
STEP8
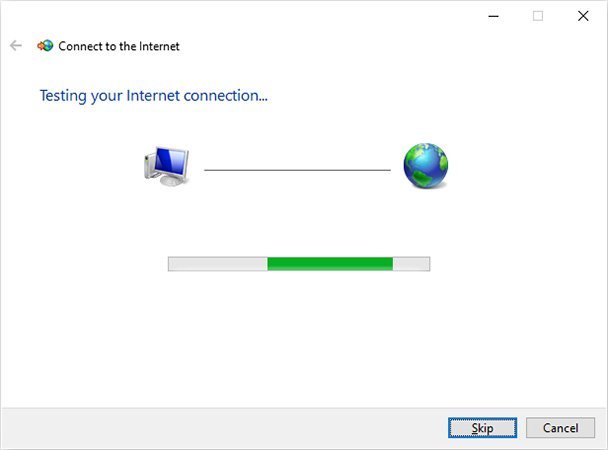
Establishing connection
The internet connection test will start. Please wait awhile.
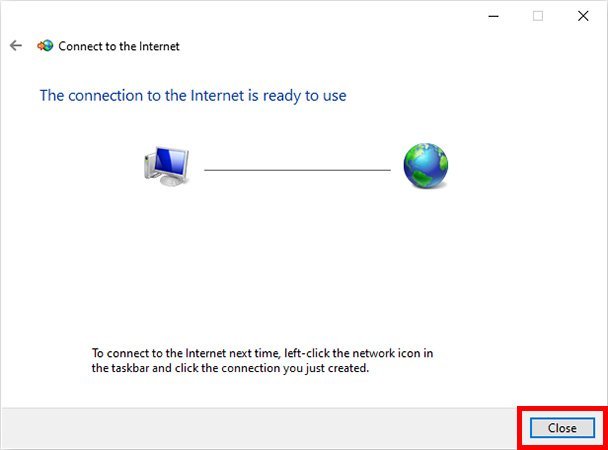
Connection to the internet is established. Click Close and your connection setup is completed.
Connection
To connect to the internet next time, please follow the instructions below.
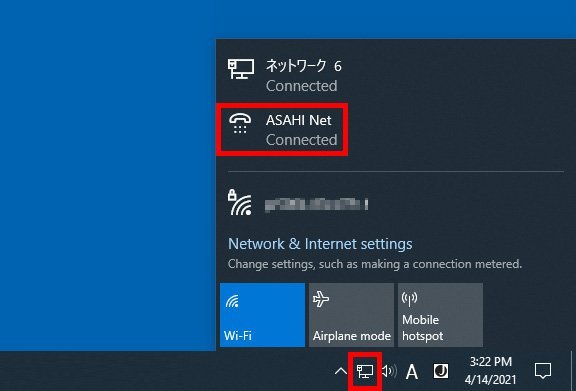
Click the connection icon ![]() in the taskbar and click the connection (e.g., ASAHI Net) you just created.
in the taskbar and click the connection (e.g., ASAHI Net) you just created.
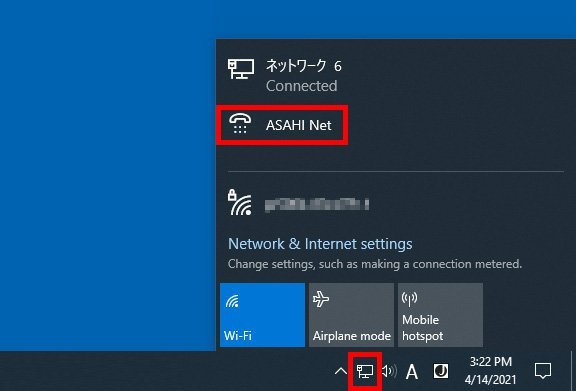
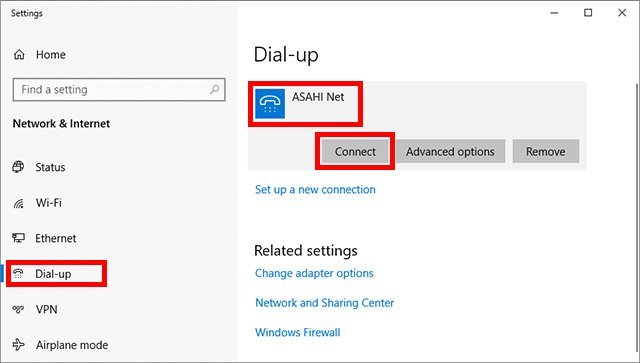
Select Dial-up, click the connection you just created (e.g., ASAHI Net) and click Connect to connect to the internet.
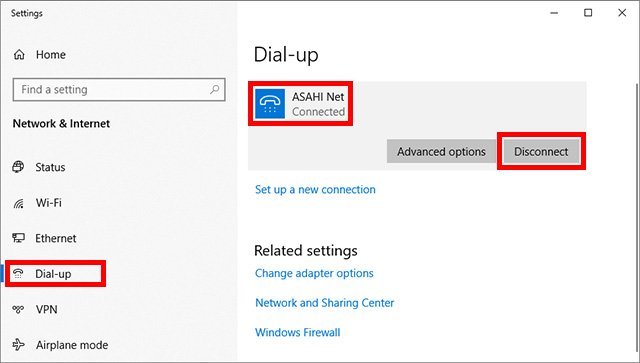
Disconnect
If you wish to disconnect, click the connection icon ![]() in the taskbar.
in the taskbar.
Select Dial-up, click the connection you just created (e.g., ASAHI Net) and click Disconnect to disconnect from the internet.