IPv6 Connection Feature - Operating Requirements for Windows 10
Here, you can check the recommended settings for an IPv6 connection, and how it will appear on your computer under normal operation.
The settings described here are the default settings on first startup of most computers, so you usually do not need to adjust settings.
-
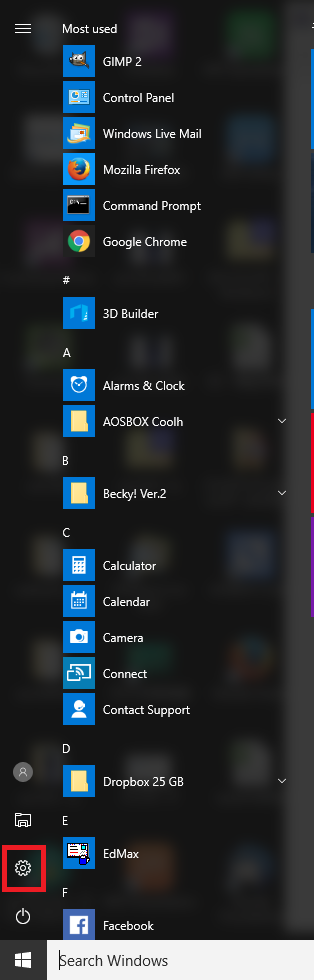
STEP1
Open the Network Settings window
Click the Start button and select “Settings” (gear icon).
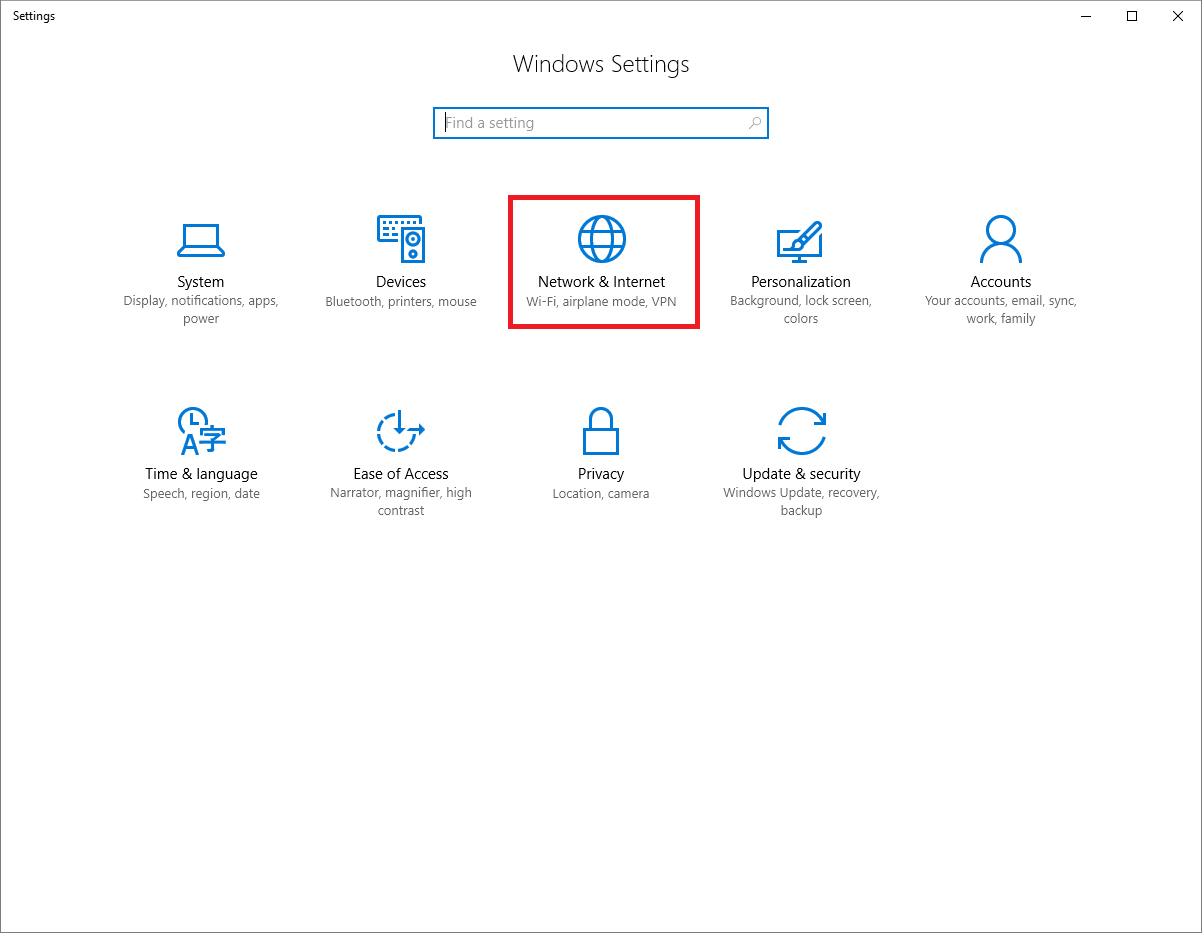
Click “Network & Internet”.
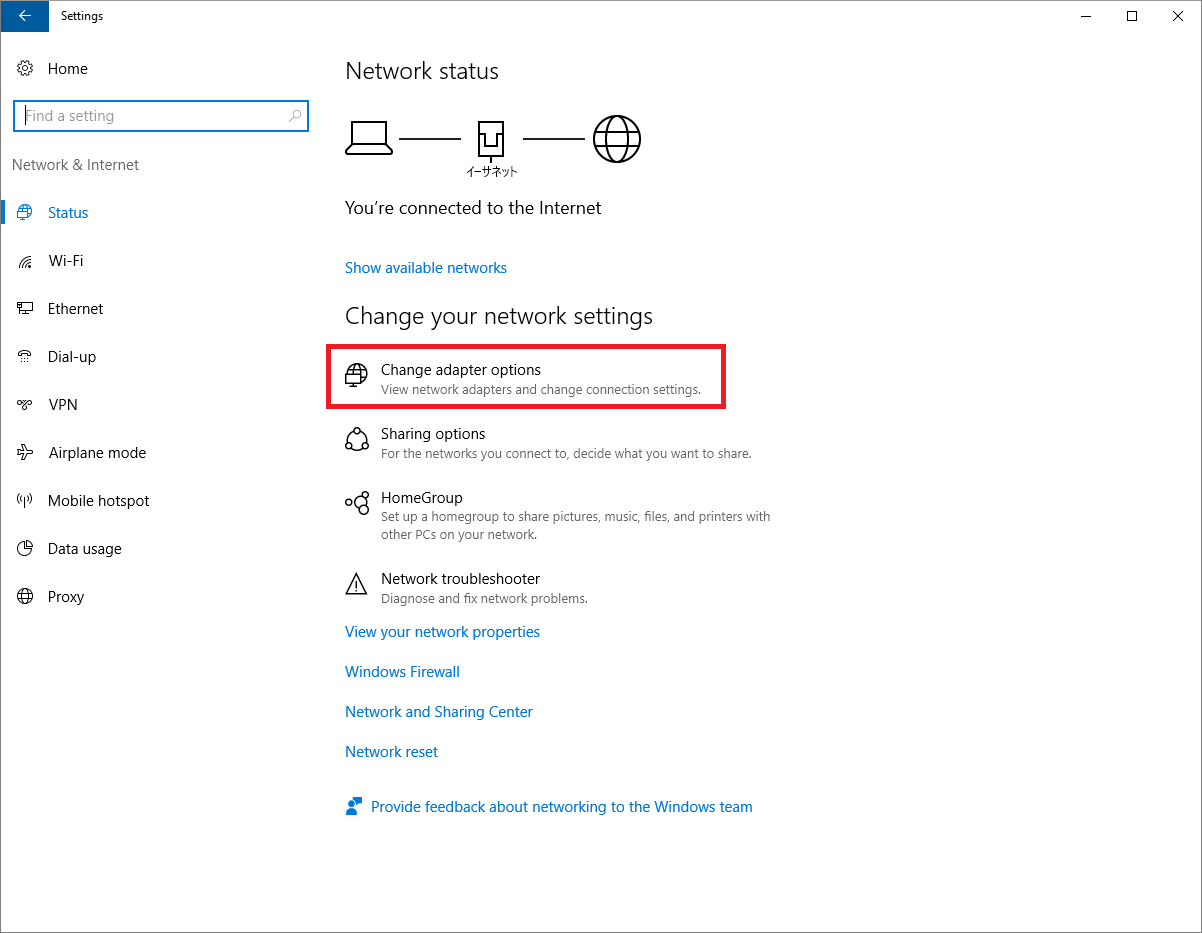
Click “Change adapter options”.
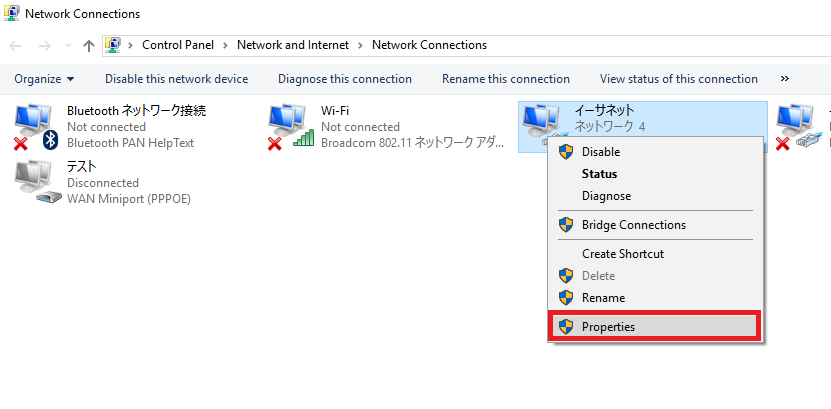
For wired connection through a router, right-click “Ethernet”, and for wireless connection right-click “Wi-Fi”. Then click “Properties” from the list.
- *If you do not see the icons described here, please contact the manufacturer of your computer.
-
STEP2
Properties
Select “Internet Protocol Version 6 (TCP/IPv6)”.* Do not remove the check mark.
Then click “Properties”.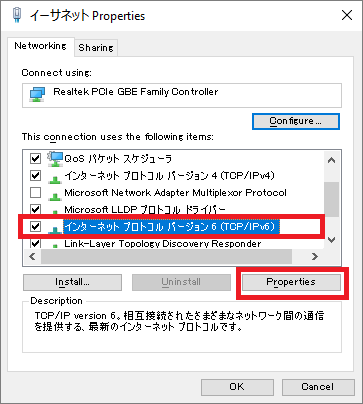
-
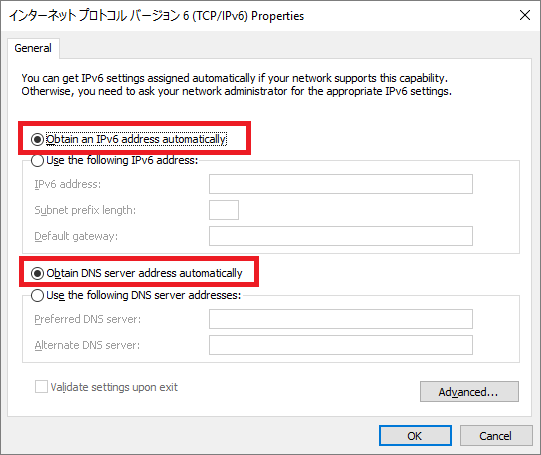
STEP3
Internet Protocol Version 6 (TCP/IPv6) property
Check “Obtain an IPv6 address automatically”.
Then check “Obtain DNS server address automatically”.The settings are completed. Click “OK”, and “OK” again to return to the previous page.
-
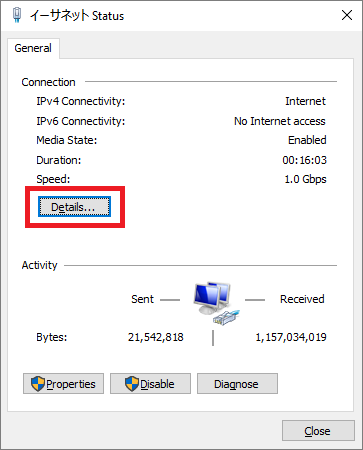
STEP4
Check connection status
For wired connection through a router, right-click “Ethernet”, and for wireless connection right-click “Wi-Fi”, and then click “Status”.

Click “Details”.
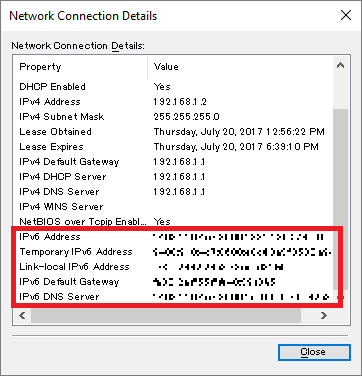
If you see an IP address for IPv6 within the window marked with a red box, you are connected to the IPv6 network.
-
*
With Asahi Net’s IPv6 Connection Feature, the beginning part of the prefixed IP address will appear as below:
In East Japan: [2405:6580-2405:6583]
In West Japan: [2405:6584-2405:6587]
-
*
With Asahi Net’s IPv6 Connection Feature, the beginning part of the prefixed IP address will appear as below: