How to Check the DNS Server Settings on Windows 11
Before checking/setting up
This section gives you information on how to check the Ethernet DNS server settings of the client (your PC) on Windows 11.
Asahi Net recommends you to set the retrieval of DNS server address to automatic.
Steps to check DNS Server
-
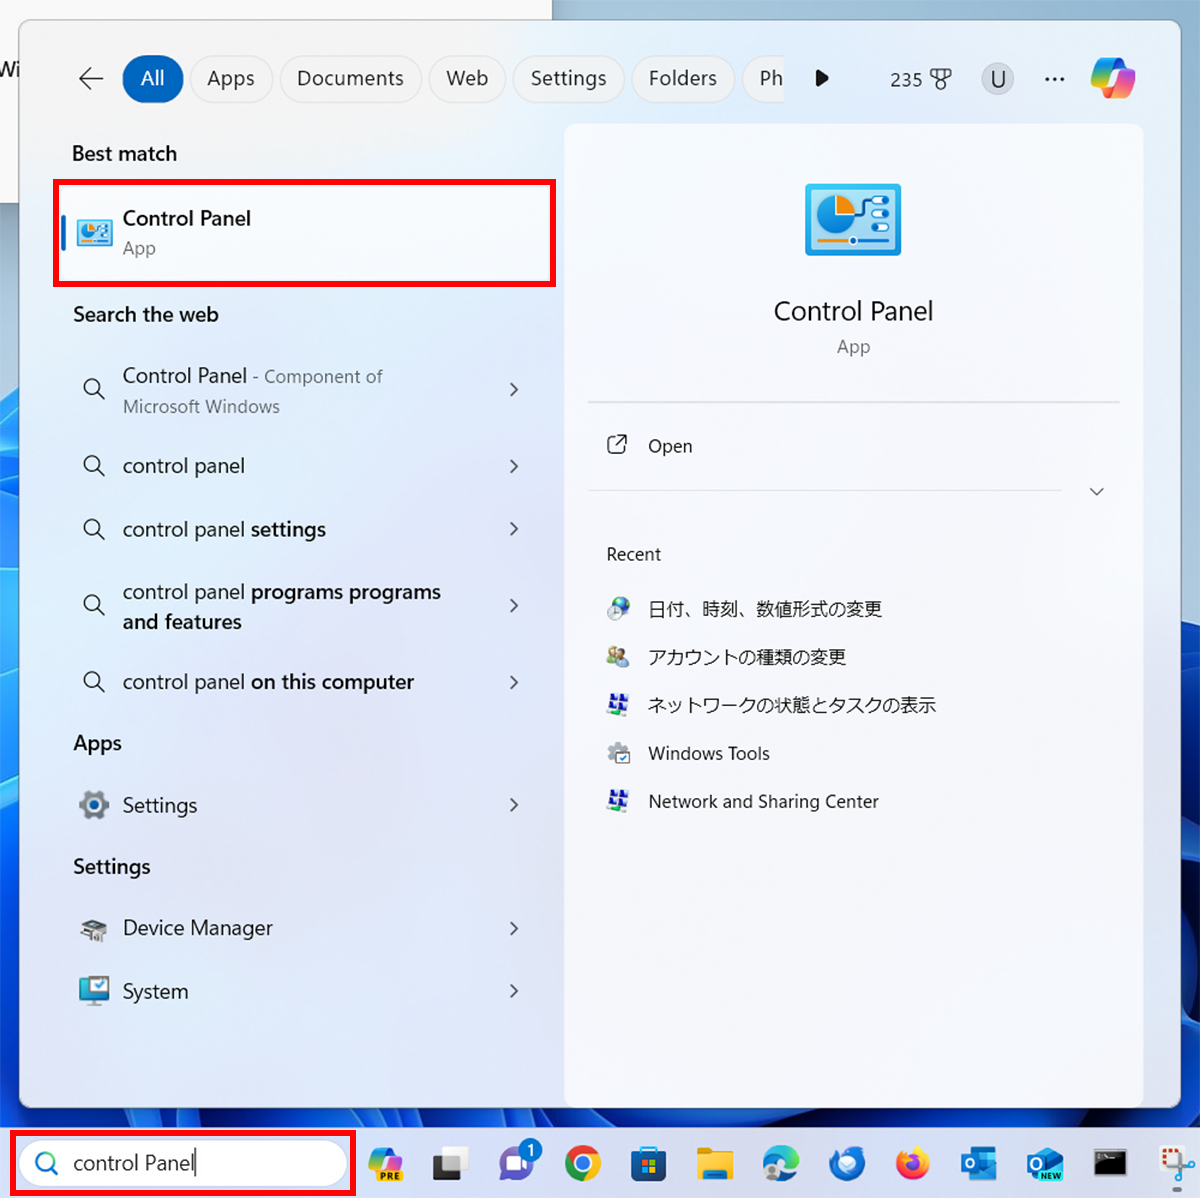
STEP1
Windows desktop
Search for Control Panel in the Windows desktop and show Control Panel.
-
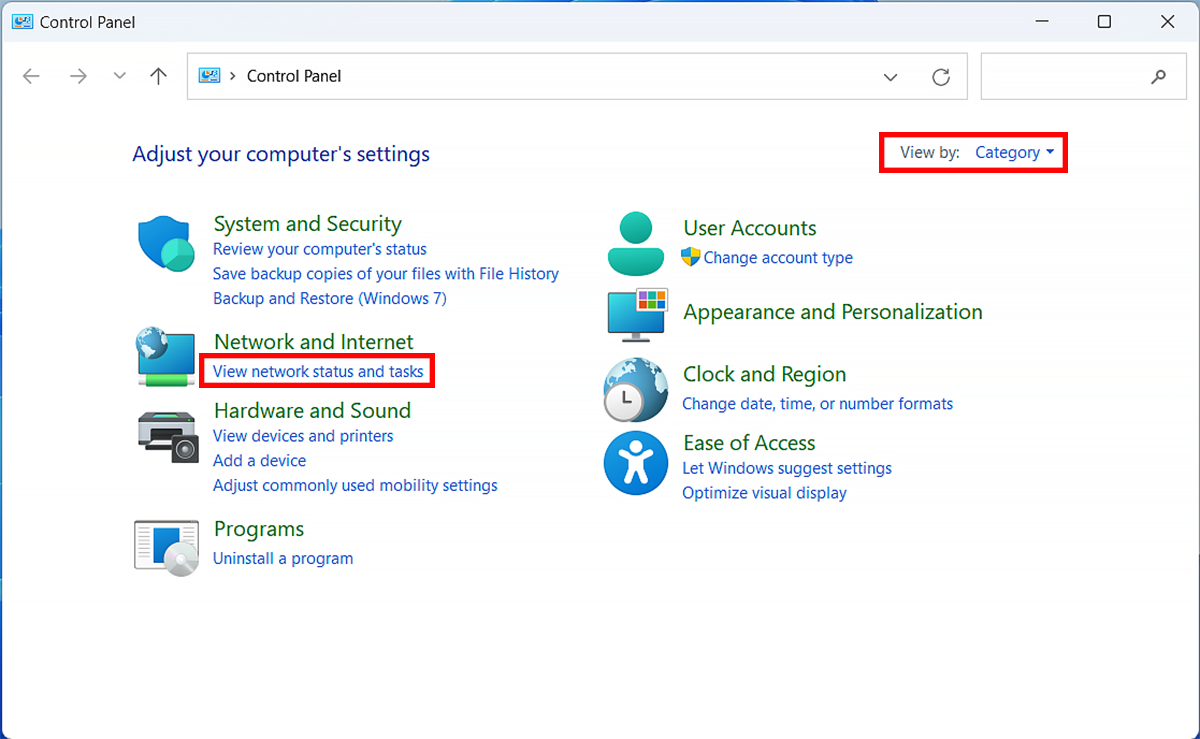
STEP2
Control Panel
Select Category under View by: and select View network status and tasks in the Control Panel.
-
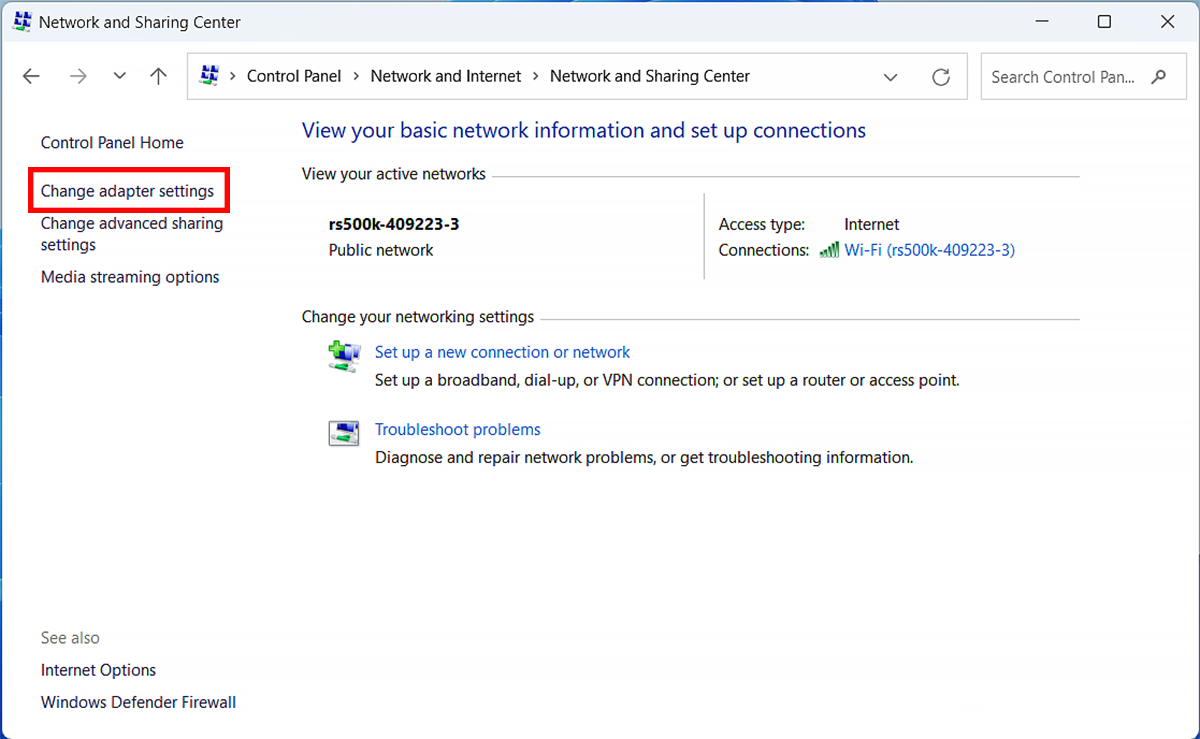
STEP3
Network and Sharing Center
Select Change adapter settings in the Network and Sharing Center.
-
STEP4
Network Connections
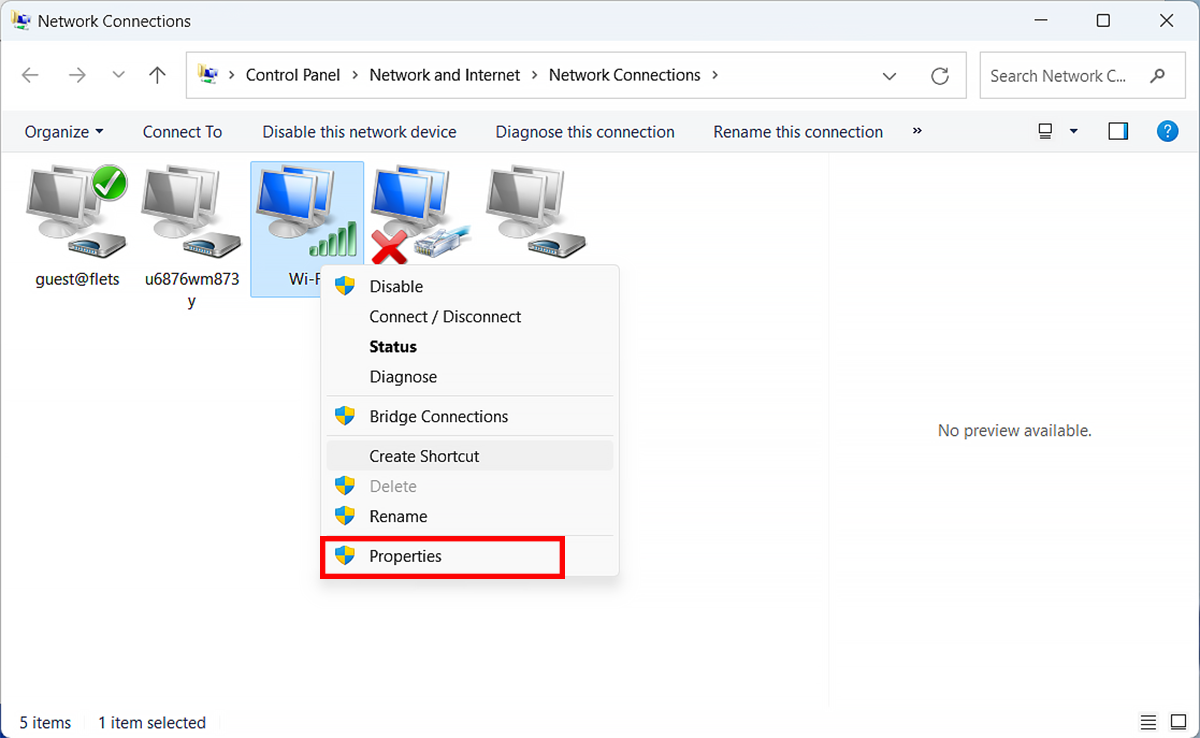
In the Network Connections, make a right click on the network which you wish to check the DNS server settings and select Properties.
-
STEP5
Properties
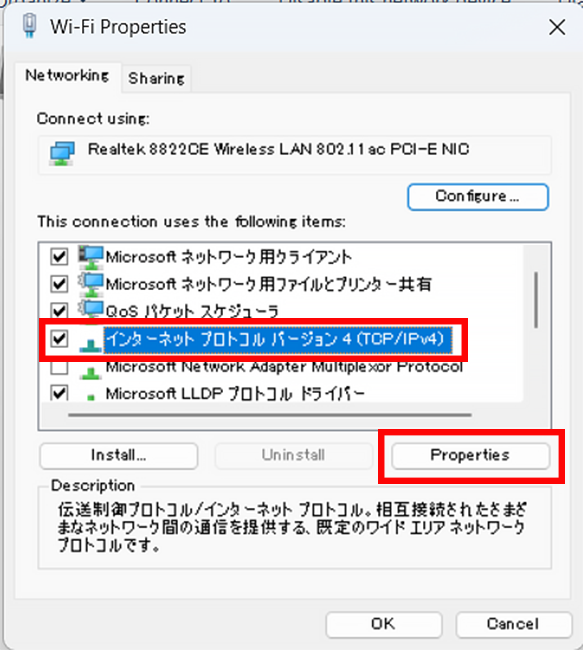
Click インターネットプロトコルバージョン4(TCP/IPv4) (= Internet protocol version 4 (TCP/IPv4)), and then click Properties.
-
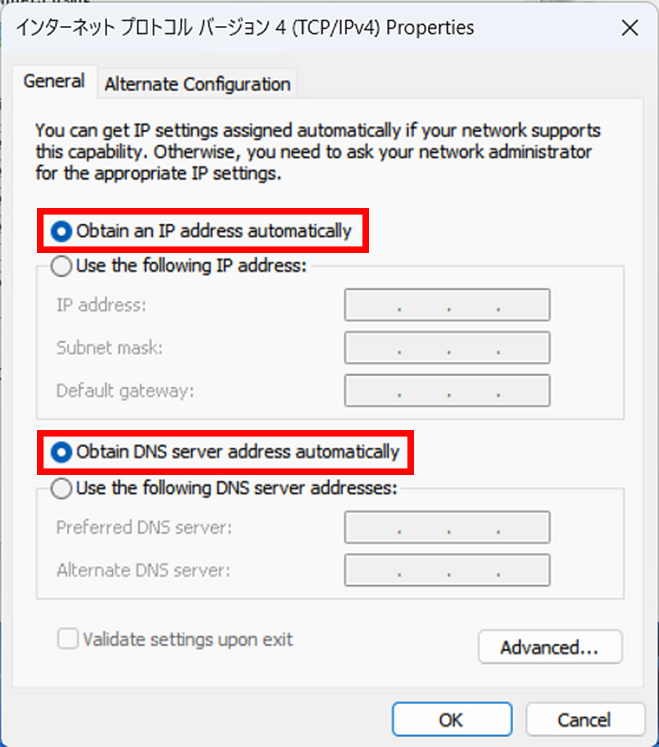
STEP6
インターネットプロトコルバージョン4(TCP/IPv4) (= Internet protocol version 4 (TCP/IPv4)) Properties
Click the General tab, and check to see that the Obtain an IP address automatically and Obtain DNS server address automatically are selected.
If not, select both of them and click OK to apply the change.